This is one of my favourite printing projects to teach because it’s really difficult for students to get it wrong! The aims of this KS3 Printmaking Pattern Project are for students to understand how to design patterns, understand the poly-printing process and learn how to take inspiration from a street artist.
Get Art resources sent straight to your email:
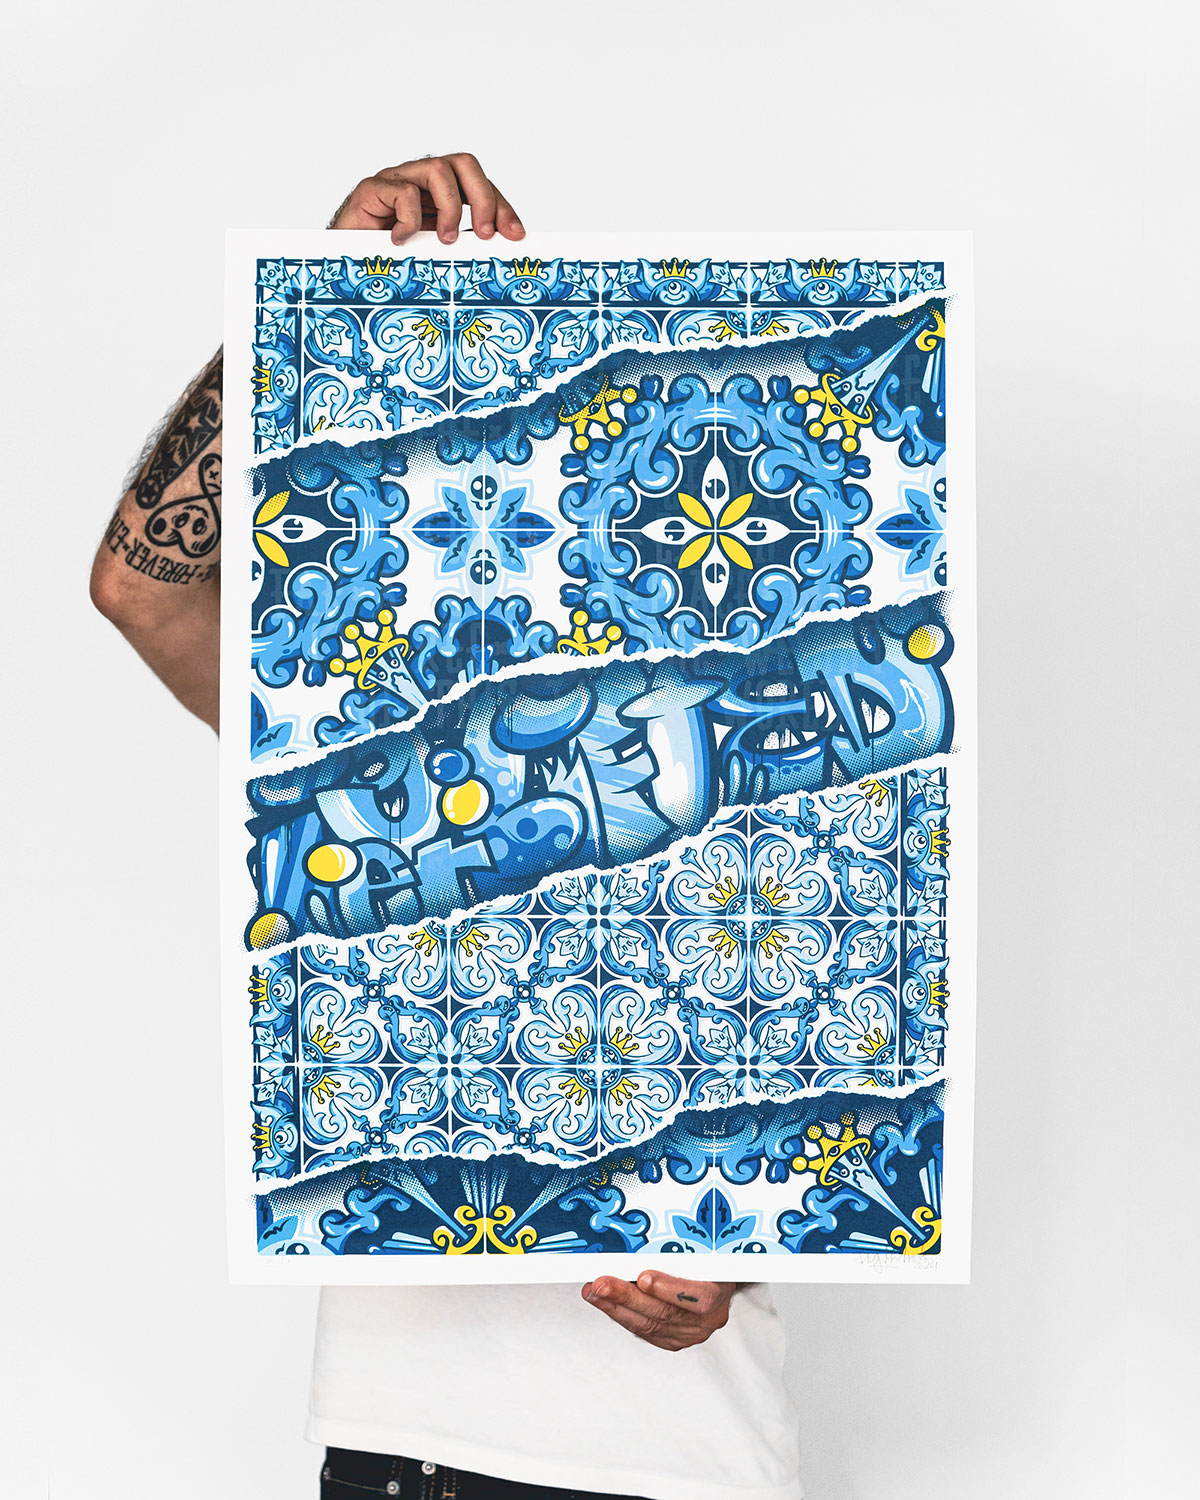
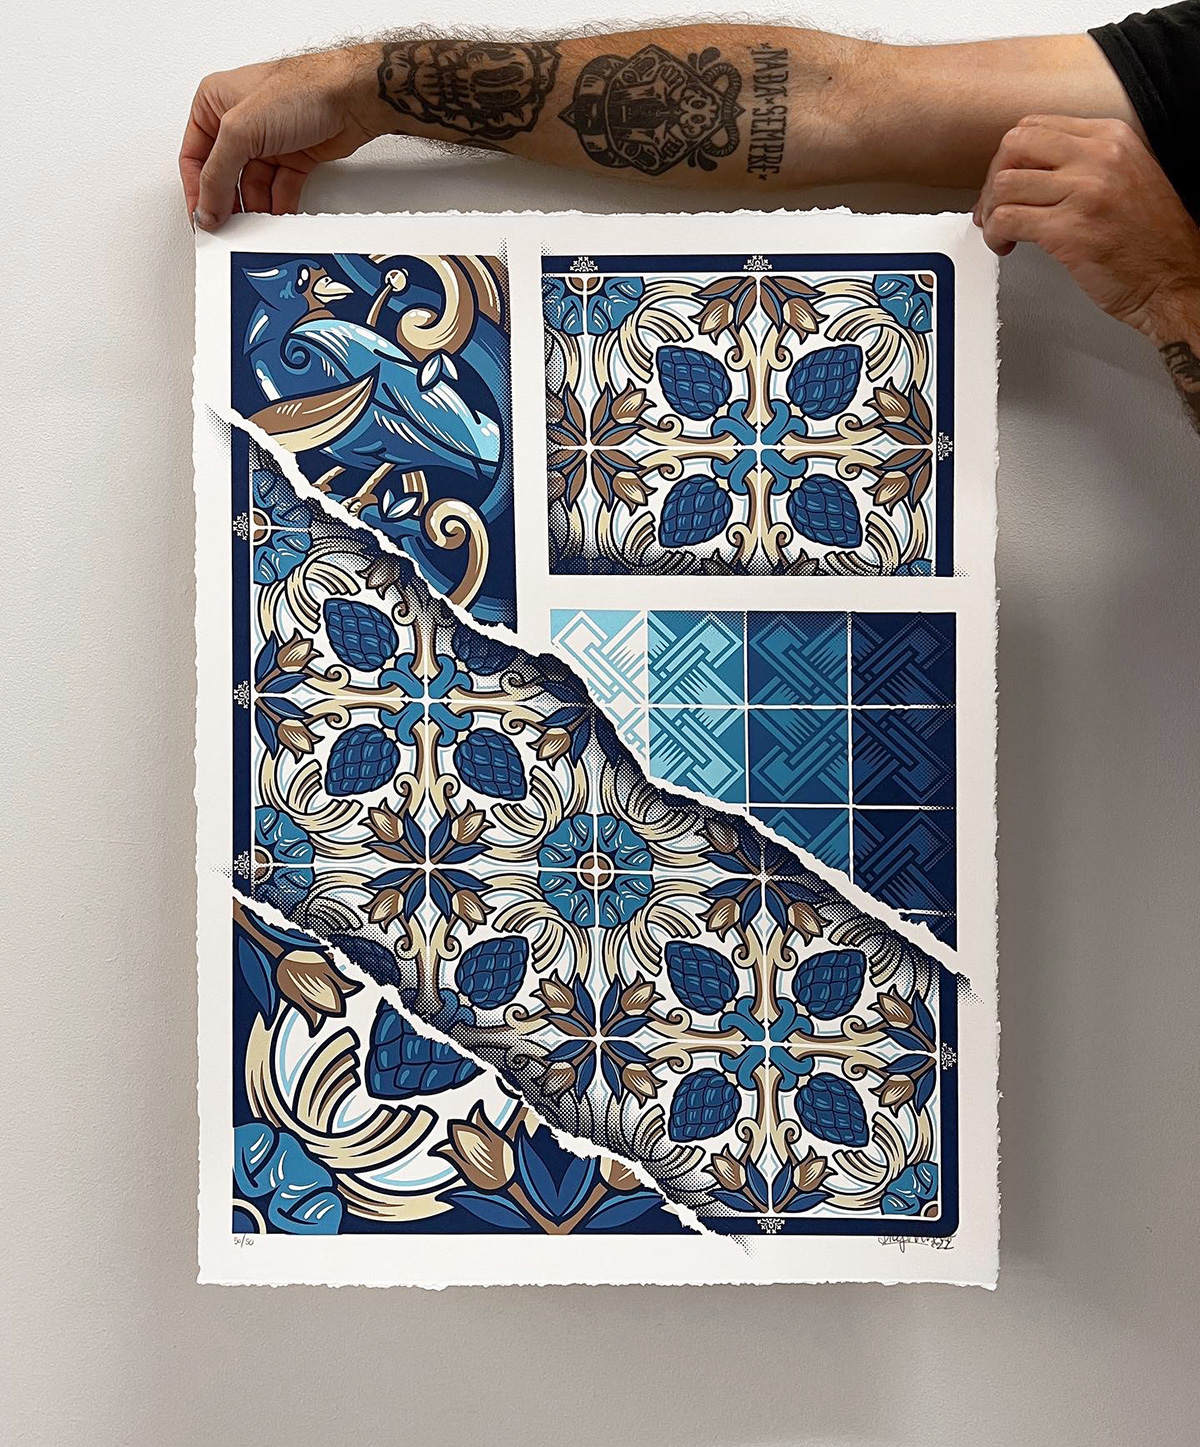
This printing project actually came about by chance, when I was introduced (by a very lovely cover teacher) to the Portuguese street artist ADD FUEL, and I loved his work! The cover teacher had seen some of my students’ drawn designs on my whiteboard, and asked if I had seen the street artist ADD FUEL – I checked him out and thought it would be a great idea for students to incorporate some of his ideas in their own work.
Inspired by the artist, I designed this printmaking project for my Y8 KS3 classes with a few things in mind:
- The project had to be engaging for different sub-groups including disadvantaged boys
- It allowed students to analyse and discuss graffiti and street art
- Students could respond to the artist in their own way
- It gave students autonomy over their final outcomes
- Students learned a printmaking process
- Students could learn from their mistakes and refine their work
- The project included colour theory
Get this full project on TES or TPT – enjoy.

This project gives students the opportunity to experience a wide range of media including Indian inks and printing inks, and also create ambitious work on a larger scale than they had previously. In the first part of the project, students draw out their designs with precision and accuracy, and transfer those skills into their printmaking later on.
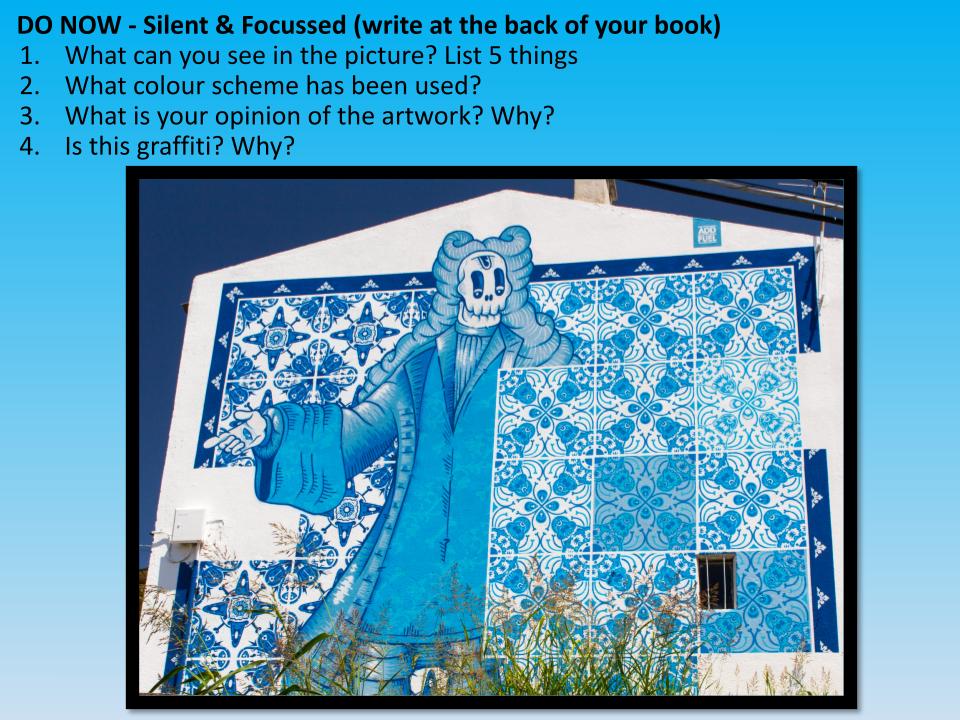
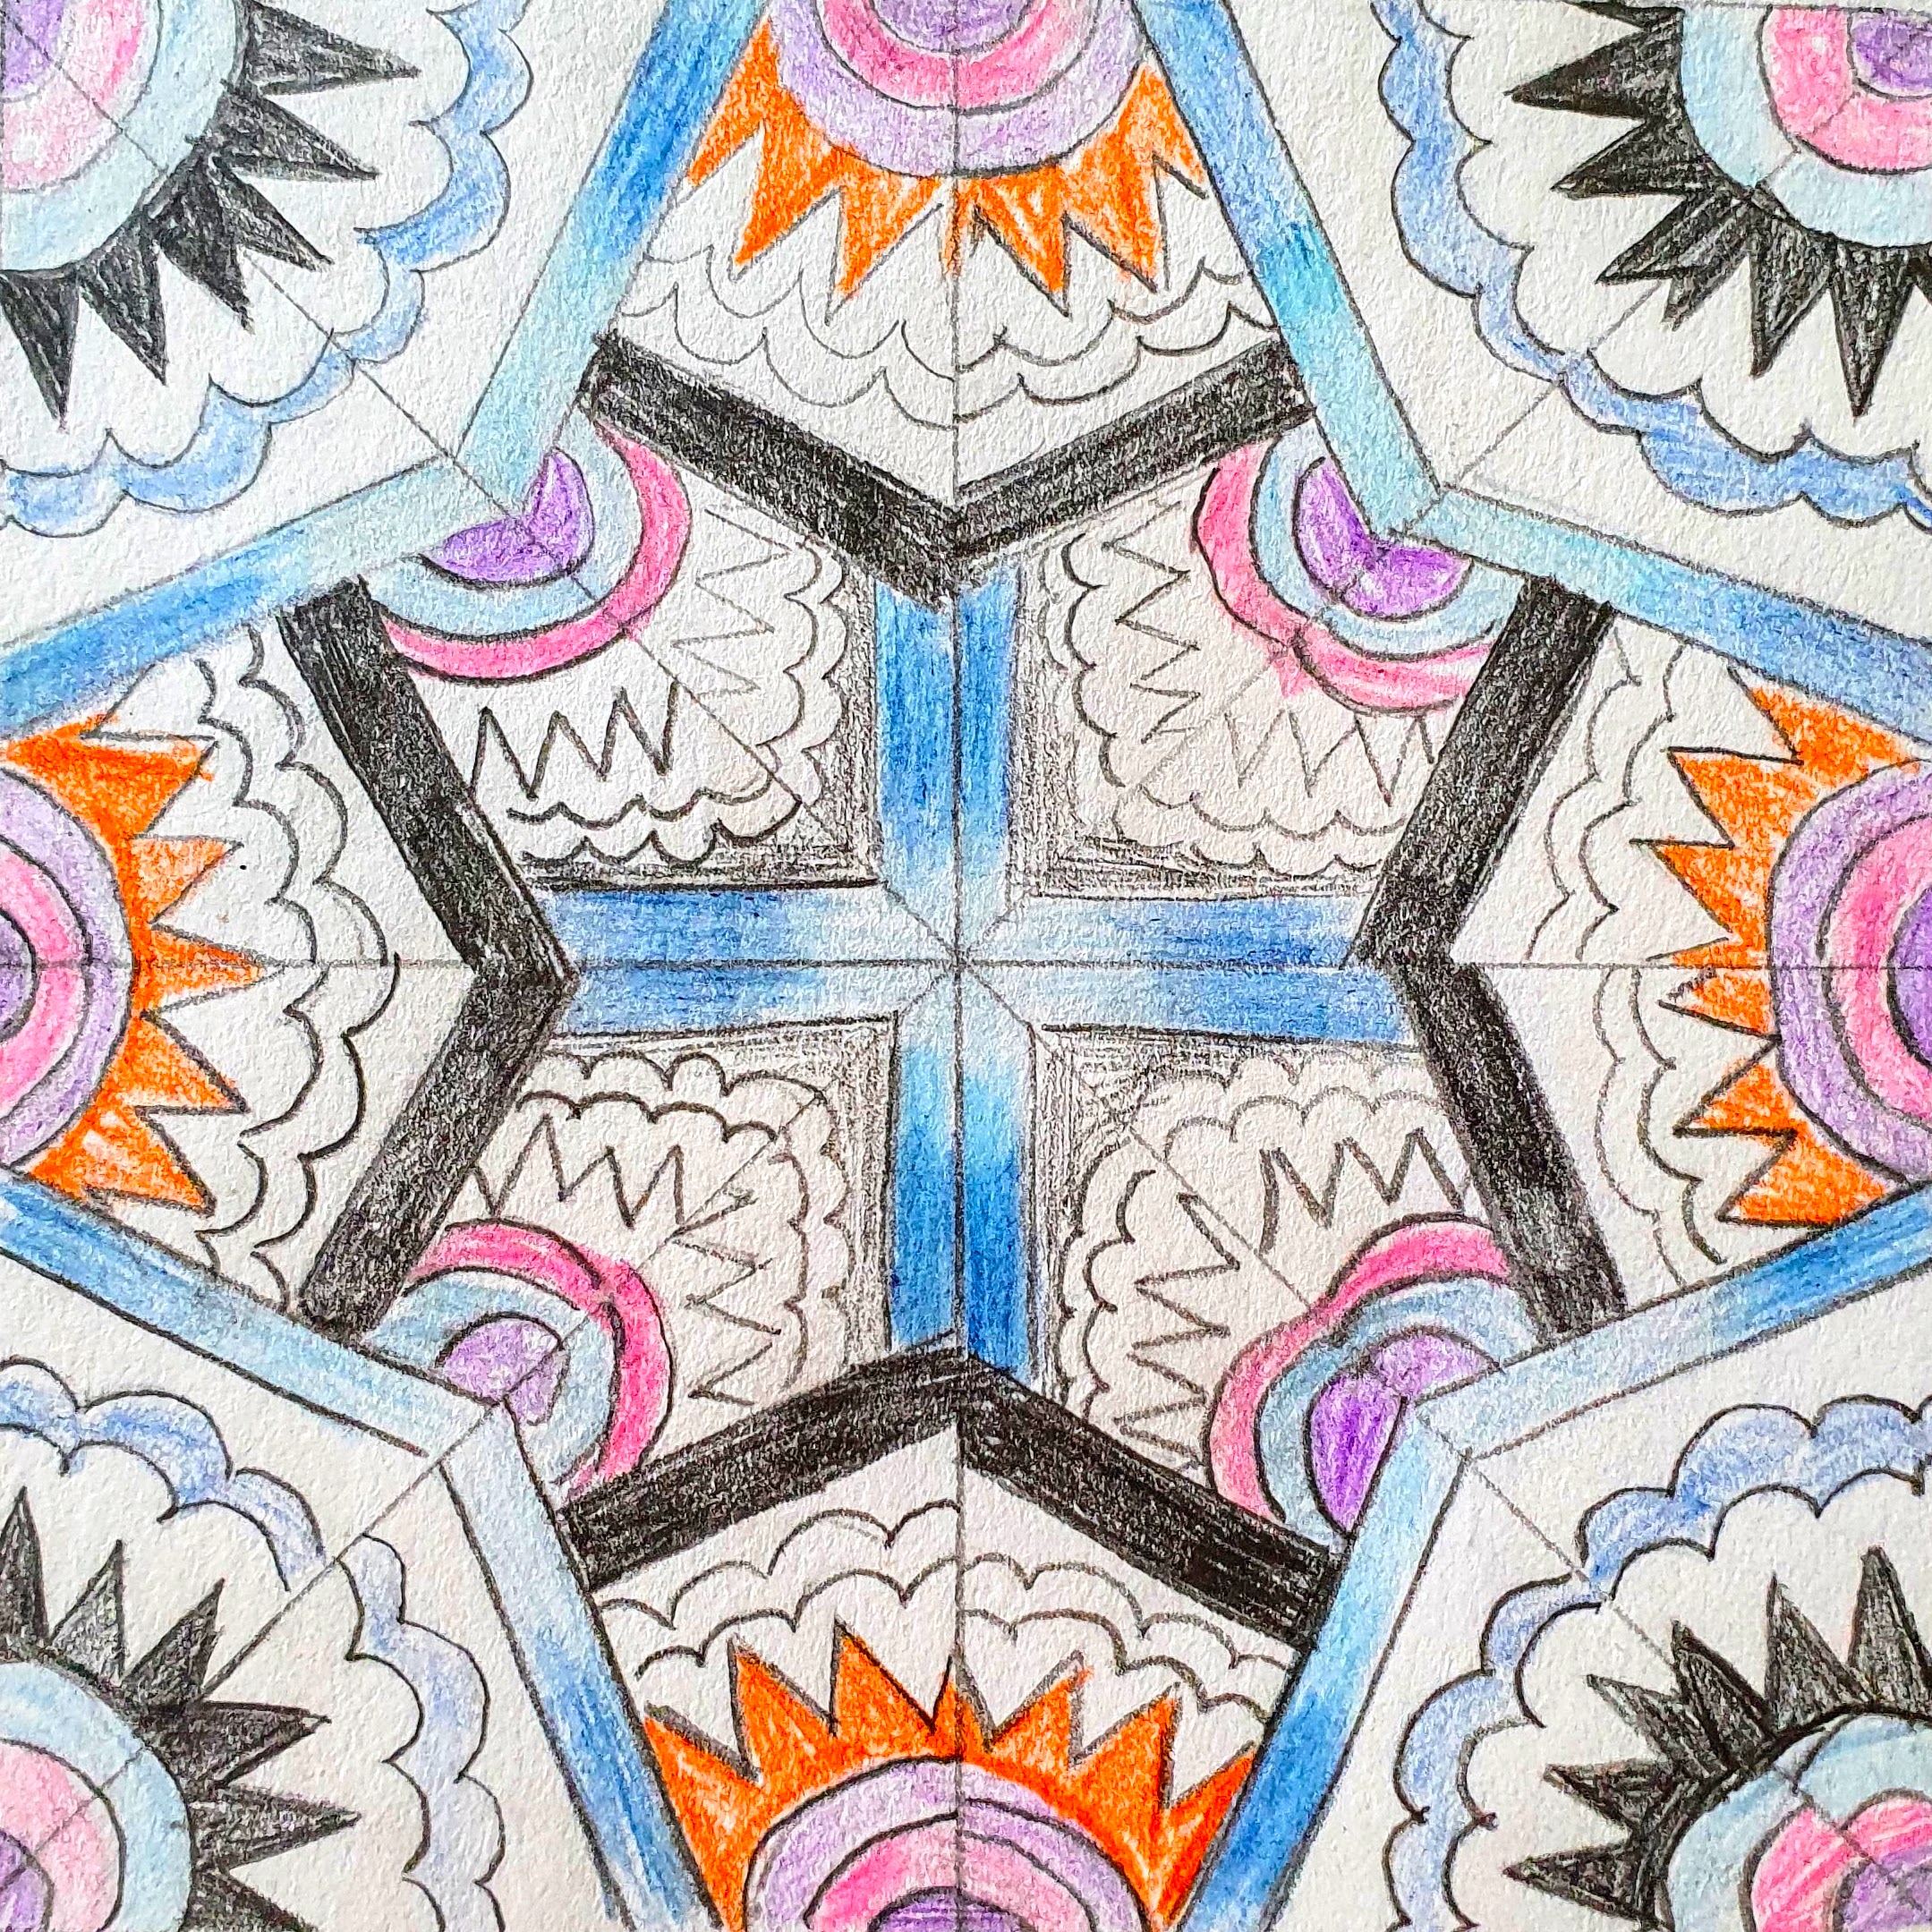
To kick off the project, students looked at the street artist ADD FUEL and his mural work. We discussed the features of his work including: a monochromatic colour scheme, use of pattern, how parts look 3D and whether or not his mural street art work is classed as graffiti… There were some very interesting opinions 😆
Students then responded to ADD FUEL and created some amazing research pages about him – I was really impressed:

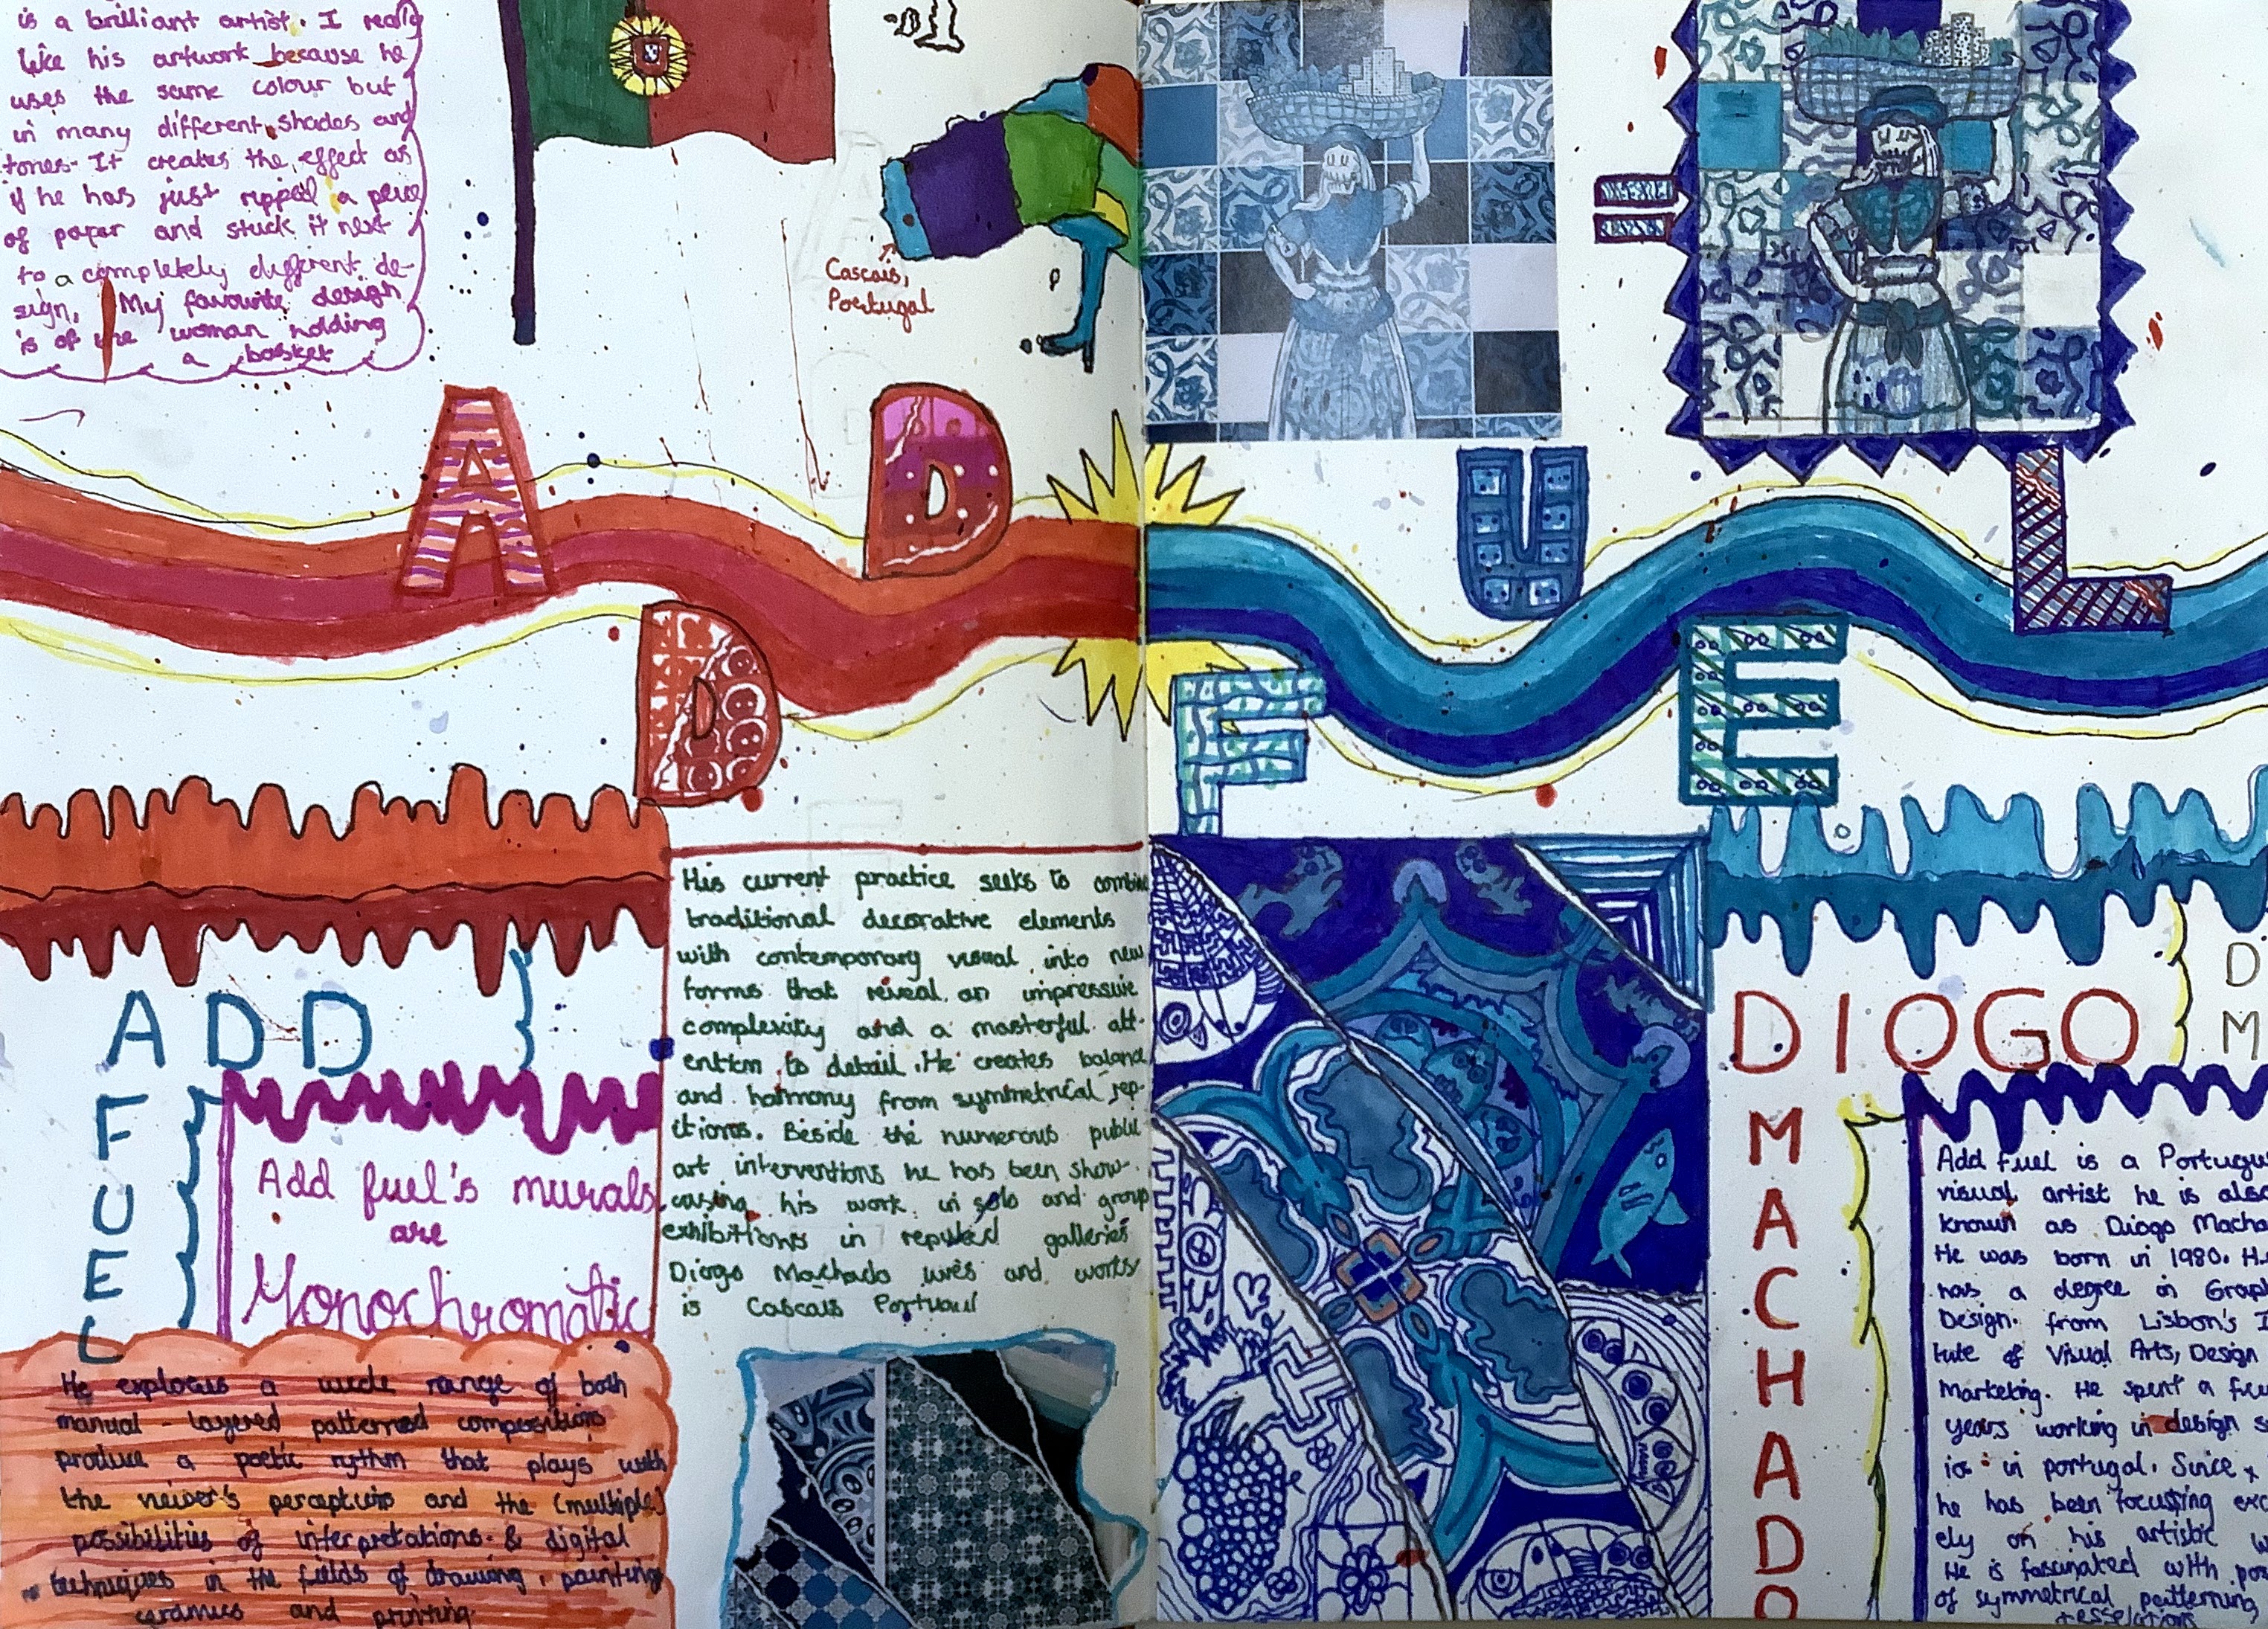
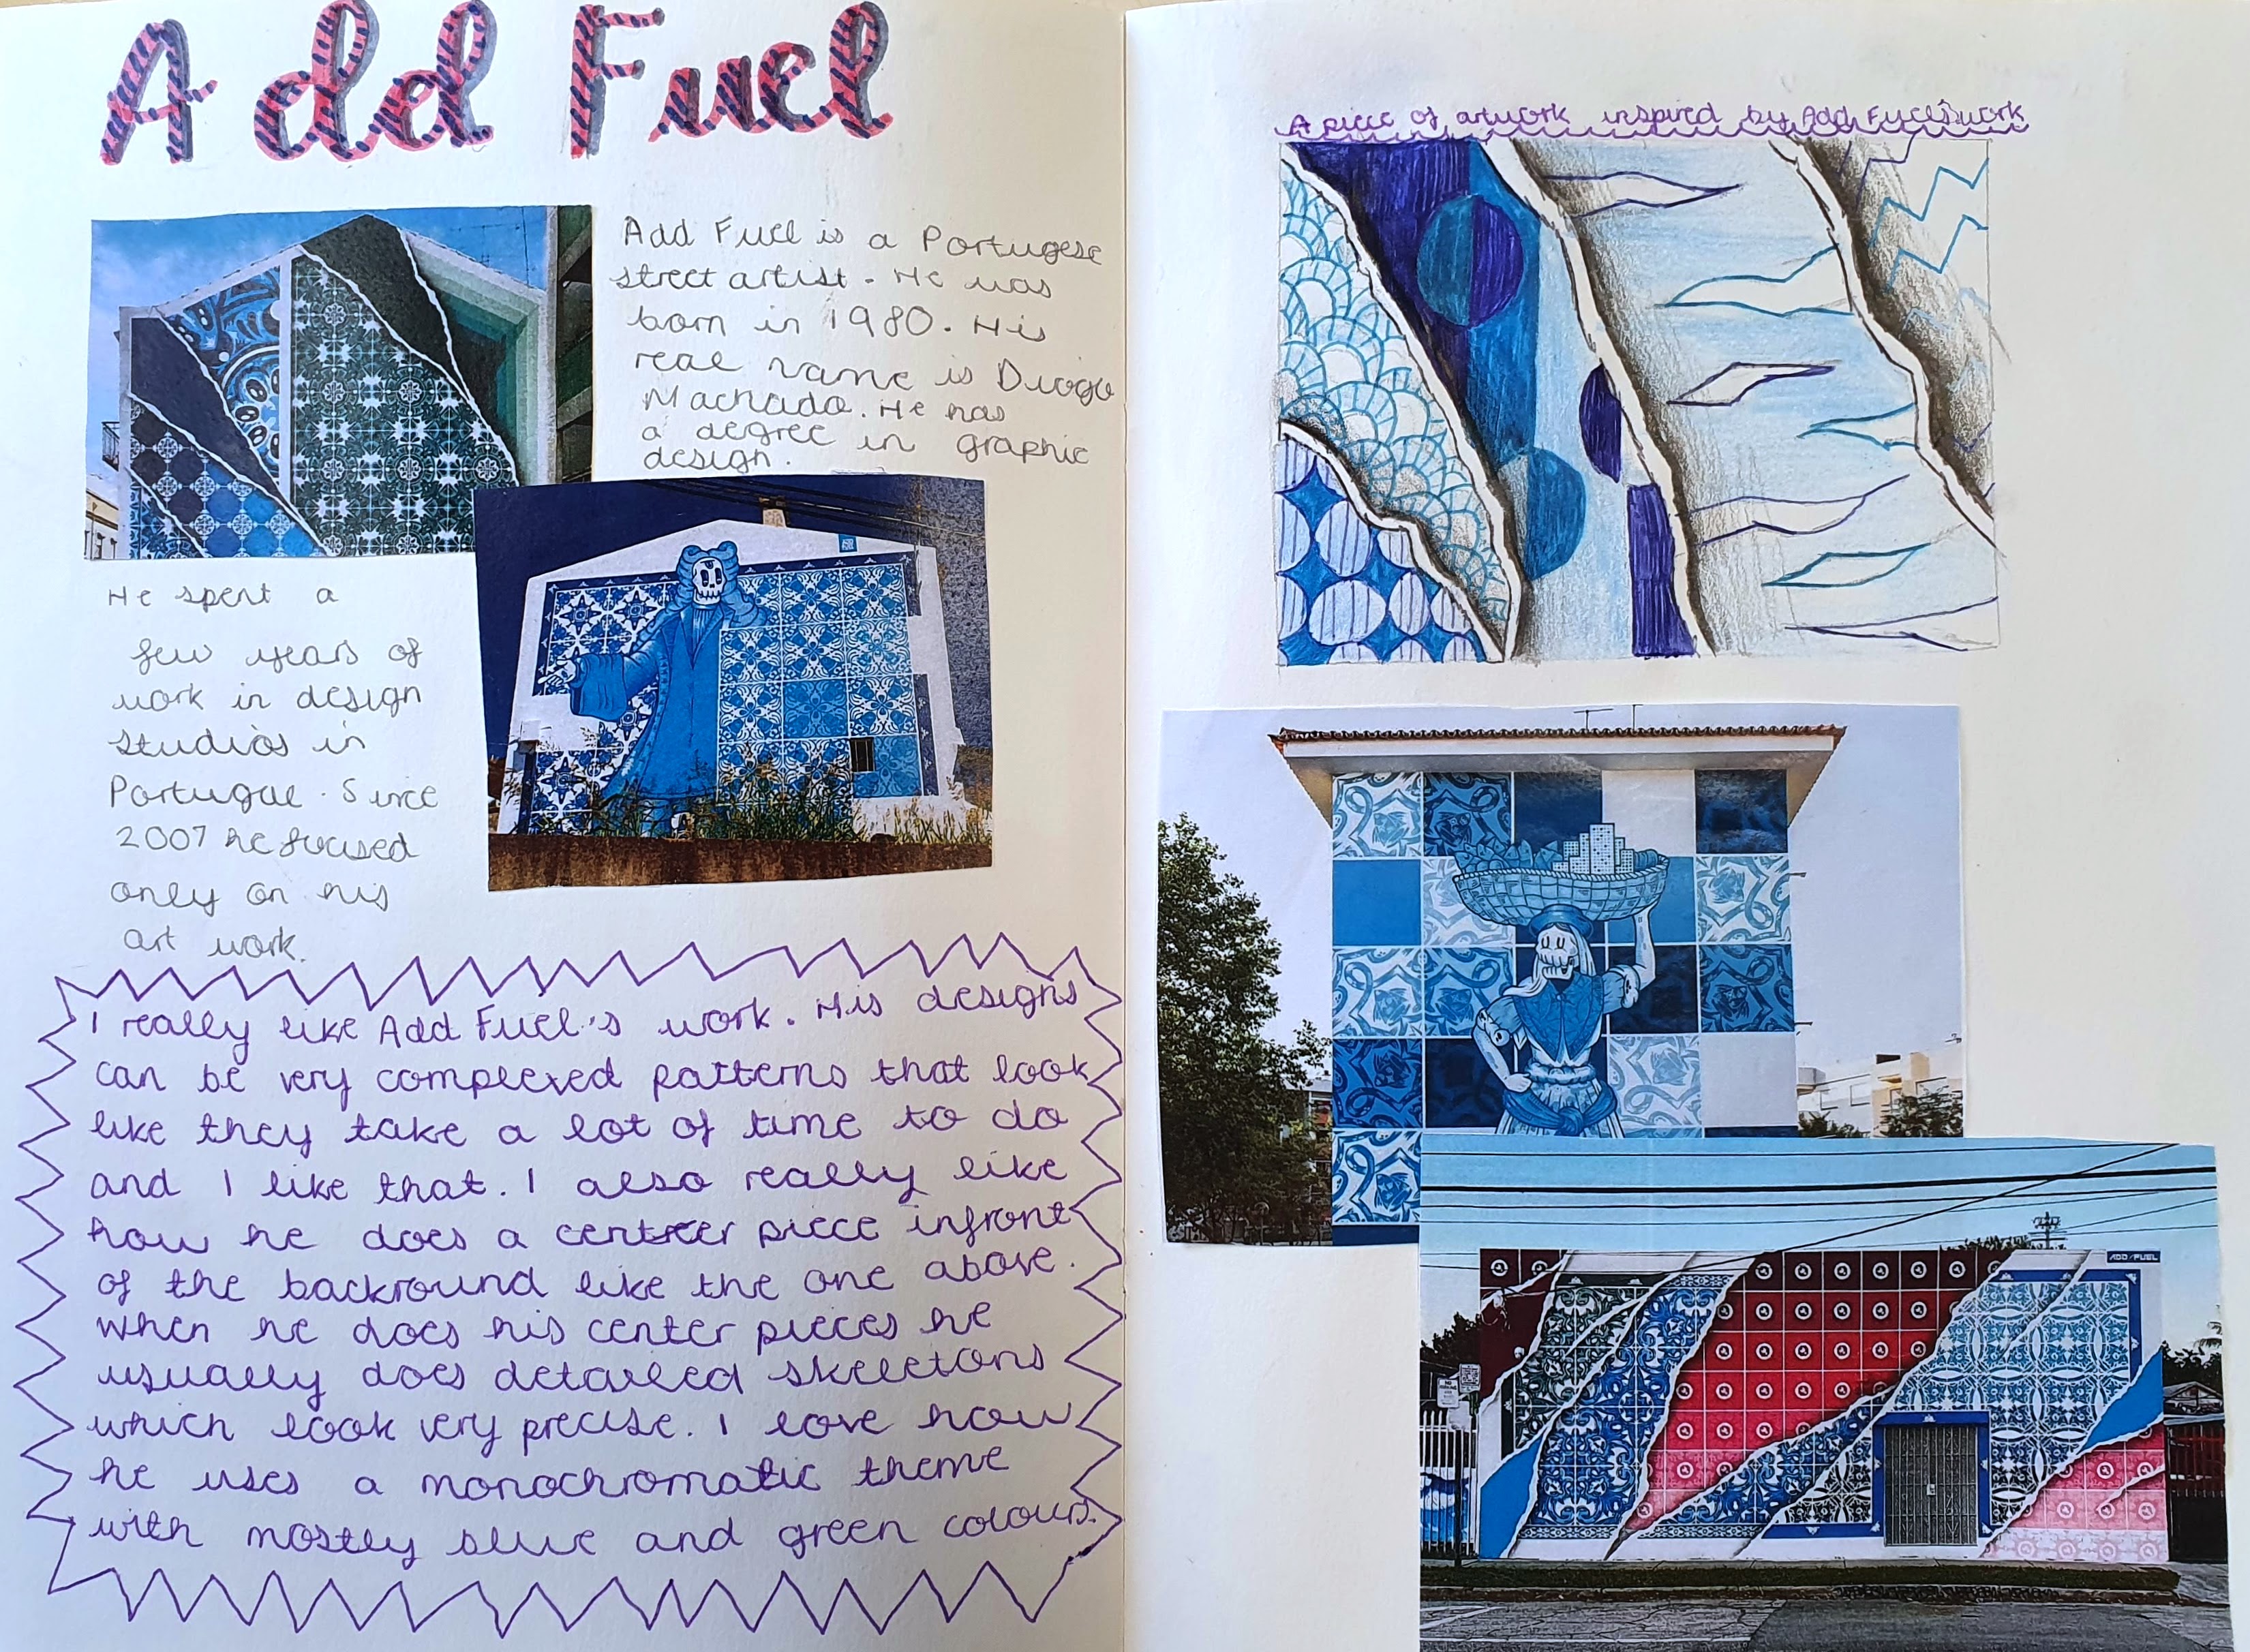
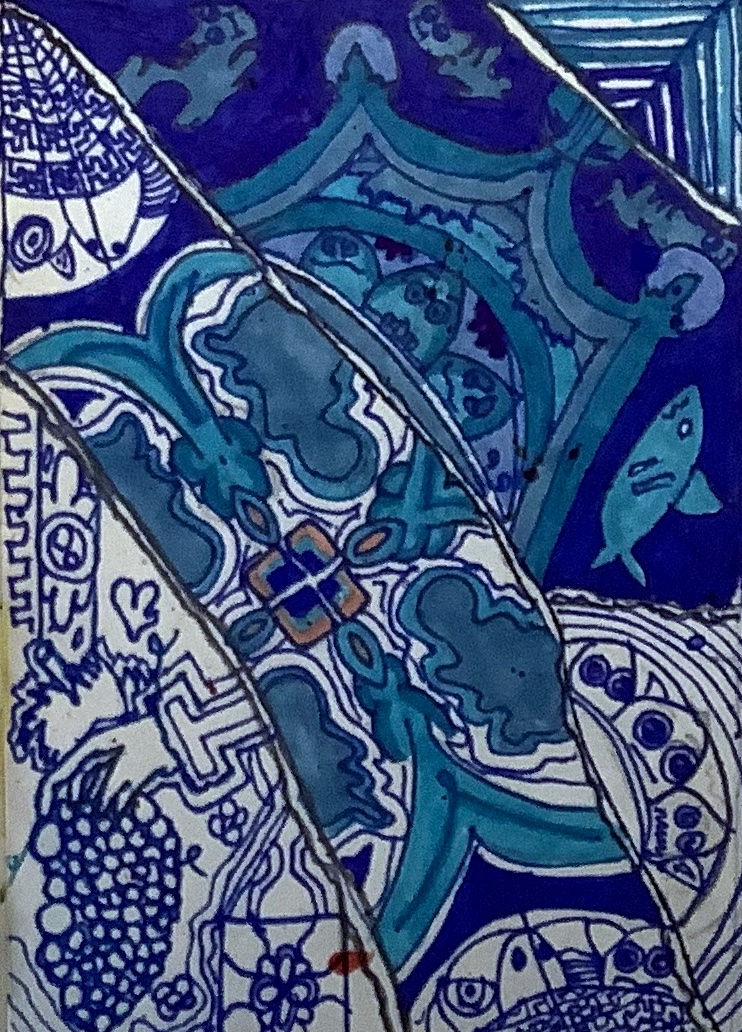
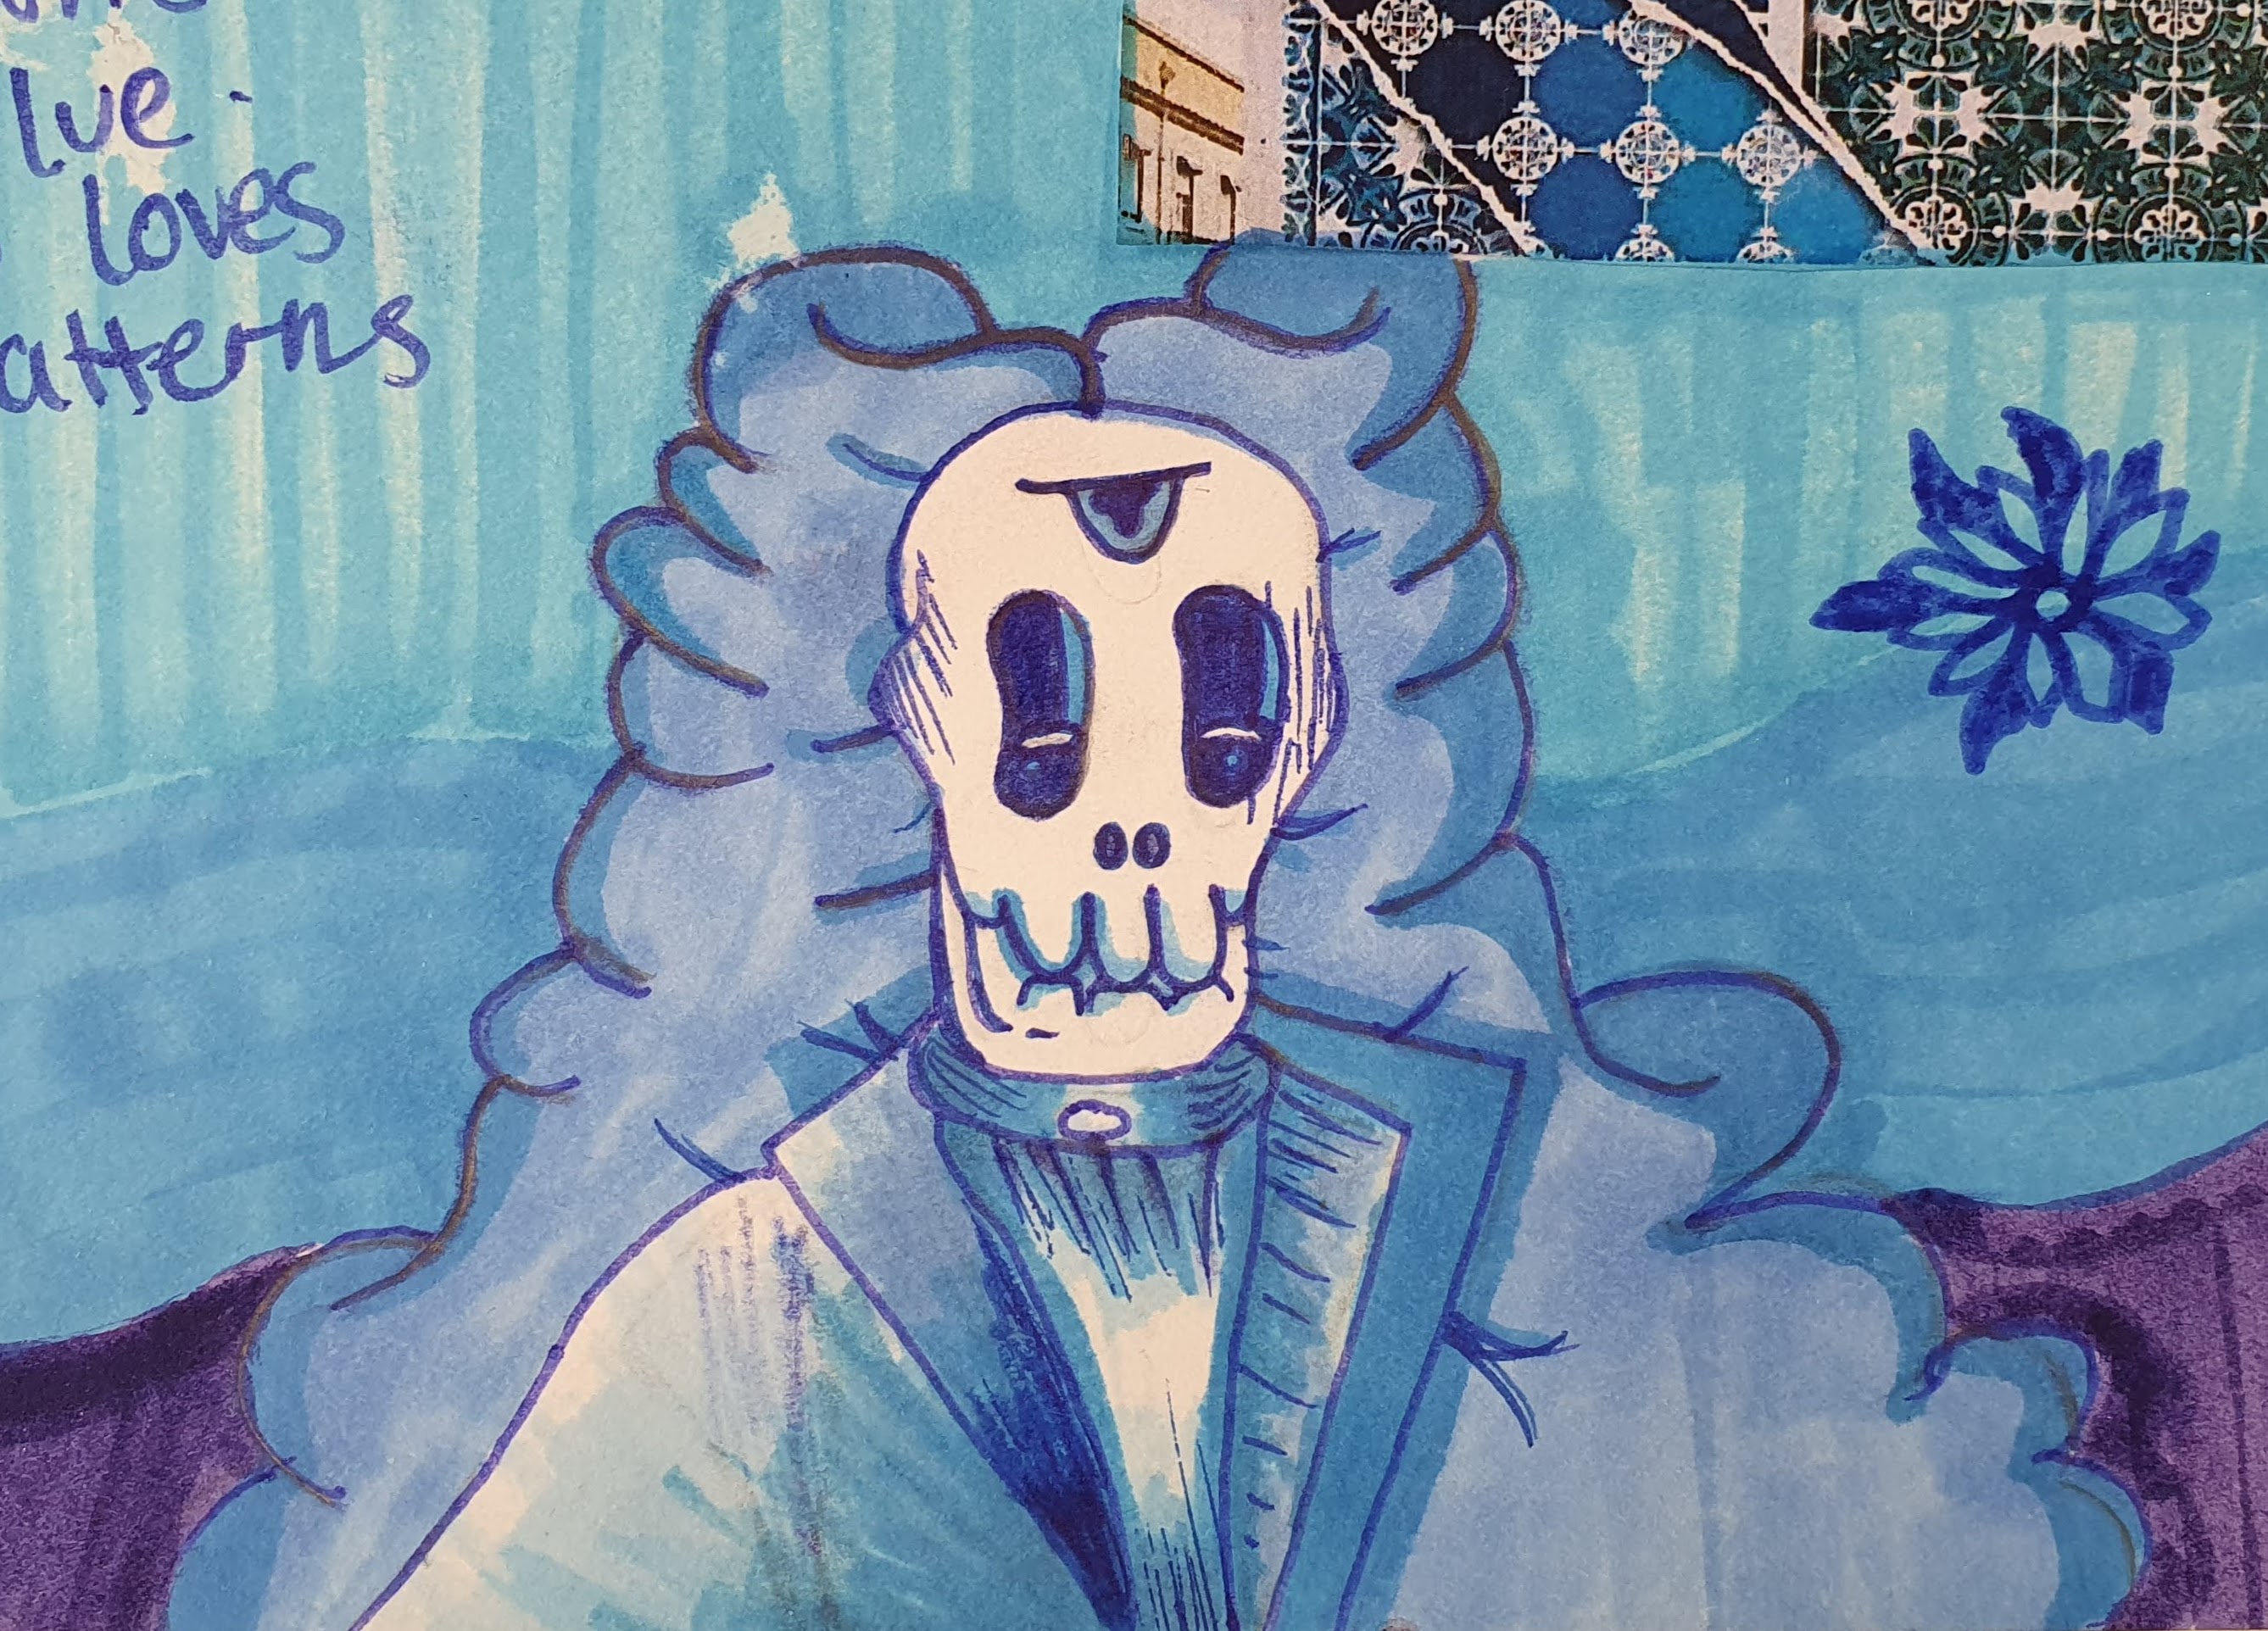
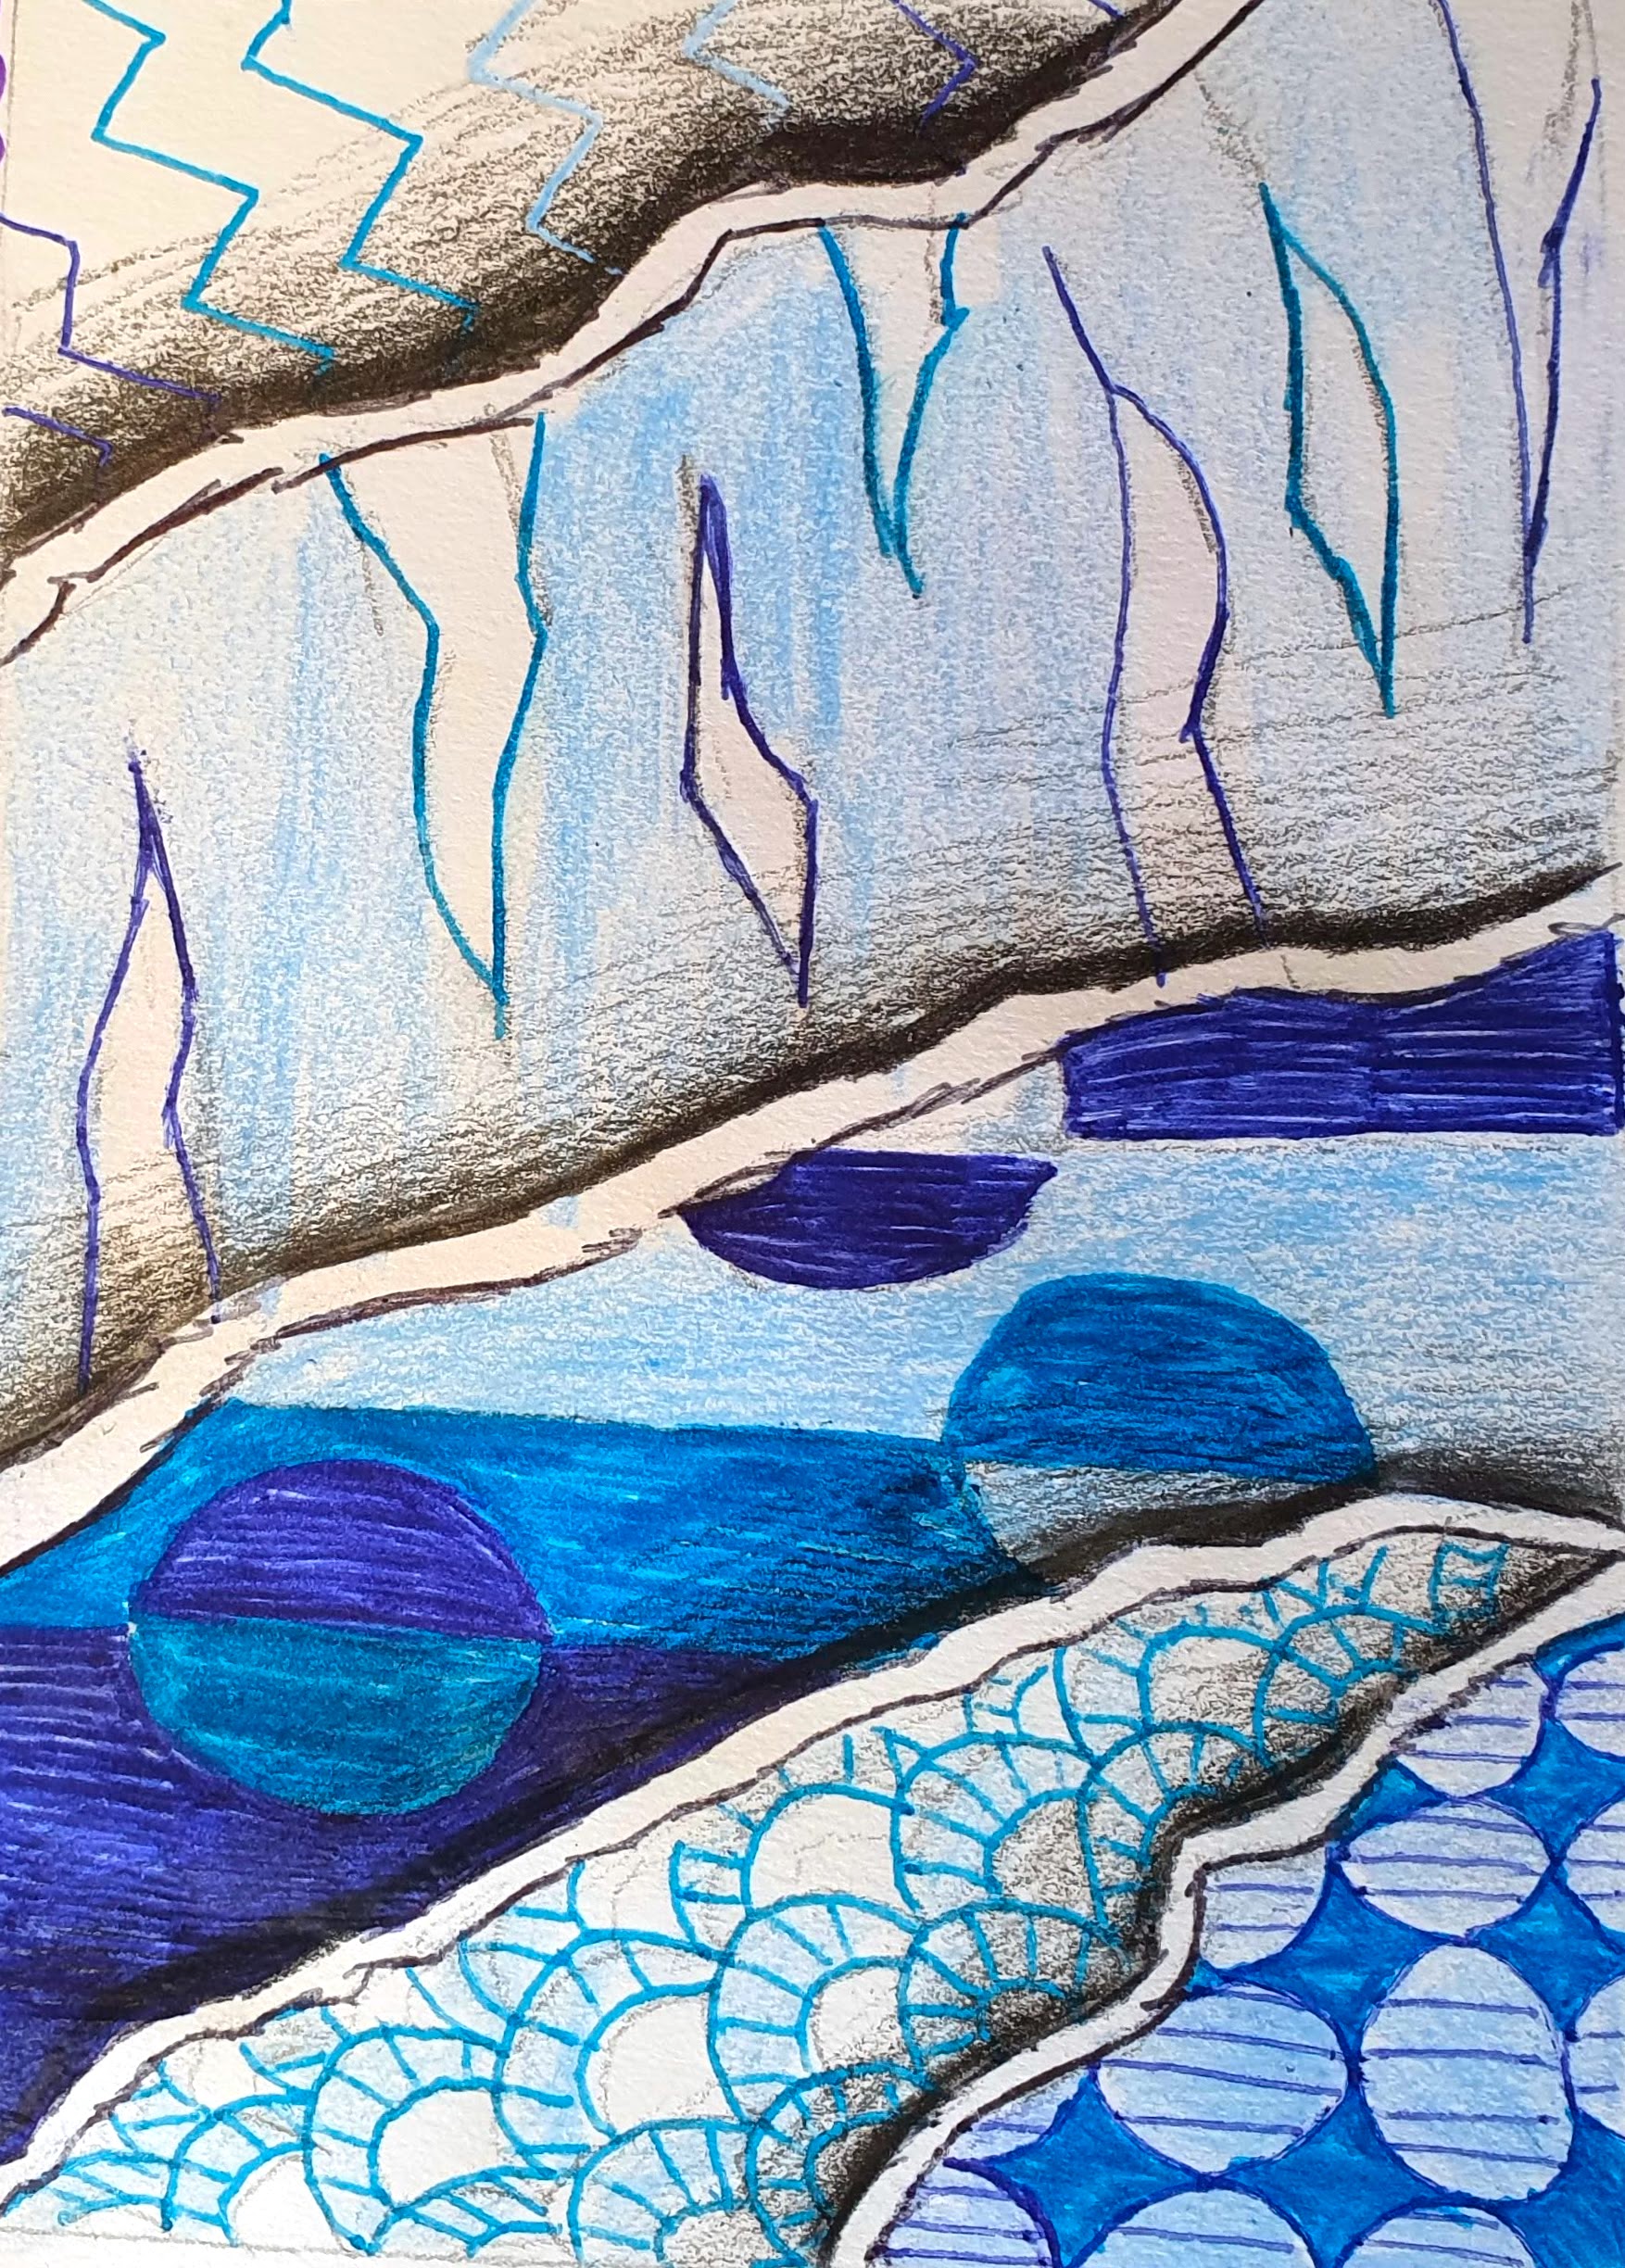
For their research pages I had set a challenge to make part of their drawing look 3D like ADD FUEL does in his work. I love the ripped effect and use of shadow to enhance the patterns!
I gave students one lesson to start their research then set a homework for them to finish it. There were some fantastic results which shows that students had really engaged with the artist and his work.

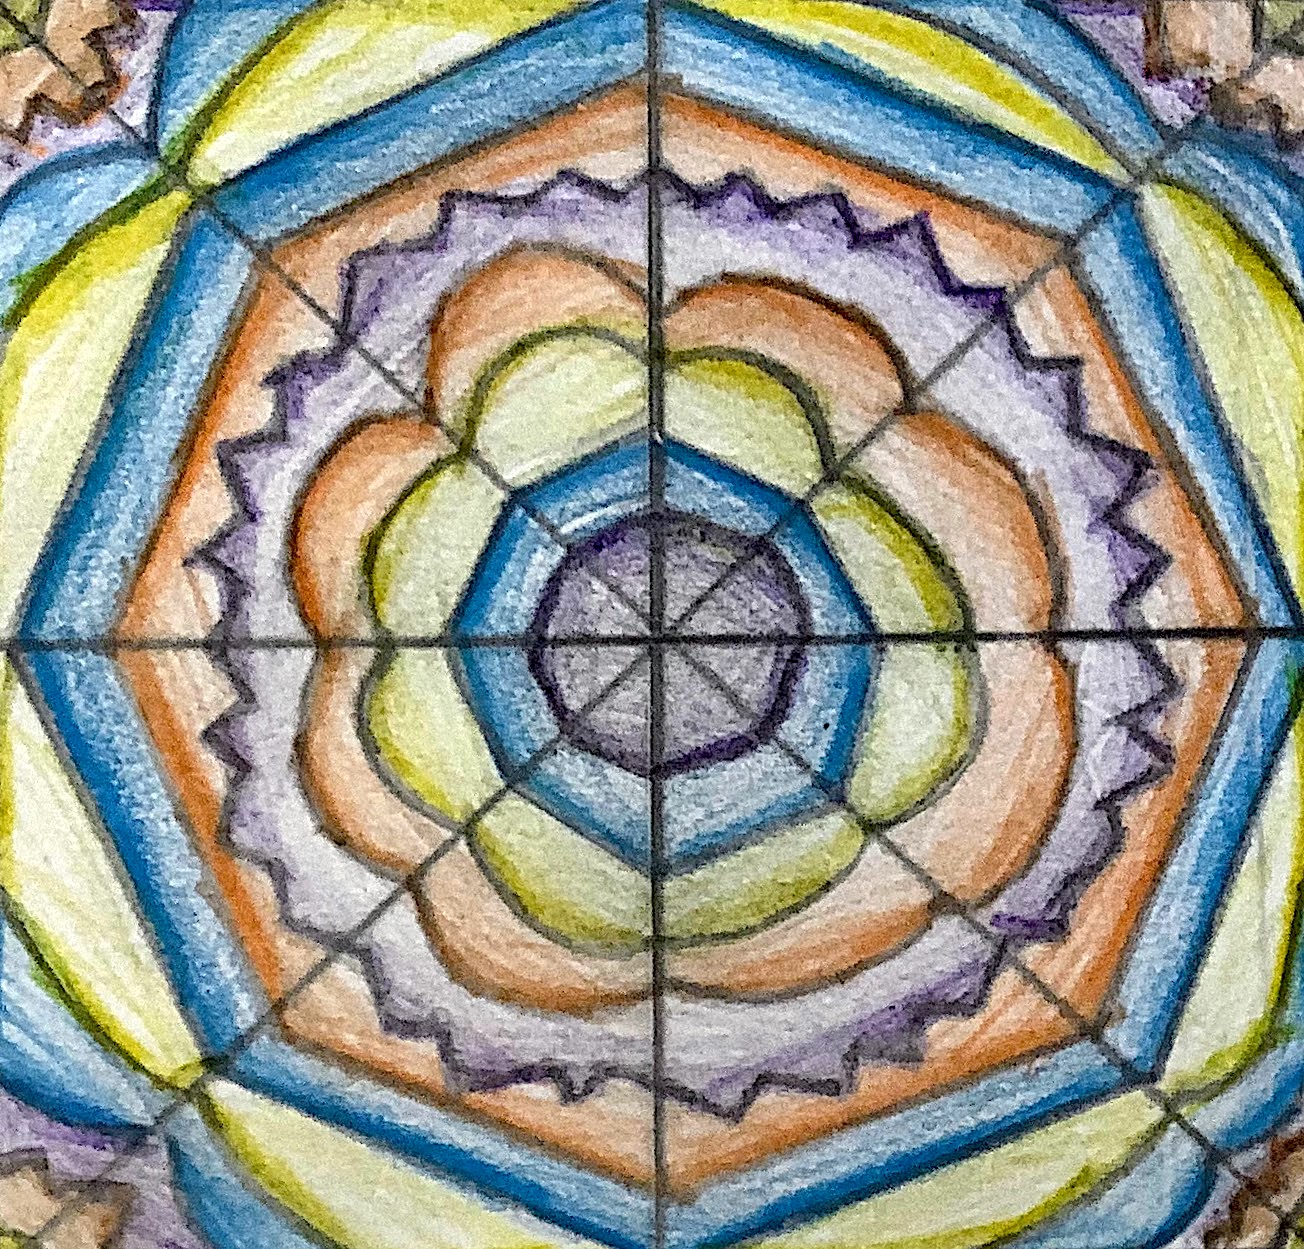
After their research into ADD FUEL, students started to create their own pattern designs...
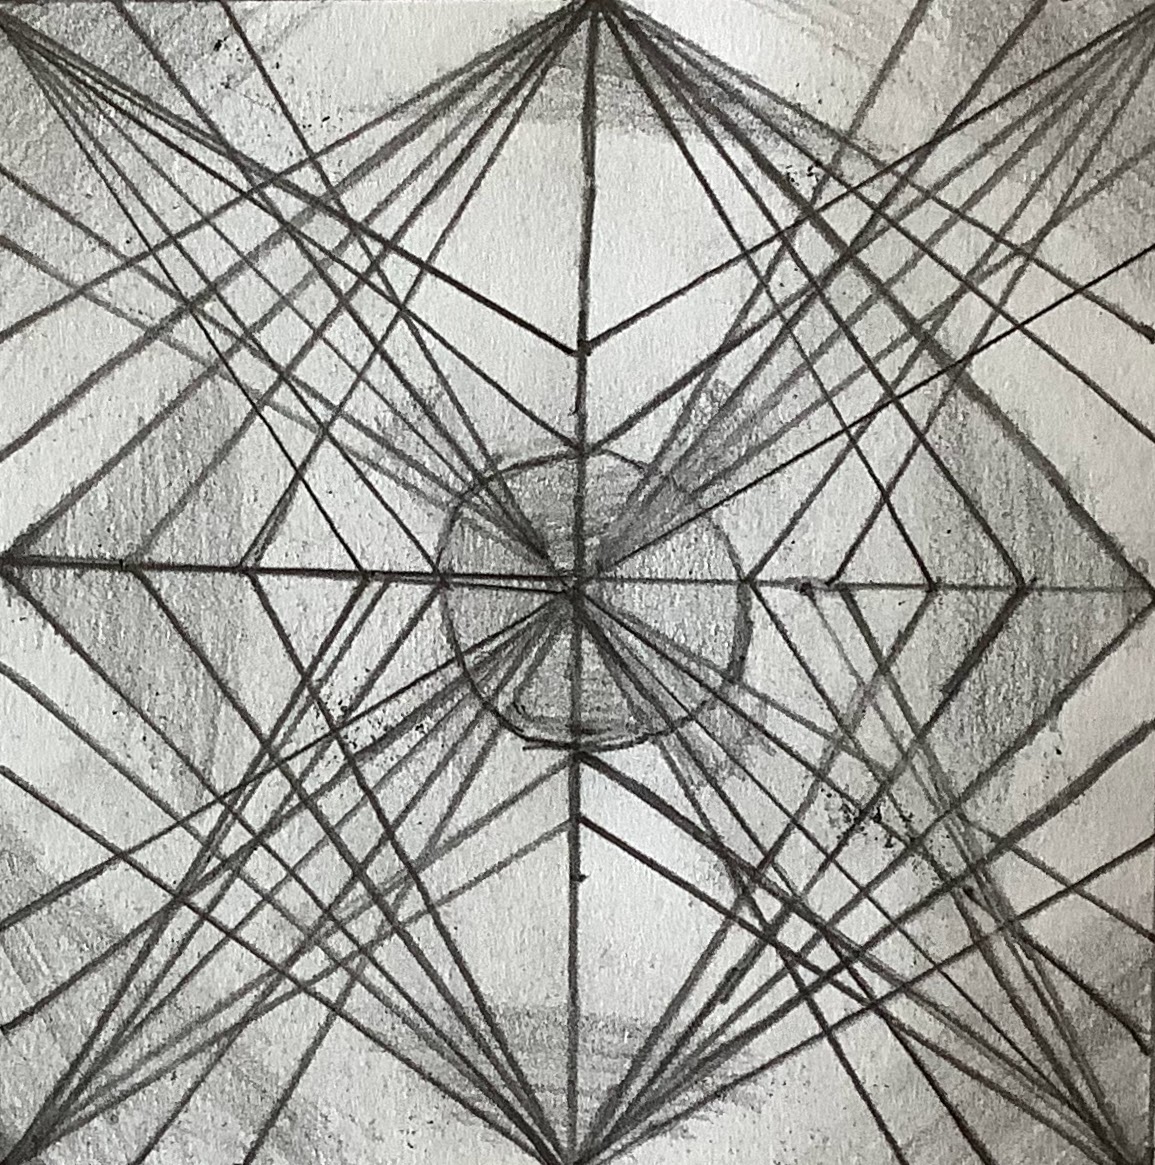
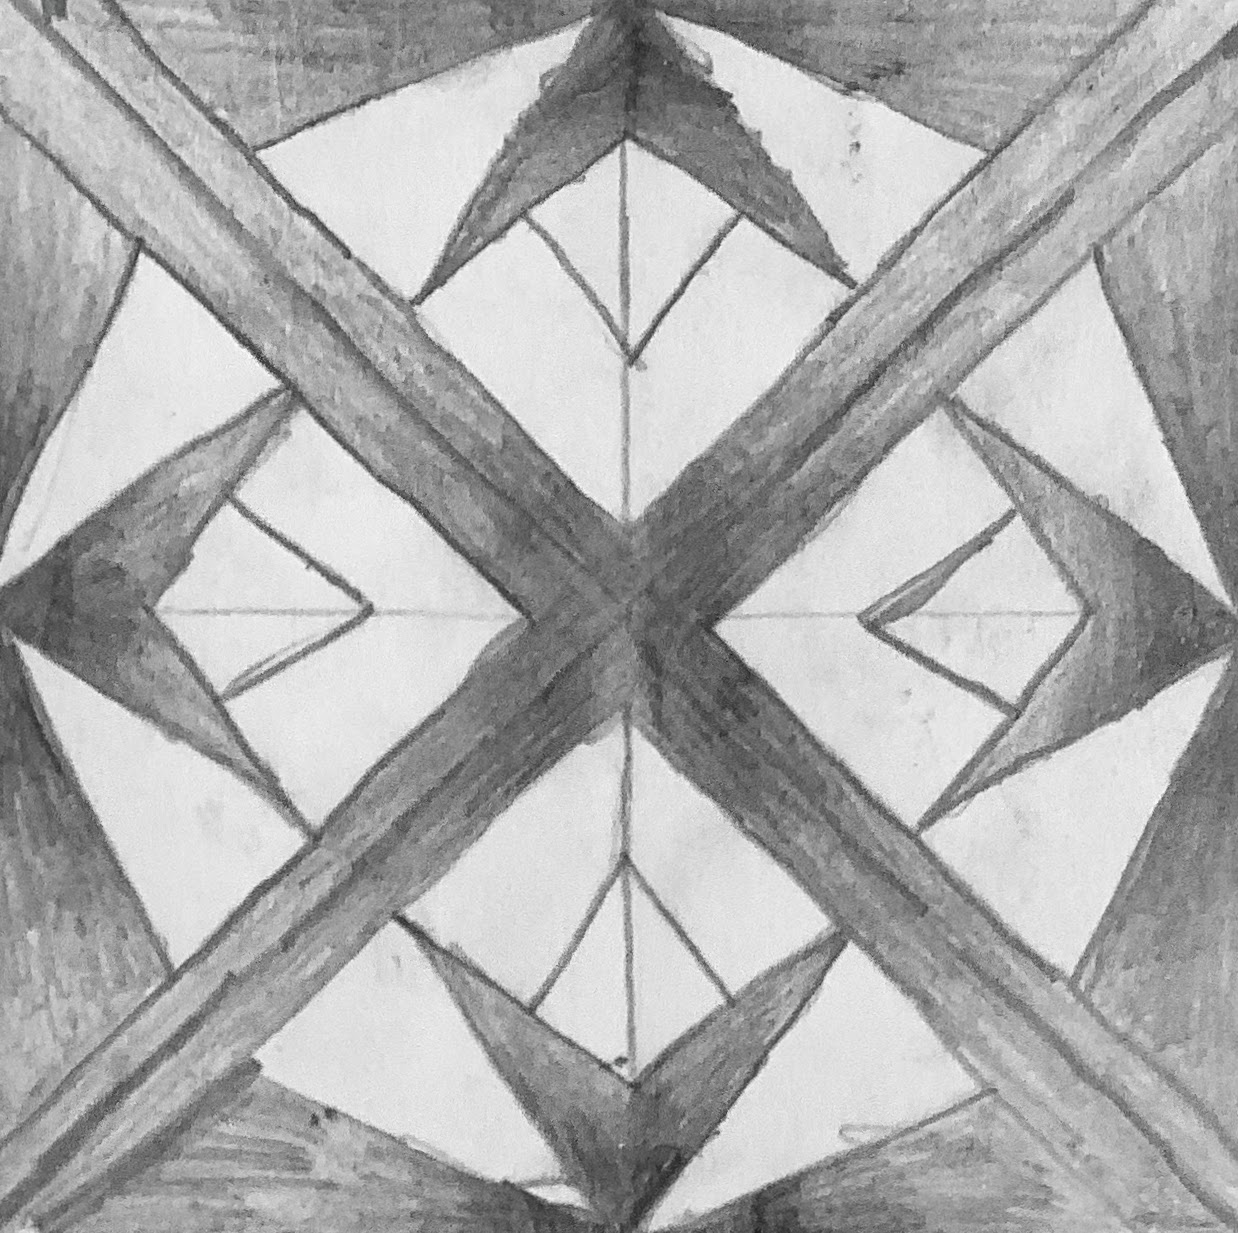
I wanted to show students how to create a rotational pattern and use the graphite transfer process with tracing paper. In lessons I used this step-by-step guide (and demo!)
The main thing students struggled with was coming up with designs of their own, so I have added handouts with examples of patterns to use in your lessons. I also told students to look back at their artist research and take pattern ideas from that.
The steps show to split the box into 8 equal sections, but you could easily simplify this into 4 or even 2 sections (depending on how simple or complex you want their designs to be!)
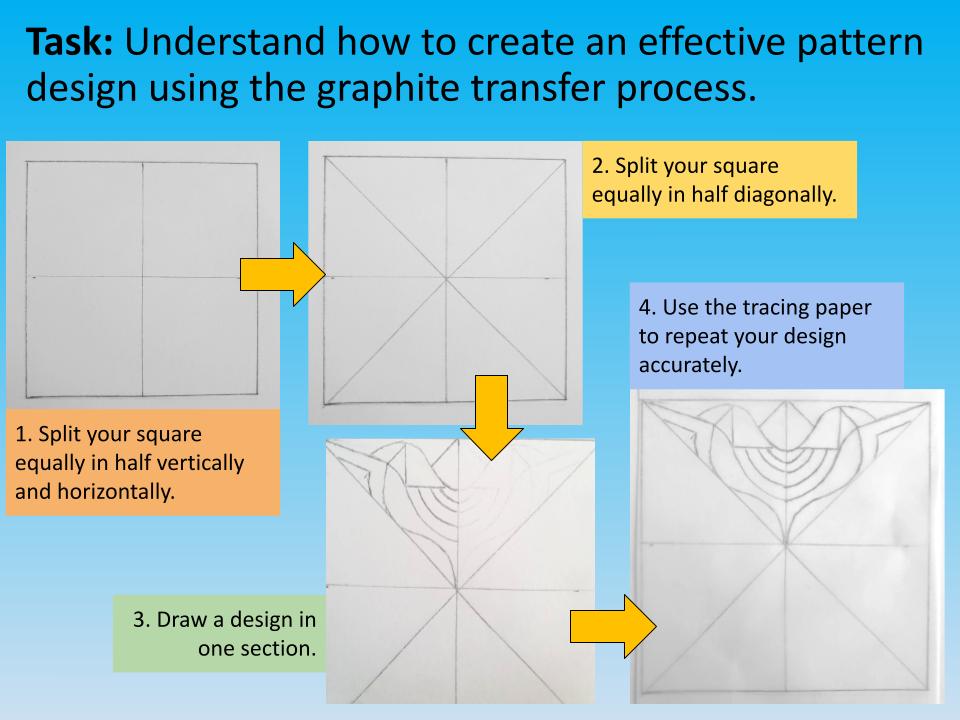
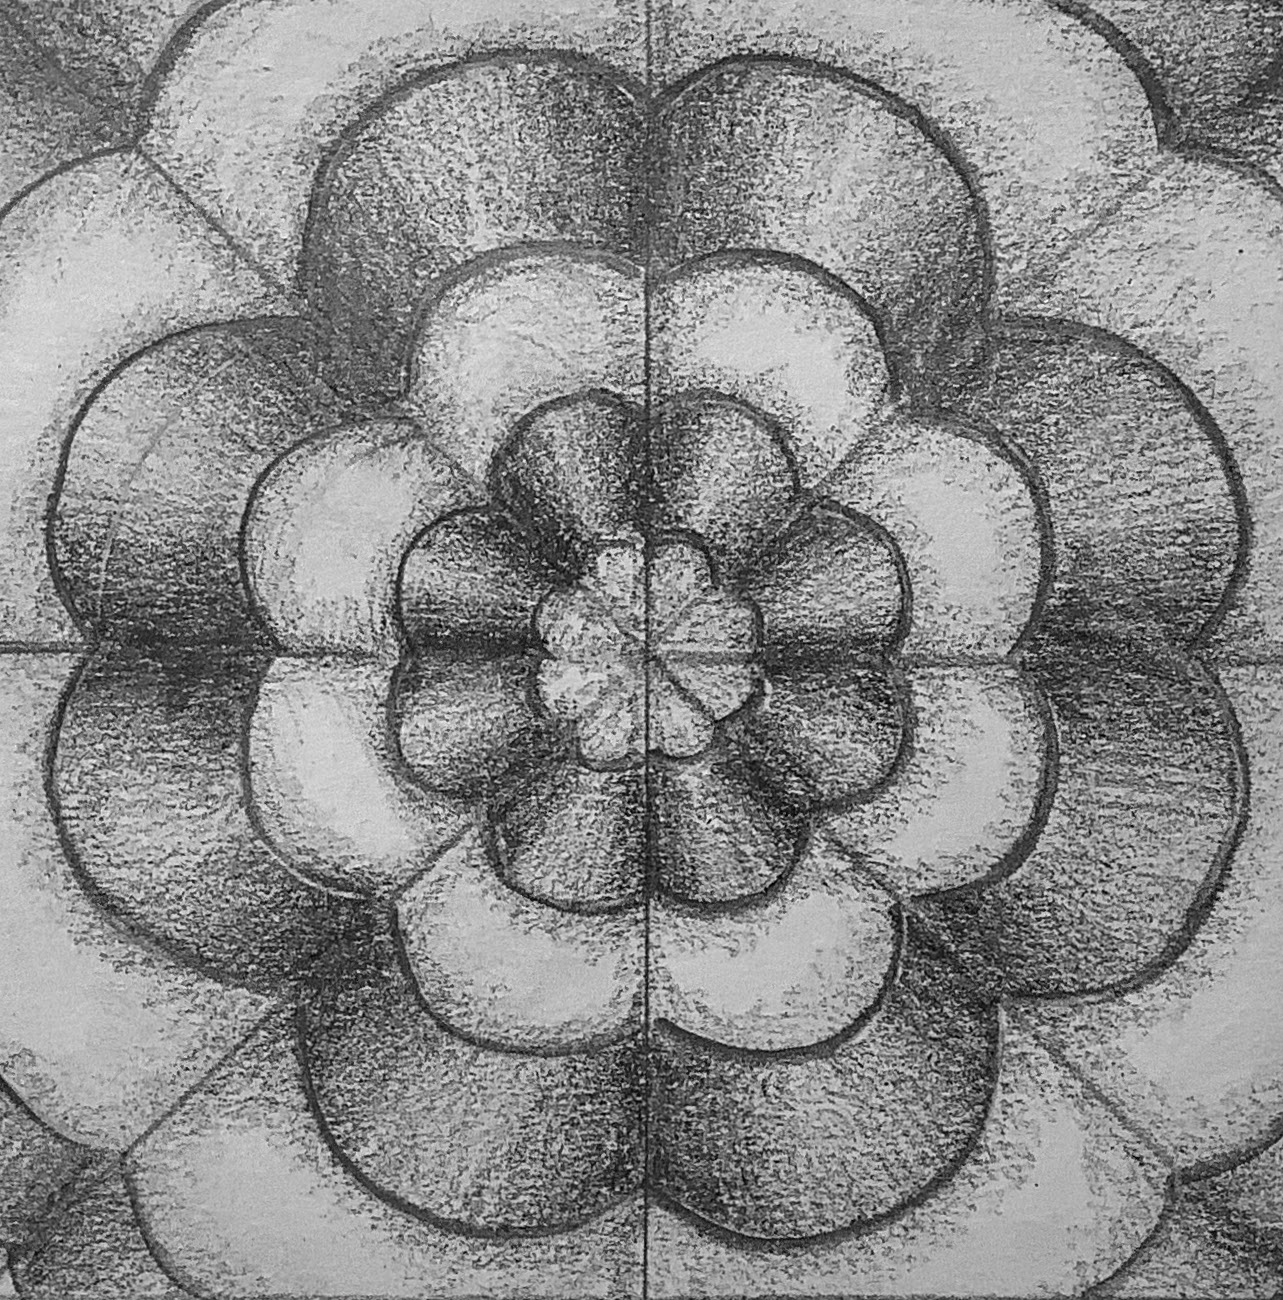
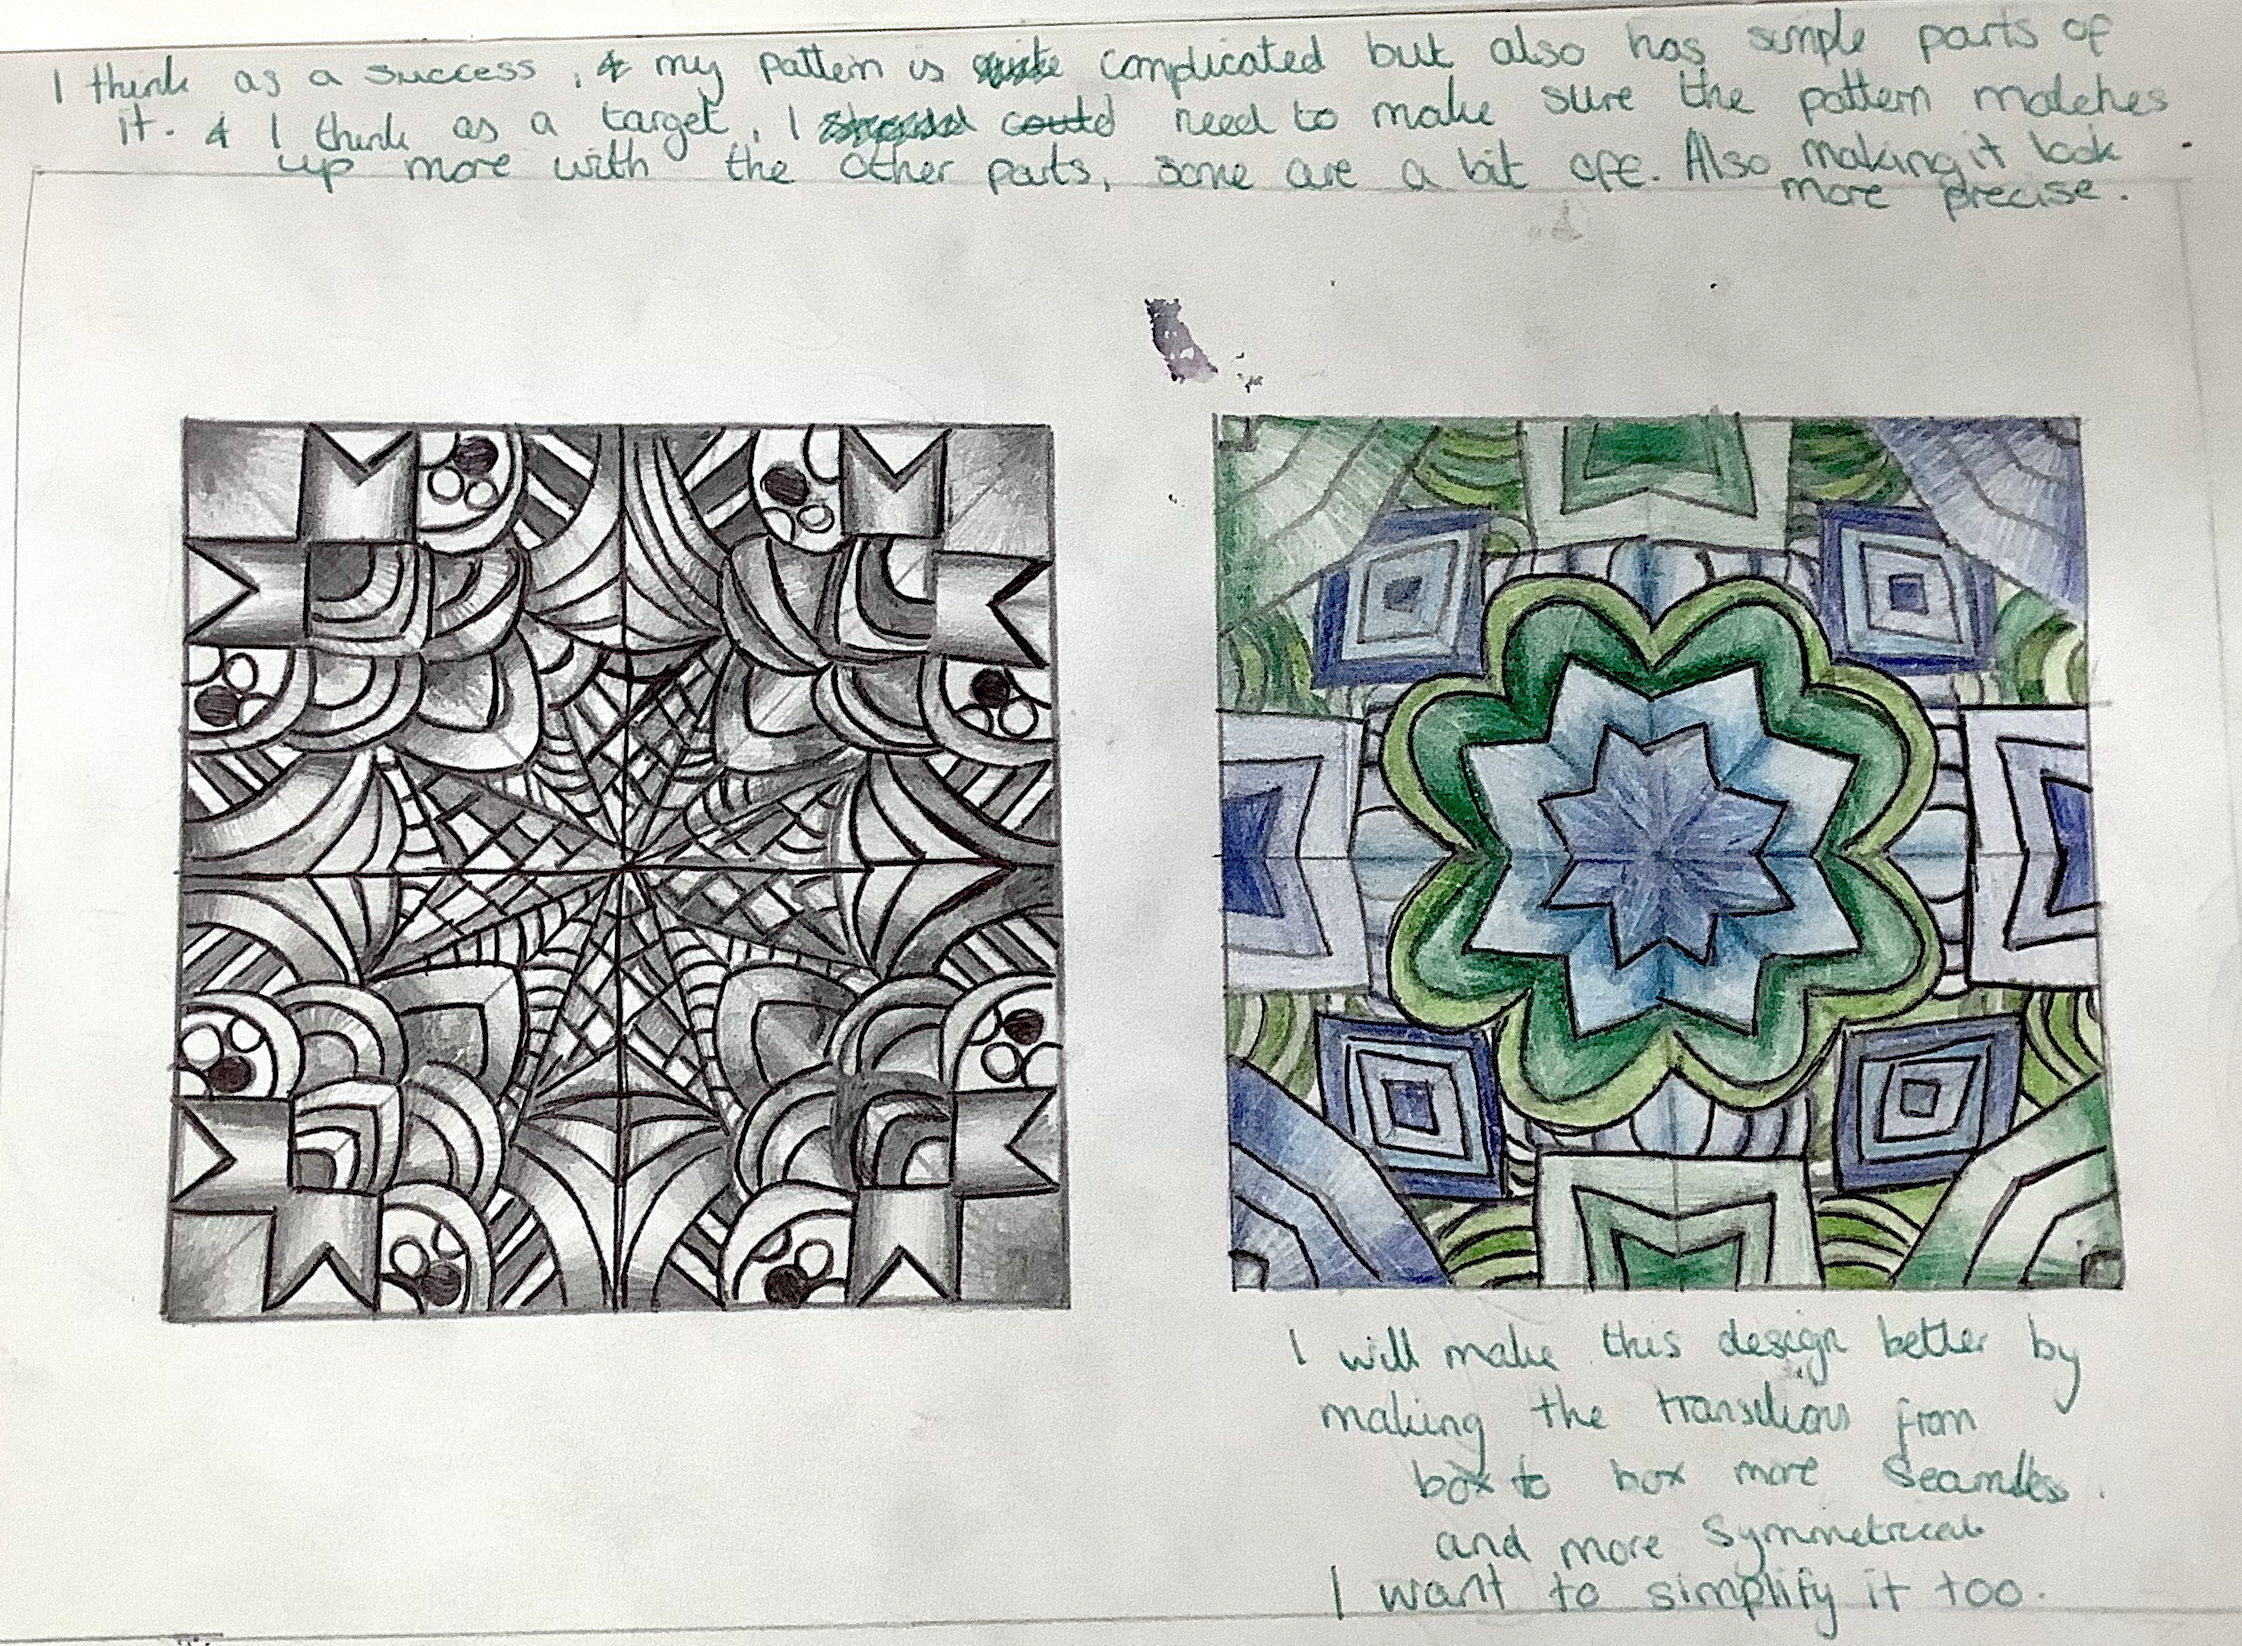
This part of the project seemed to go really well! Overall, students did a great job creating their patterns. I set a homework to add shading to make part of their work look 3D and showed a few examples of Op Art on the board.
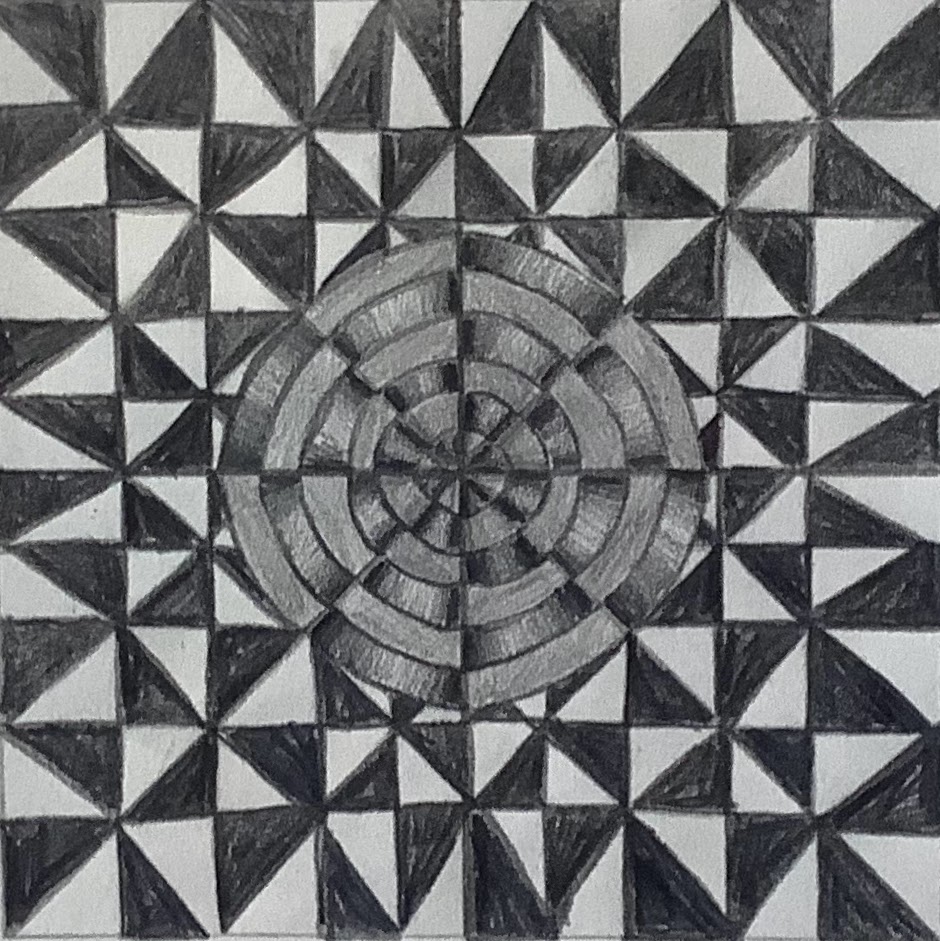
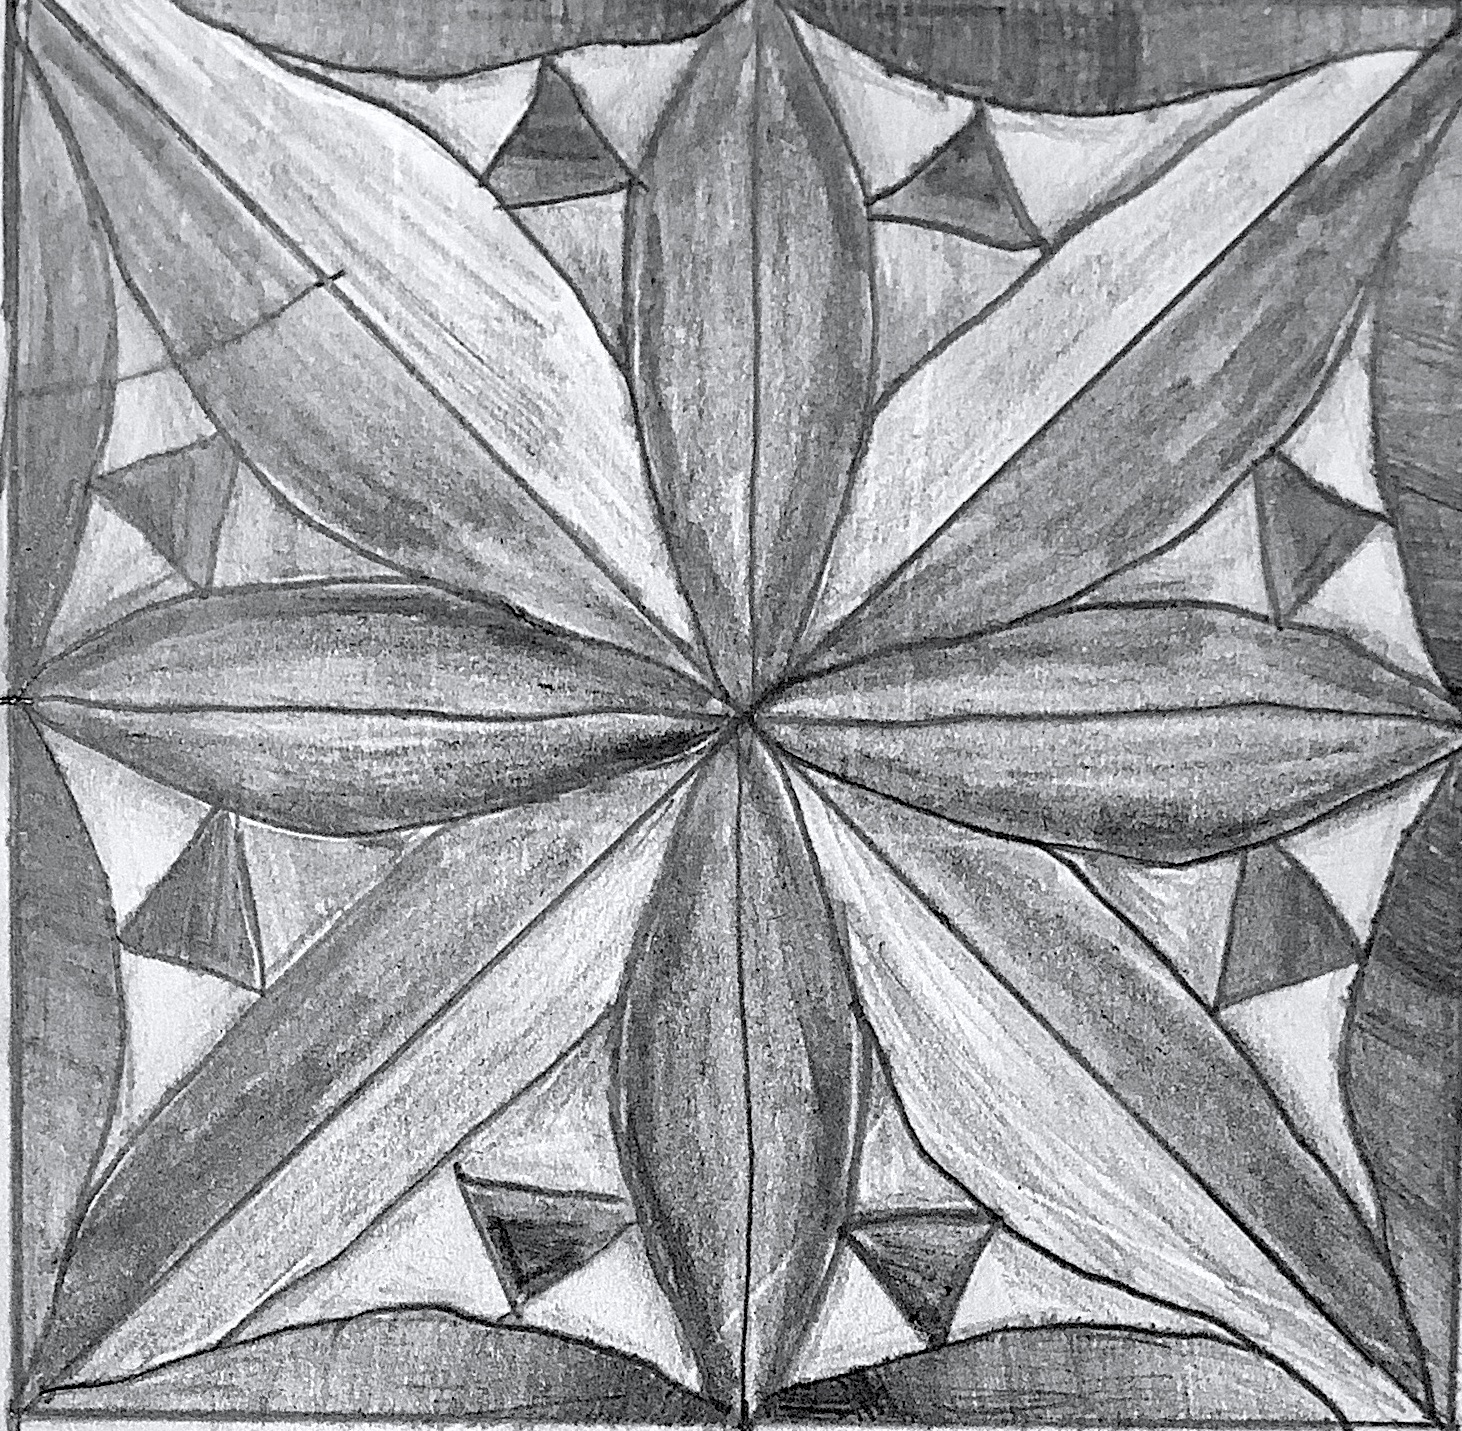

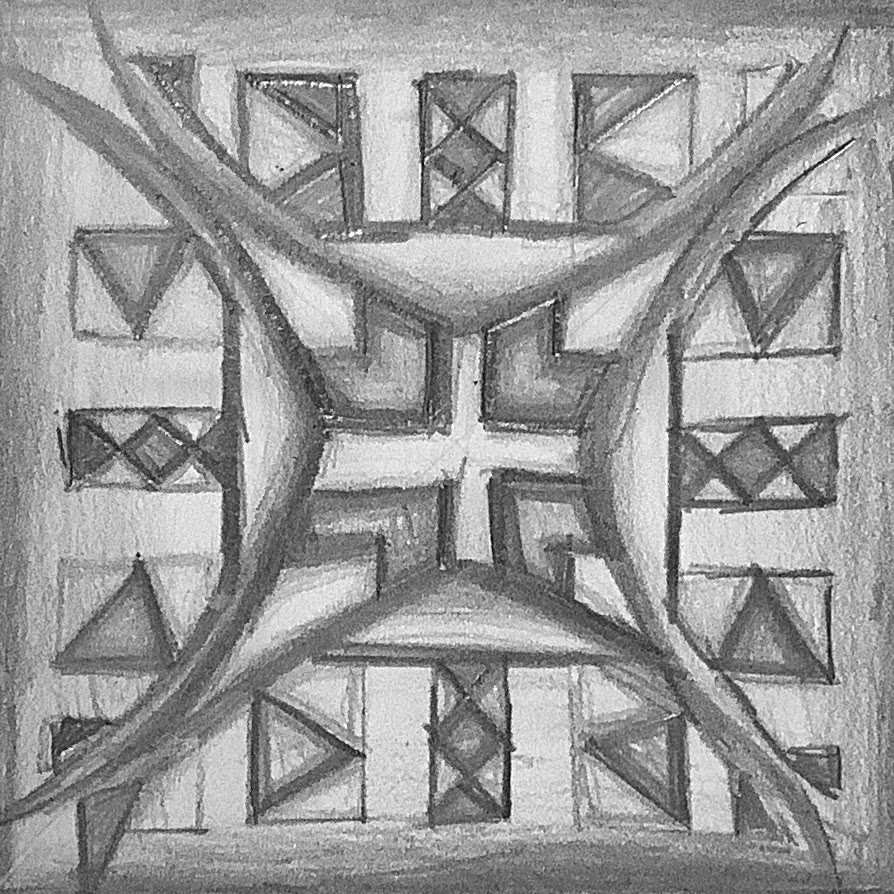
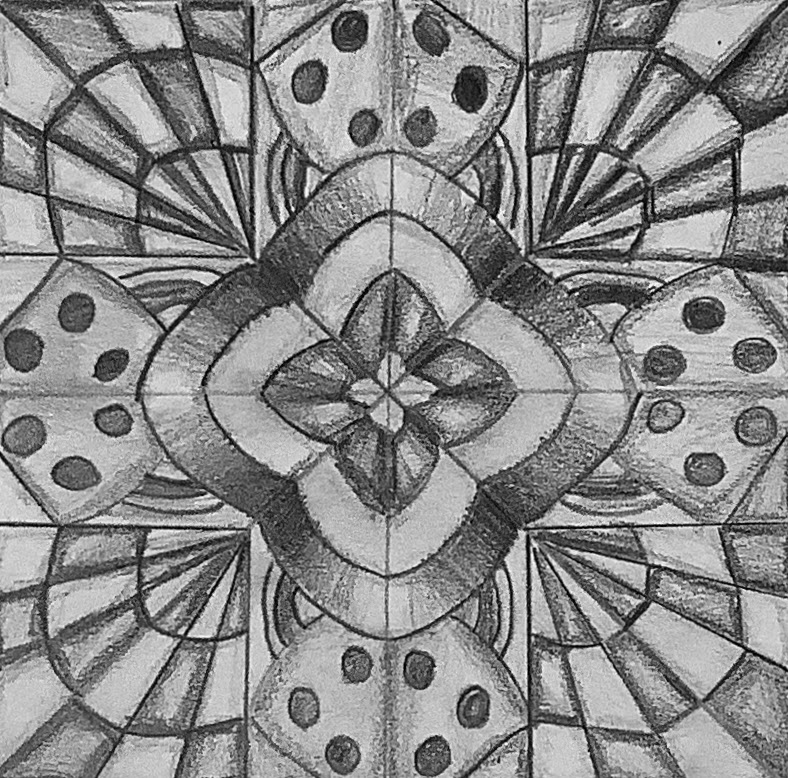
In their next lesson, students created a second, improved pattern design, this time using colour. In terms of colour theory, we discussed complementary colour schemes and how Op Art makes use of them to create illusions and crazy optical effects.
Students drew out their improved design (again using the graphite transfer process!) and used colour to compete their work for homework. Students could use coloured pencils or felt-tips, they just had to try and show a complementary colour scheme in their piece. I thought these came out amazingly!
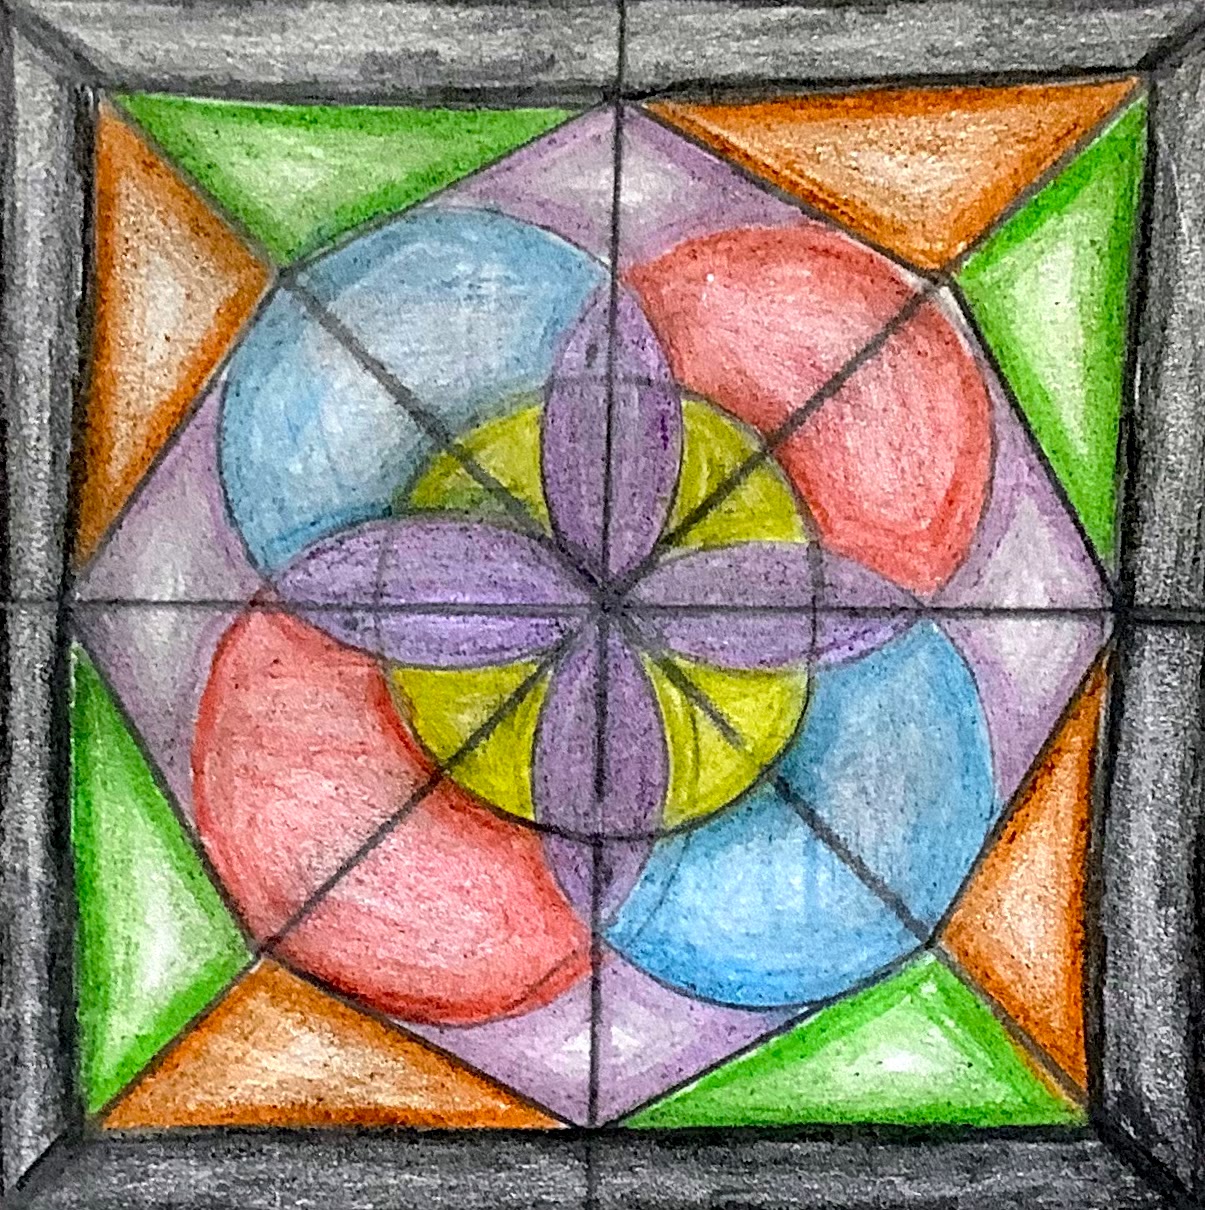

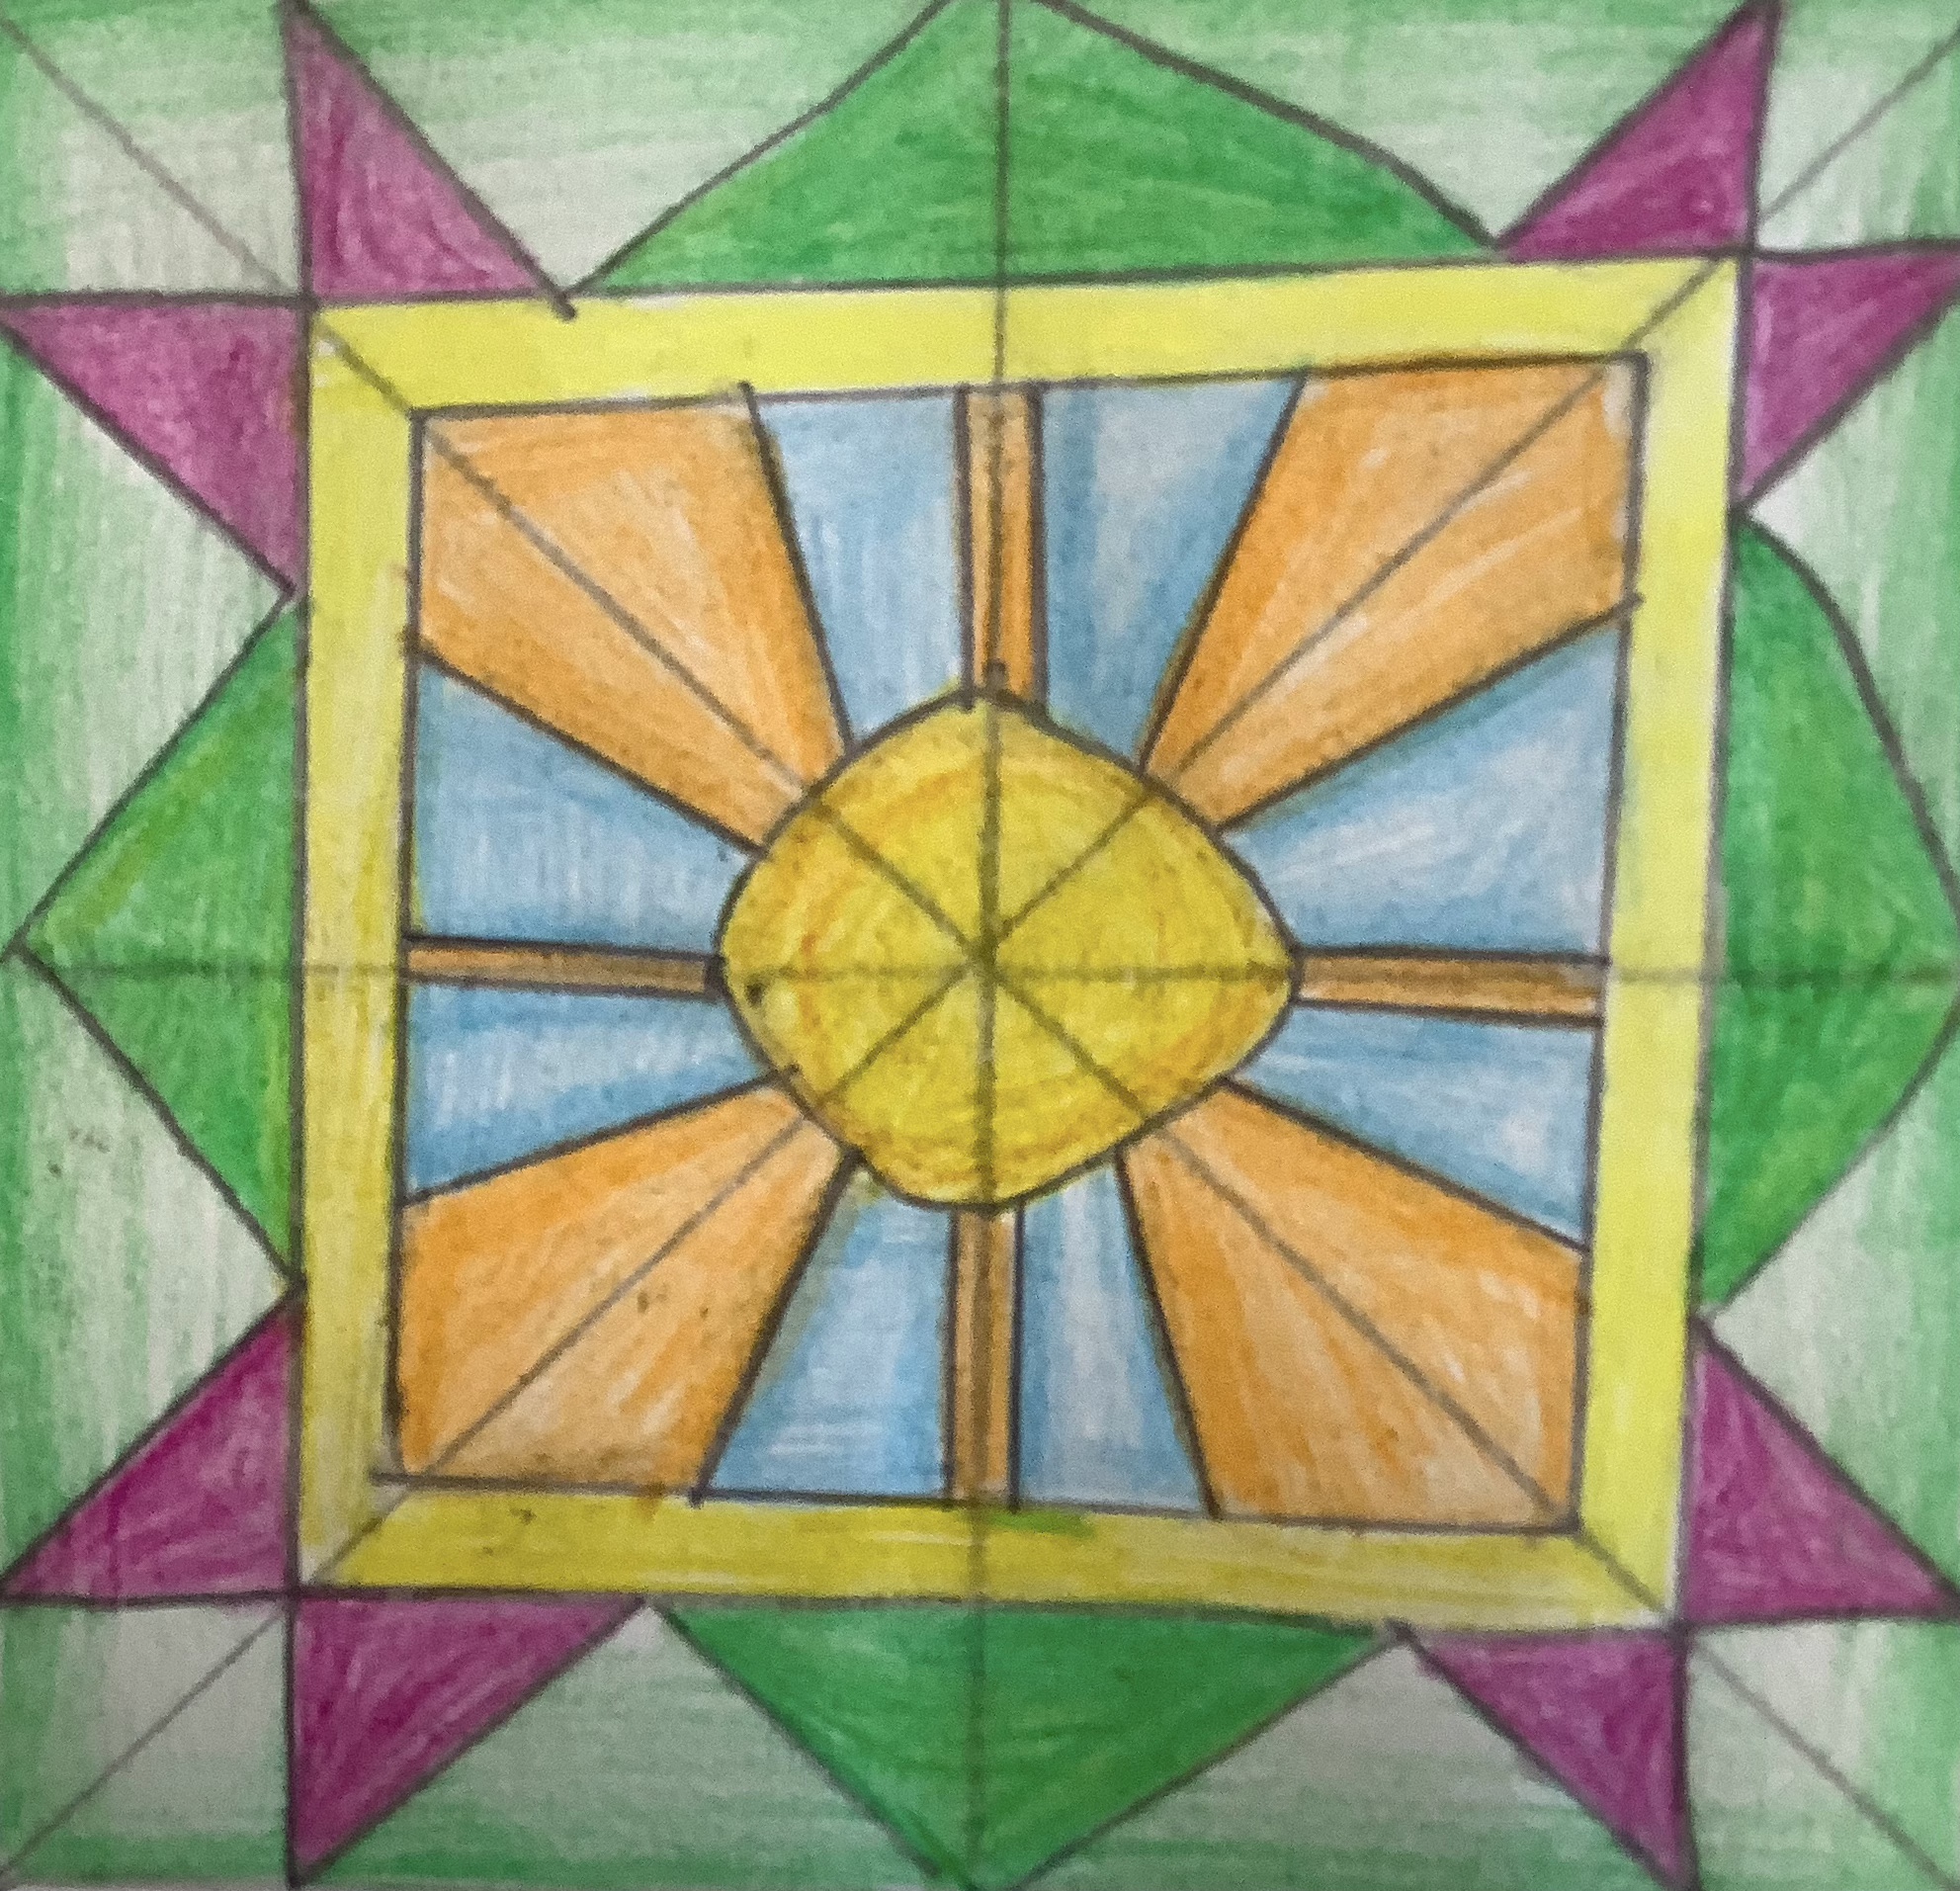
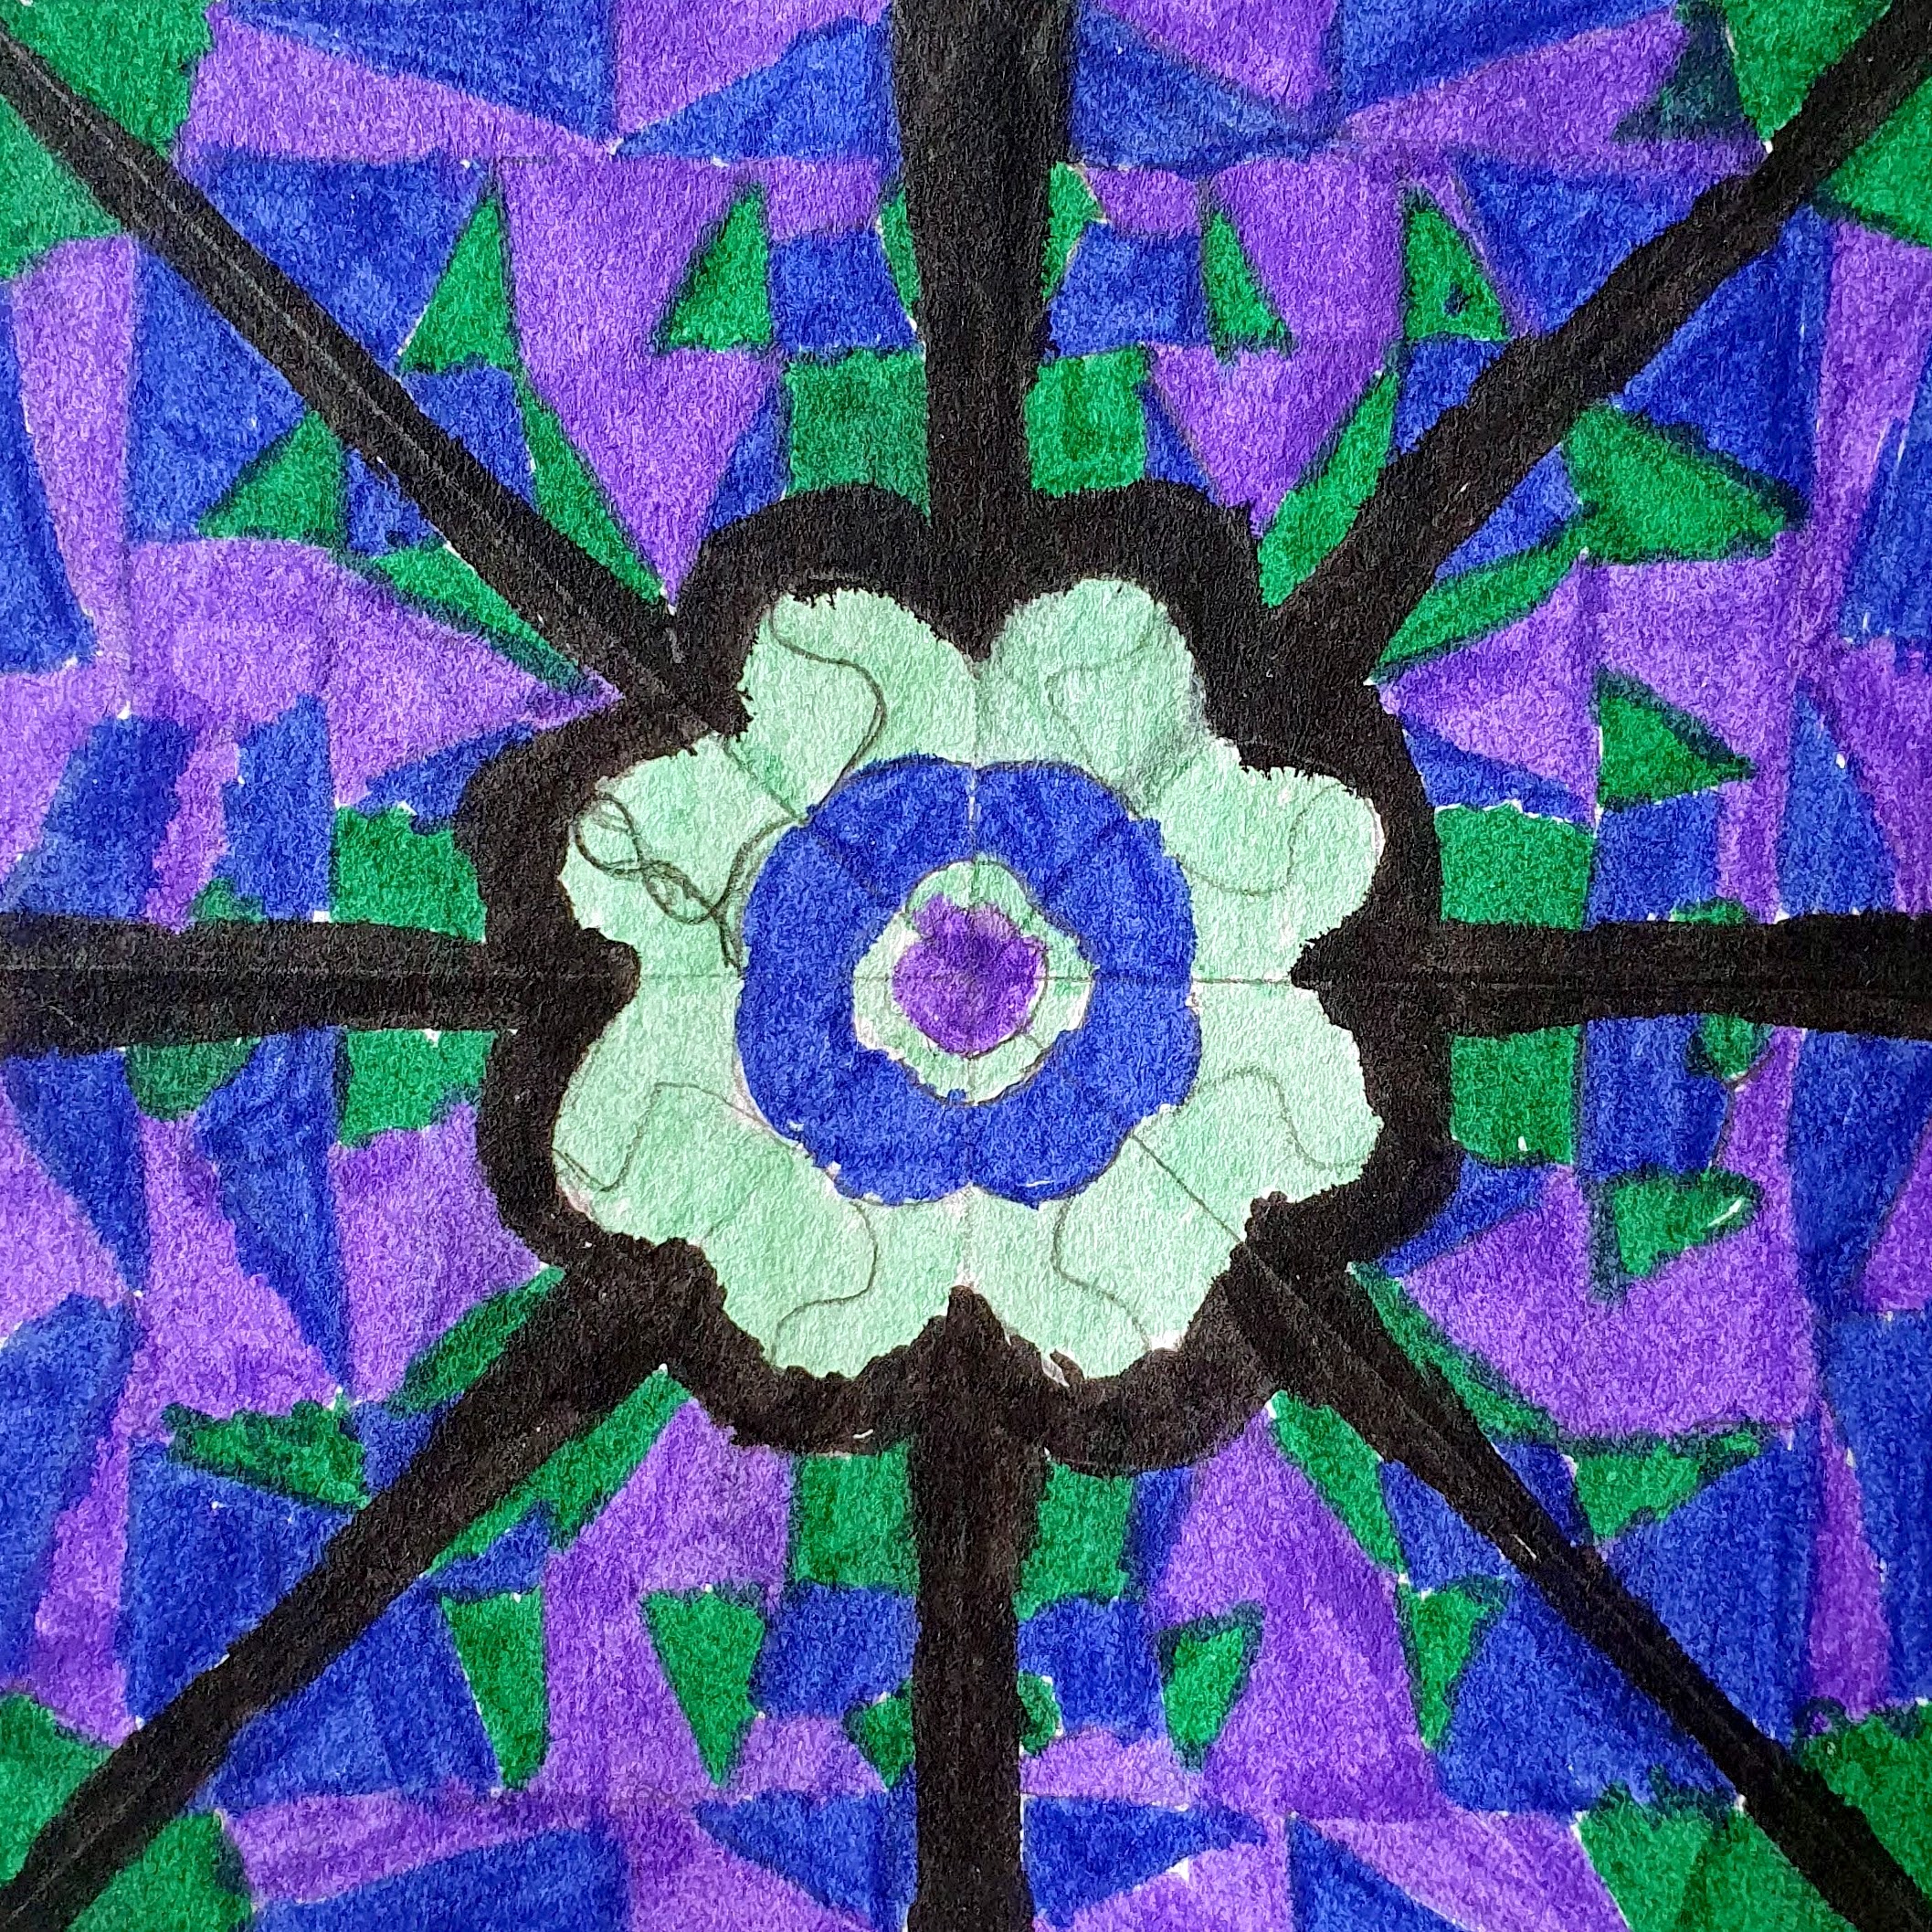
An example of a student’s sketchbook page after both the pencil and coloured pencil designs had been completed. The assessment tasks are all included in the presentation 👍
Get this full project on TES or TPT – enjoy.
Materials needed for this Pattern Printmaking Project:
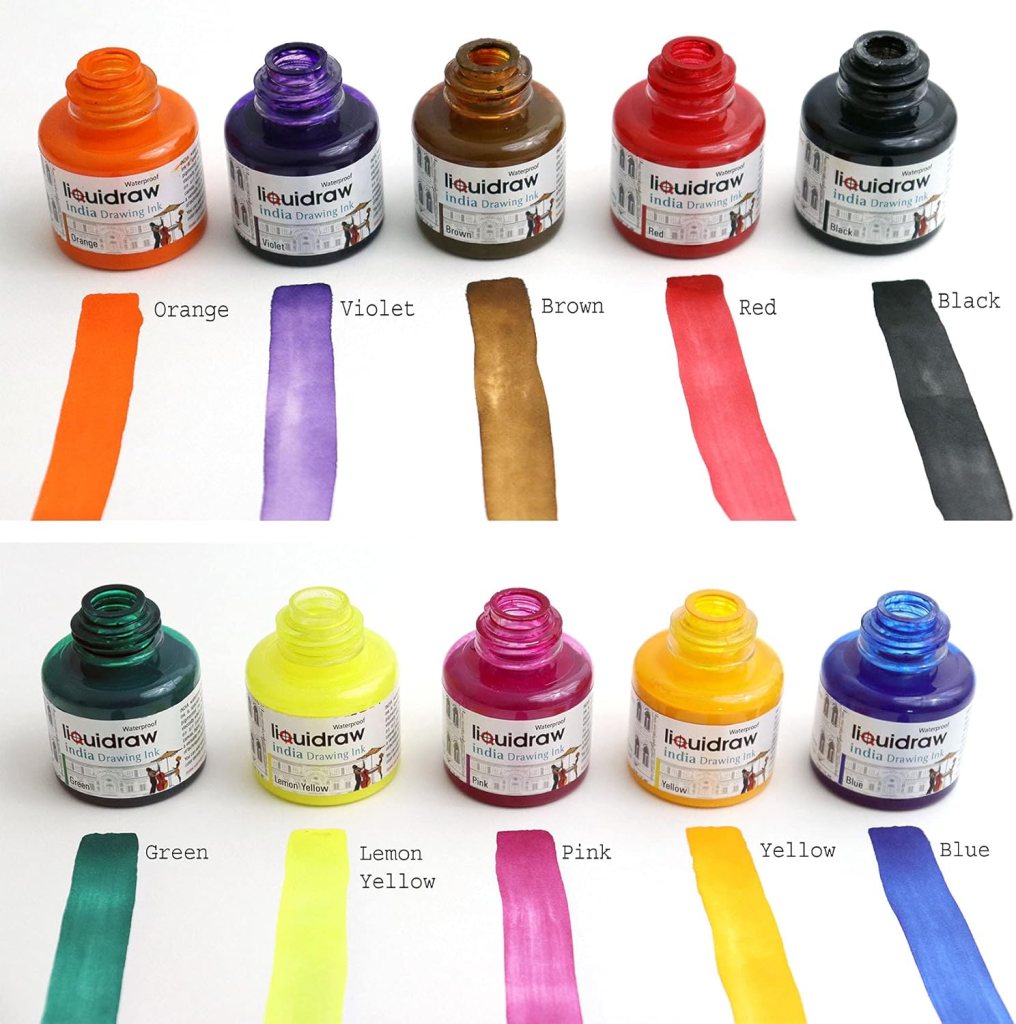
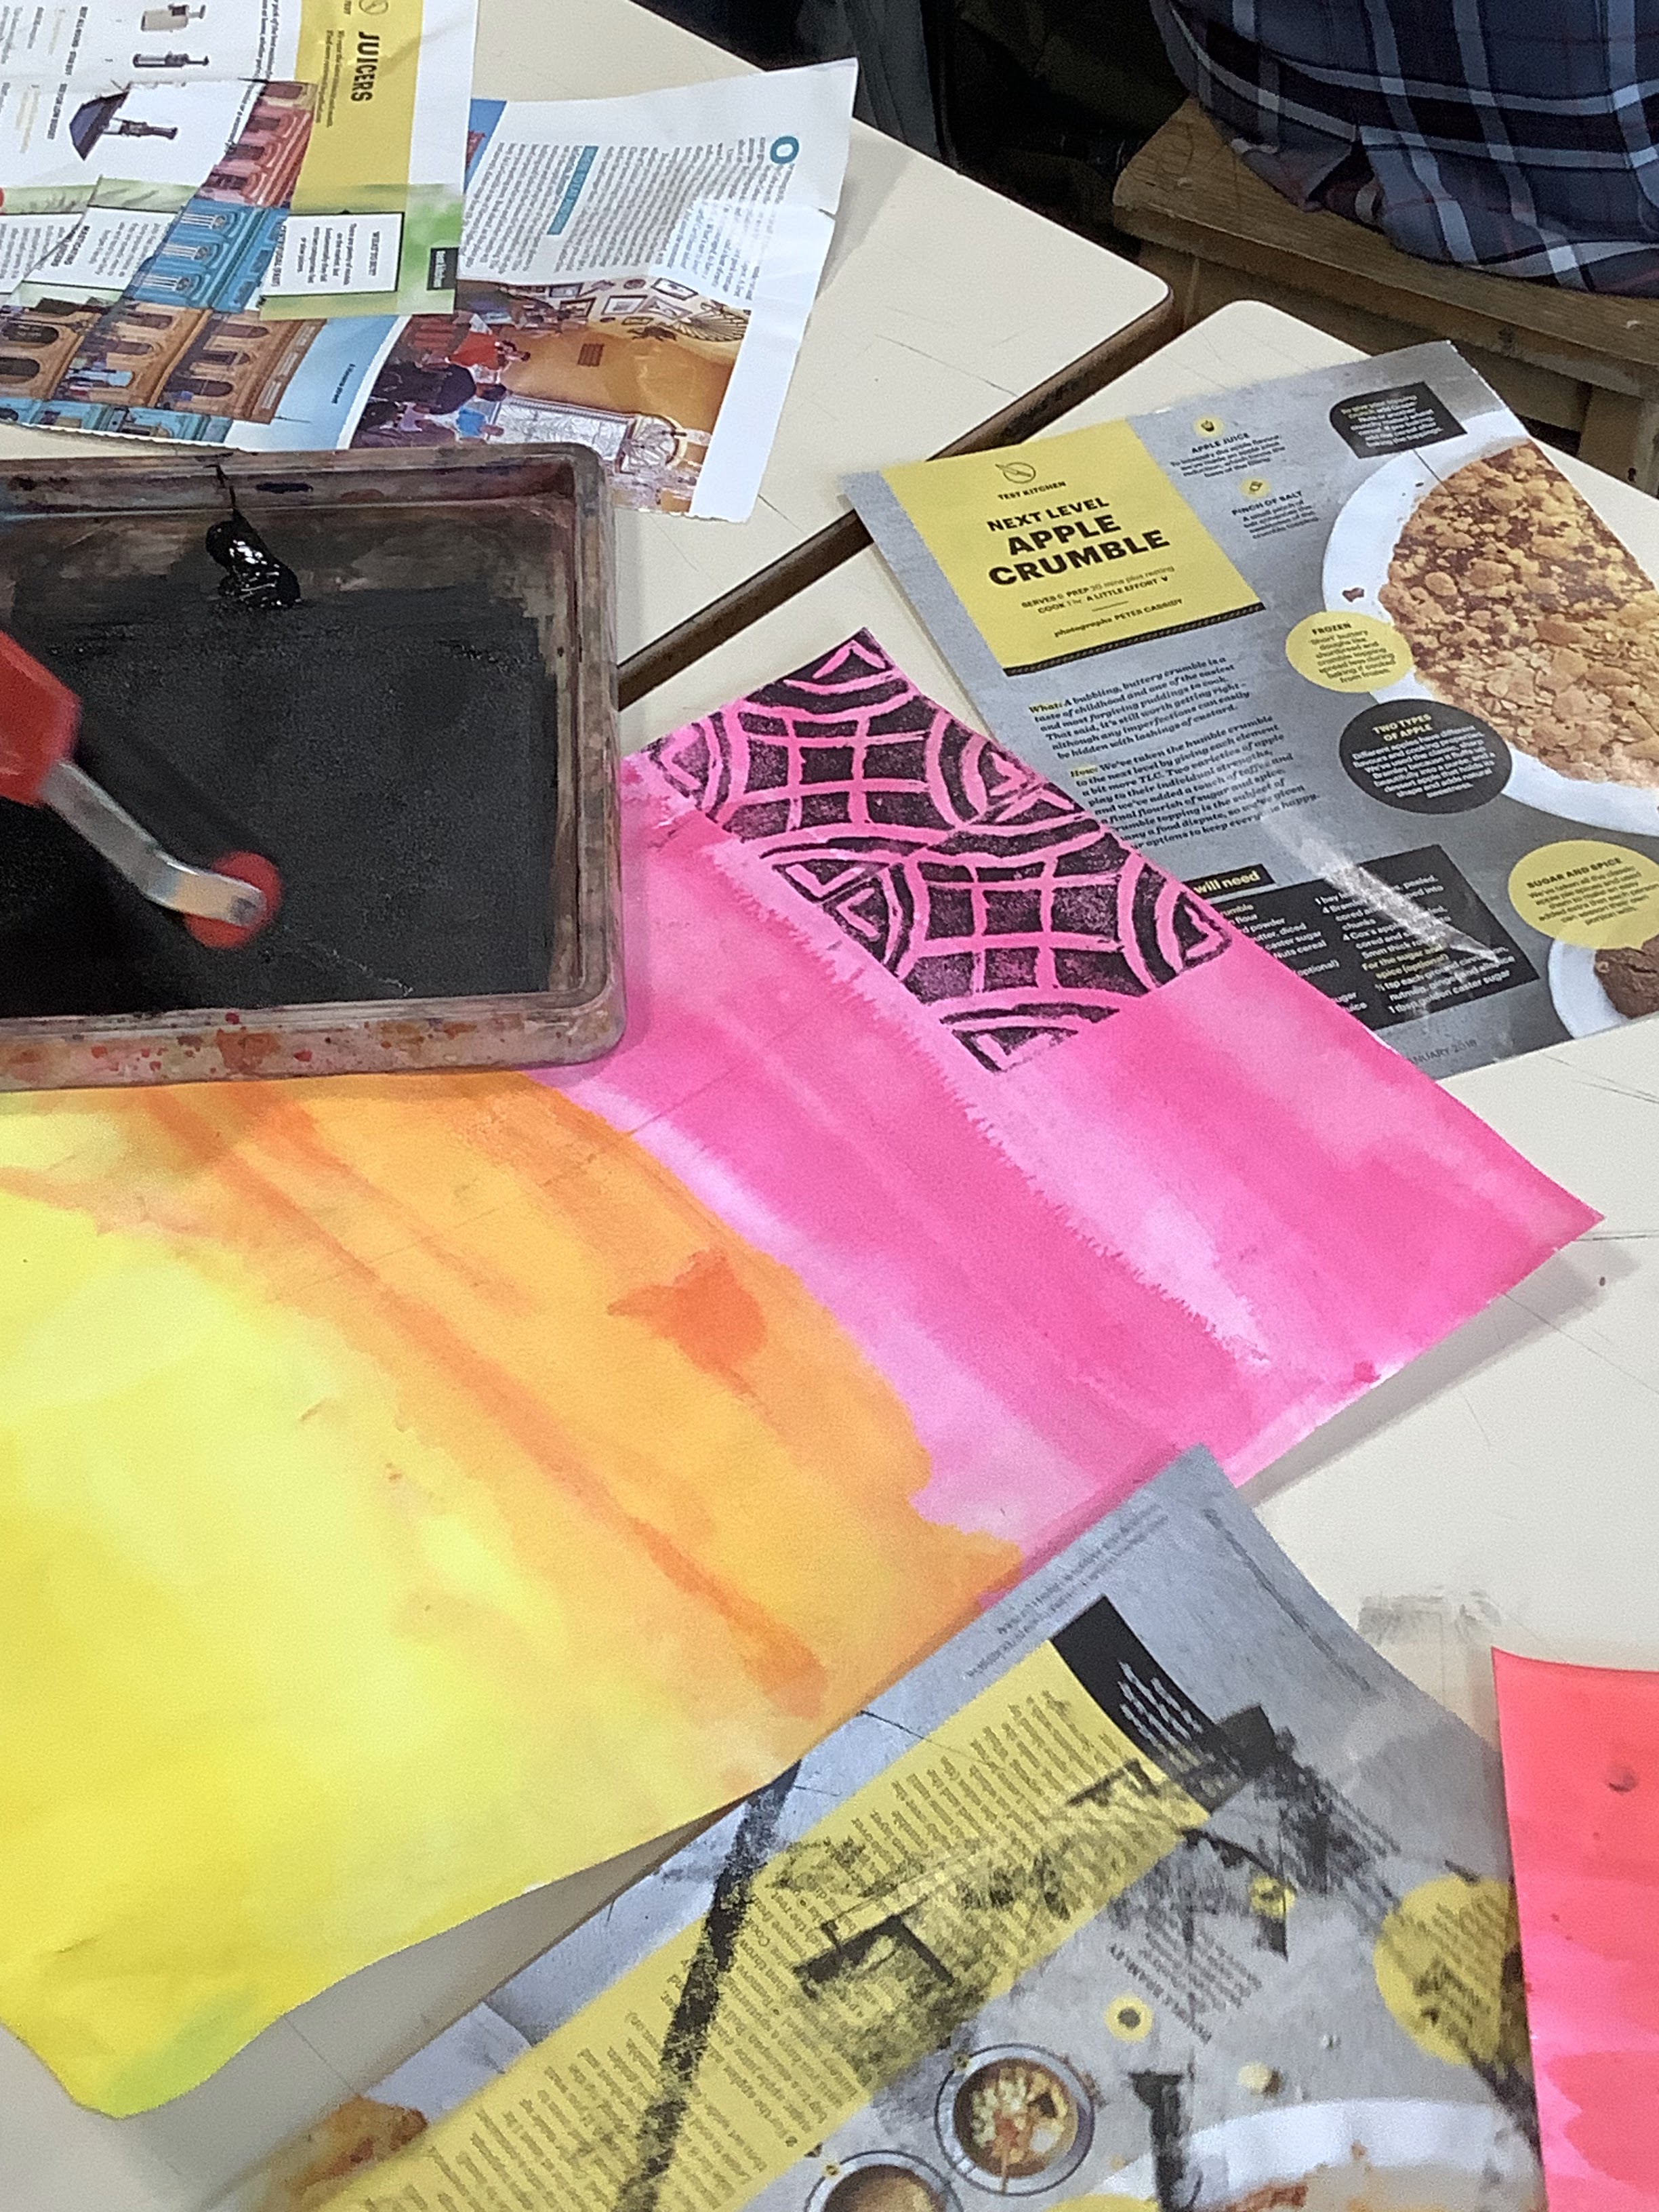
For the coloured backgrounds that students printed onto, I used Indian inks for their rich, vibrant colours and how easily they blend and spread. It also helps that they dry water resistant so printing over them works really well.
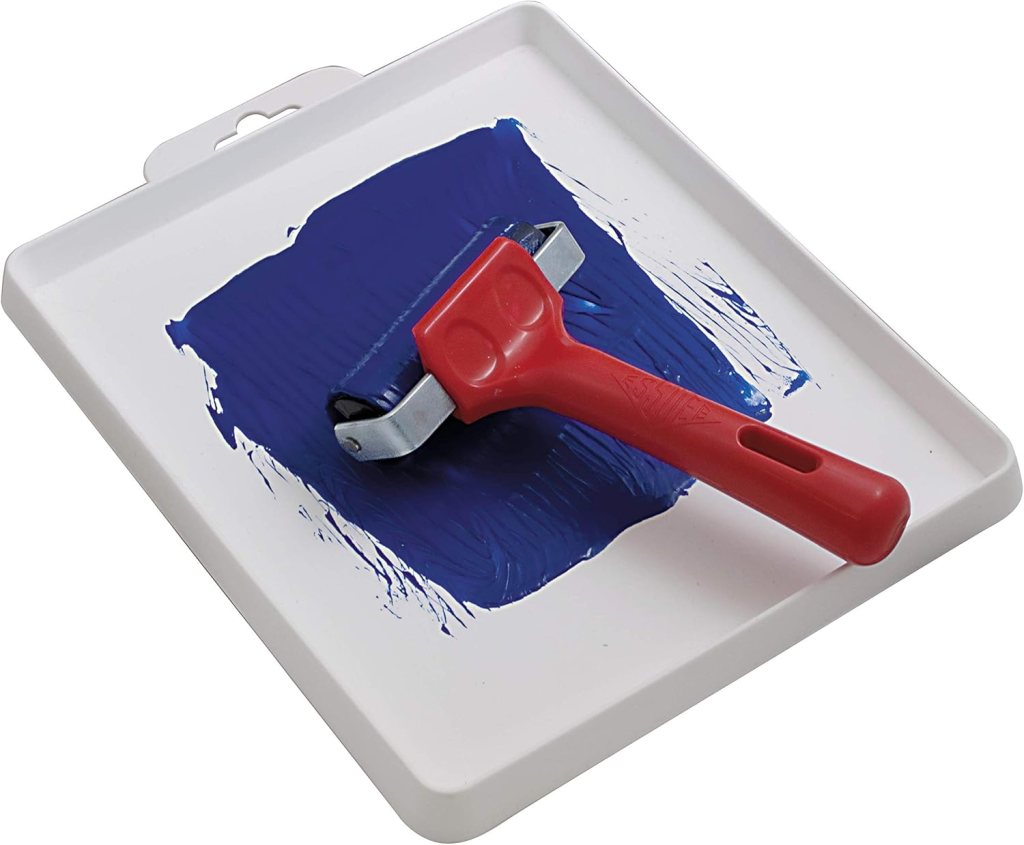
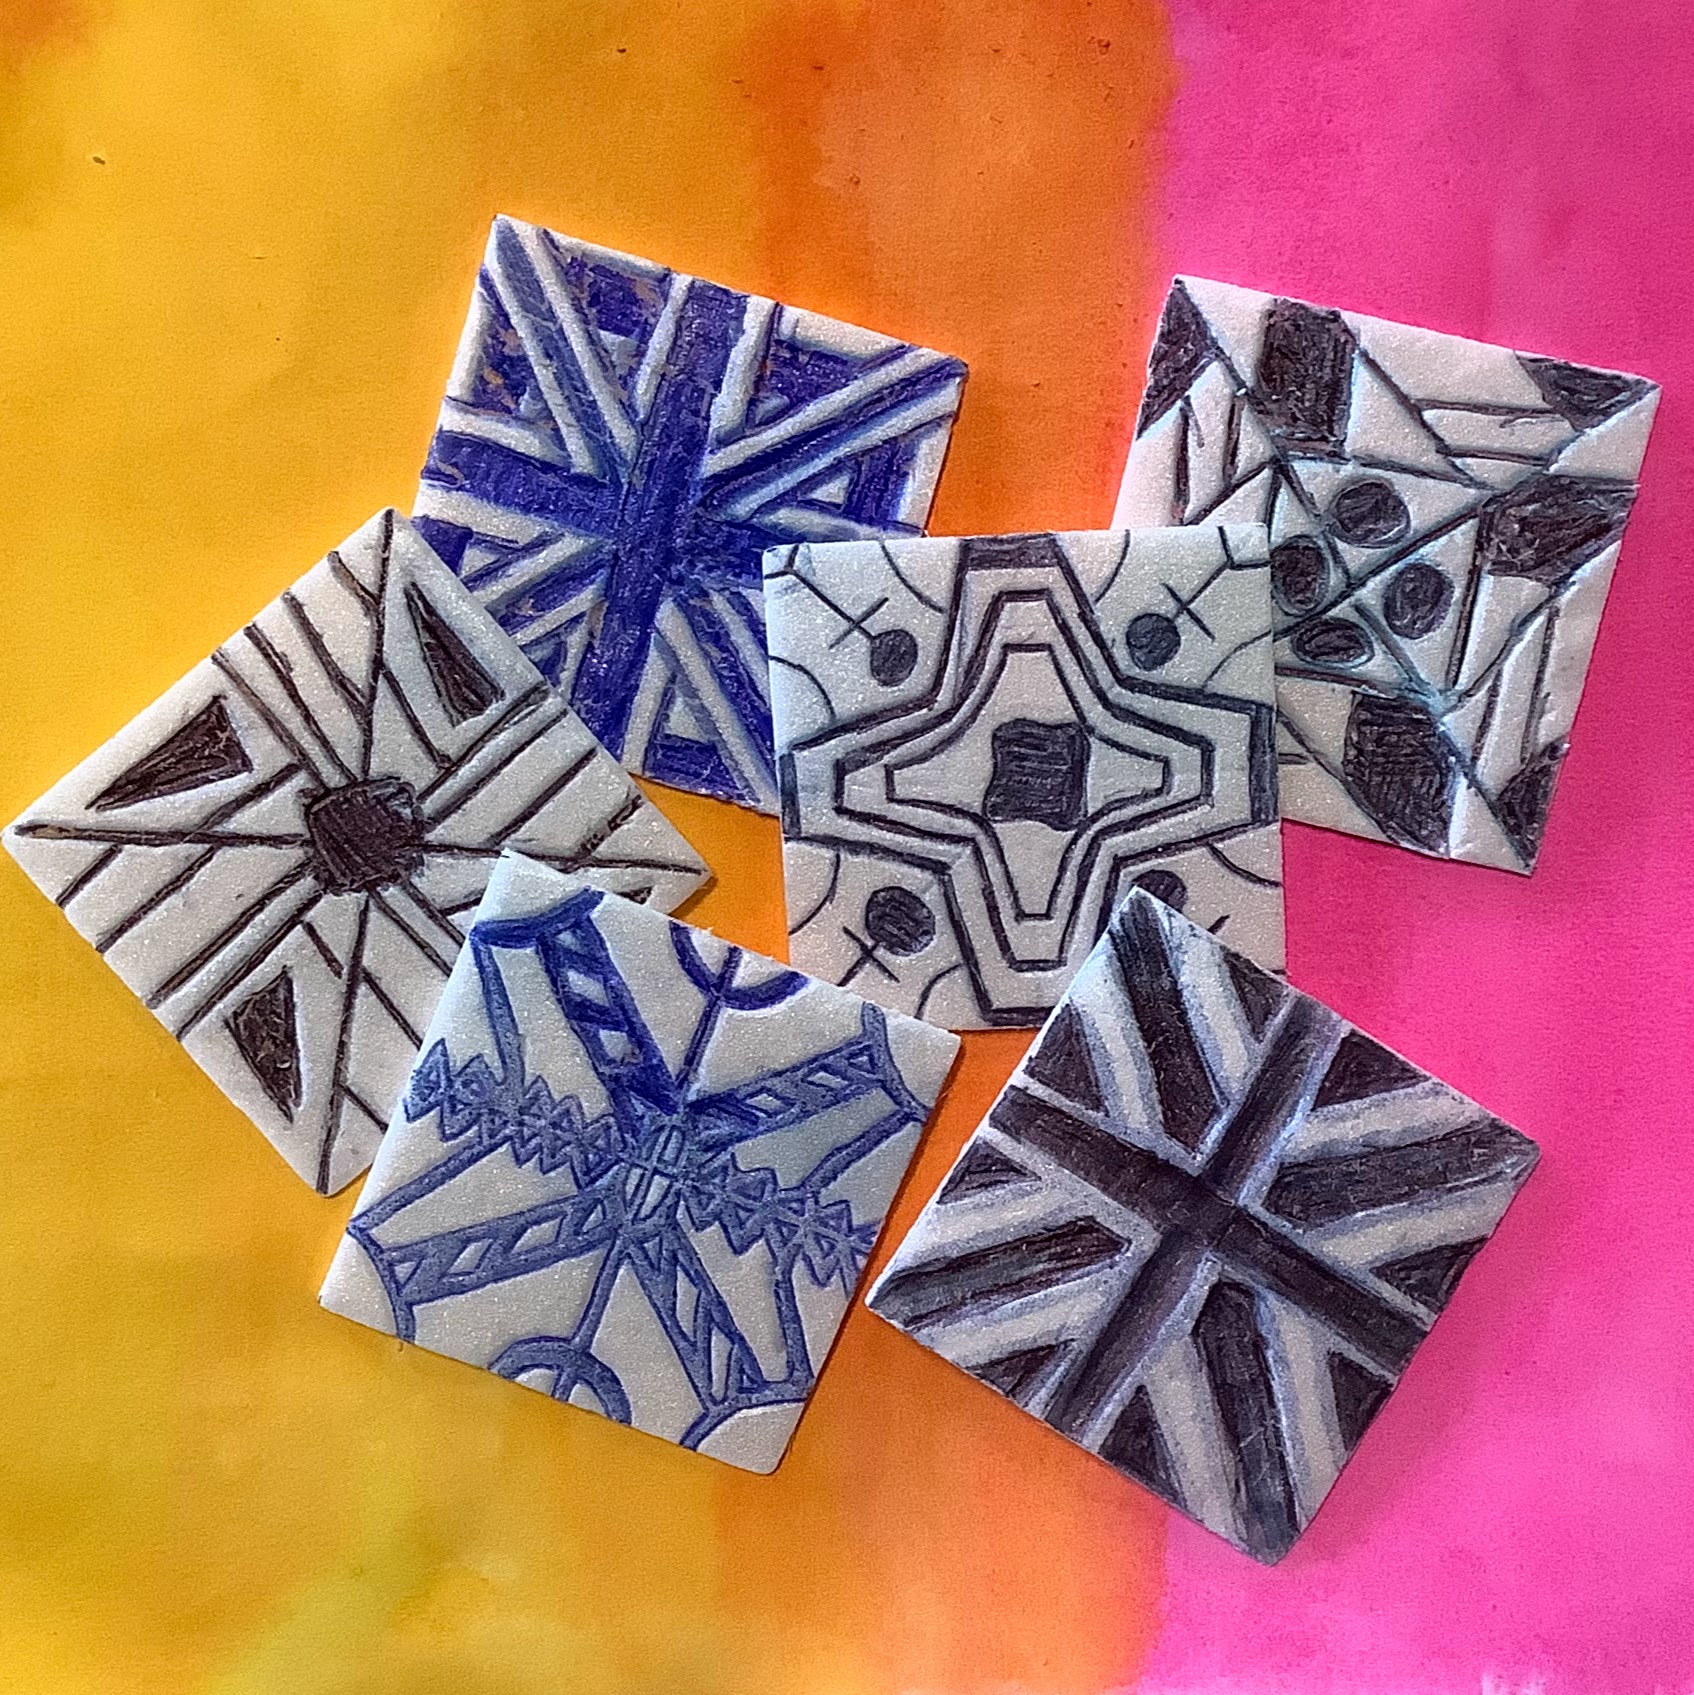
For the print blocks we use polystyrene / foam boards, cut up into squares (by our amazing technician!) then normal block / lino printing ink for the pattern prints.
Some teachers in the department chose to print two colours onto a white background instead and these worked out great too:
Get Art resources sent straight to your email:
Some students completed their designs before others, so I moved them on to making their backgrounds ready to print onto. These students then became the ‘experts’ in my next lesson, helping others do their backgrounds.
I have students work on A3 paper here 😮 which was not easy when there are so many classes with so many students, but it means students can remove / rip off any parts that haven’t printed well.


Using Indian inks can get quite messy so it was really useful to have some expert students making sure things were going well when 30 others are all using lots of equipment. 😬
Get this full project on TES or TPT – enjoy.
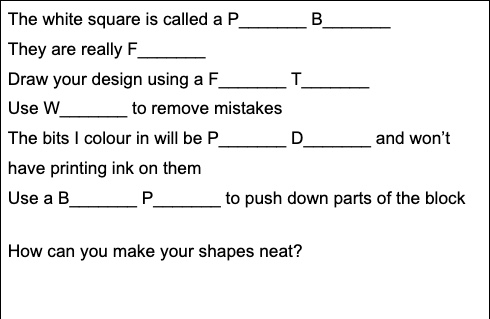
As the polyboard is so fragile, I created a lesson starter where they watch this video and fill in the blanks. The clip shows students how to draw out their designs onto polyboard and get rid of any mistakes!
So far, students should have:
- two designs in their sketchbooks
- two A3 backgrounds painted with Indian ink (warm colours and cool colours)
- a polyboard which is ready to use
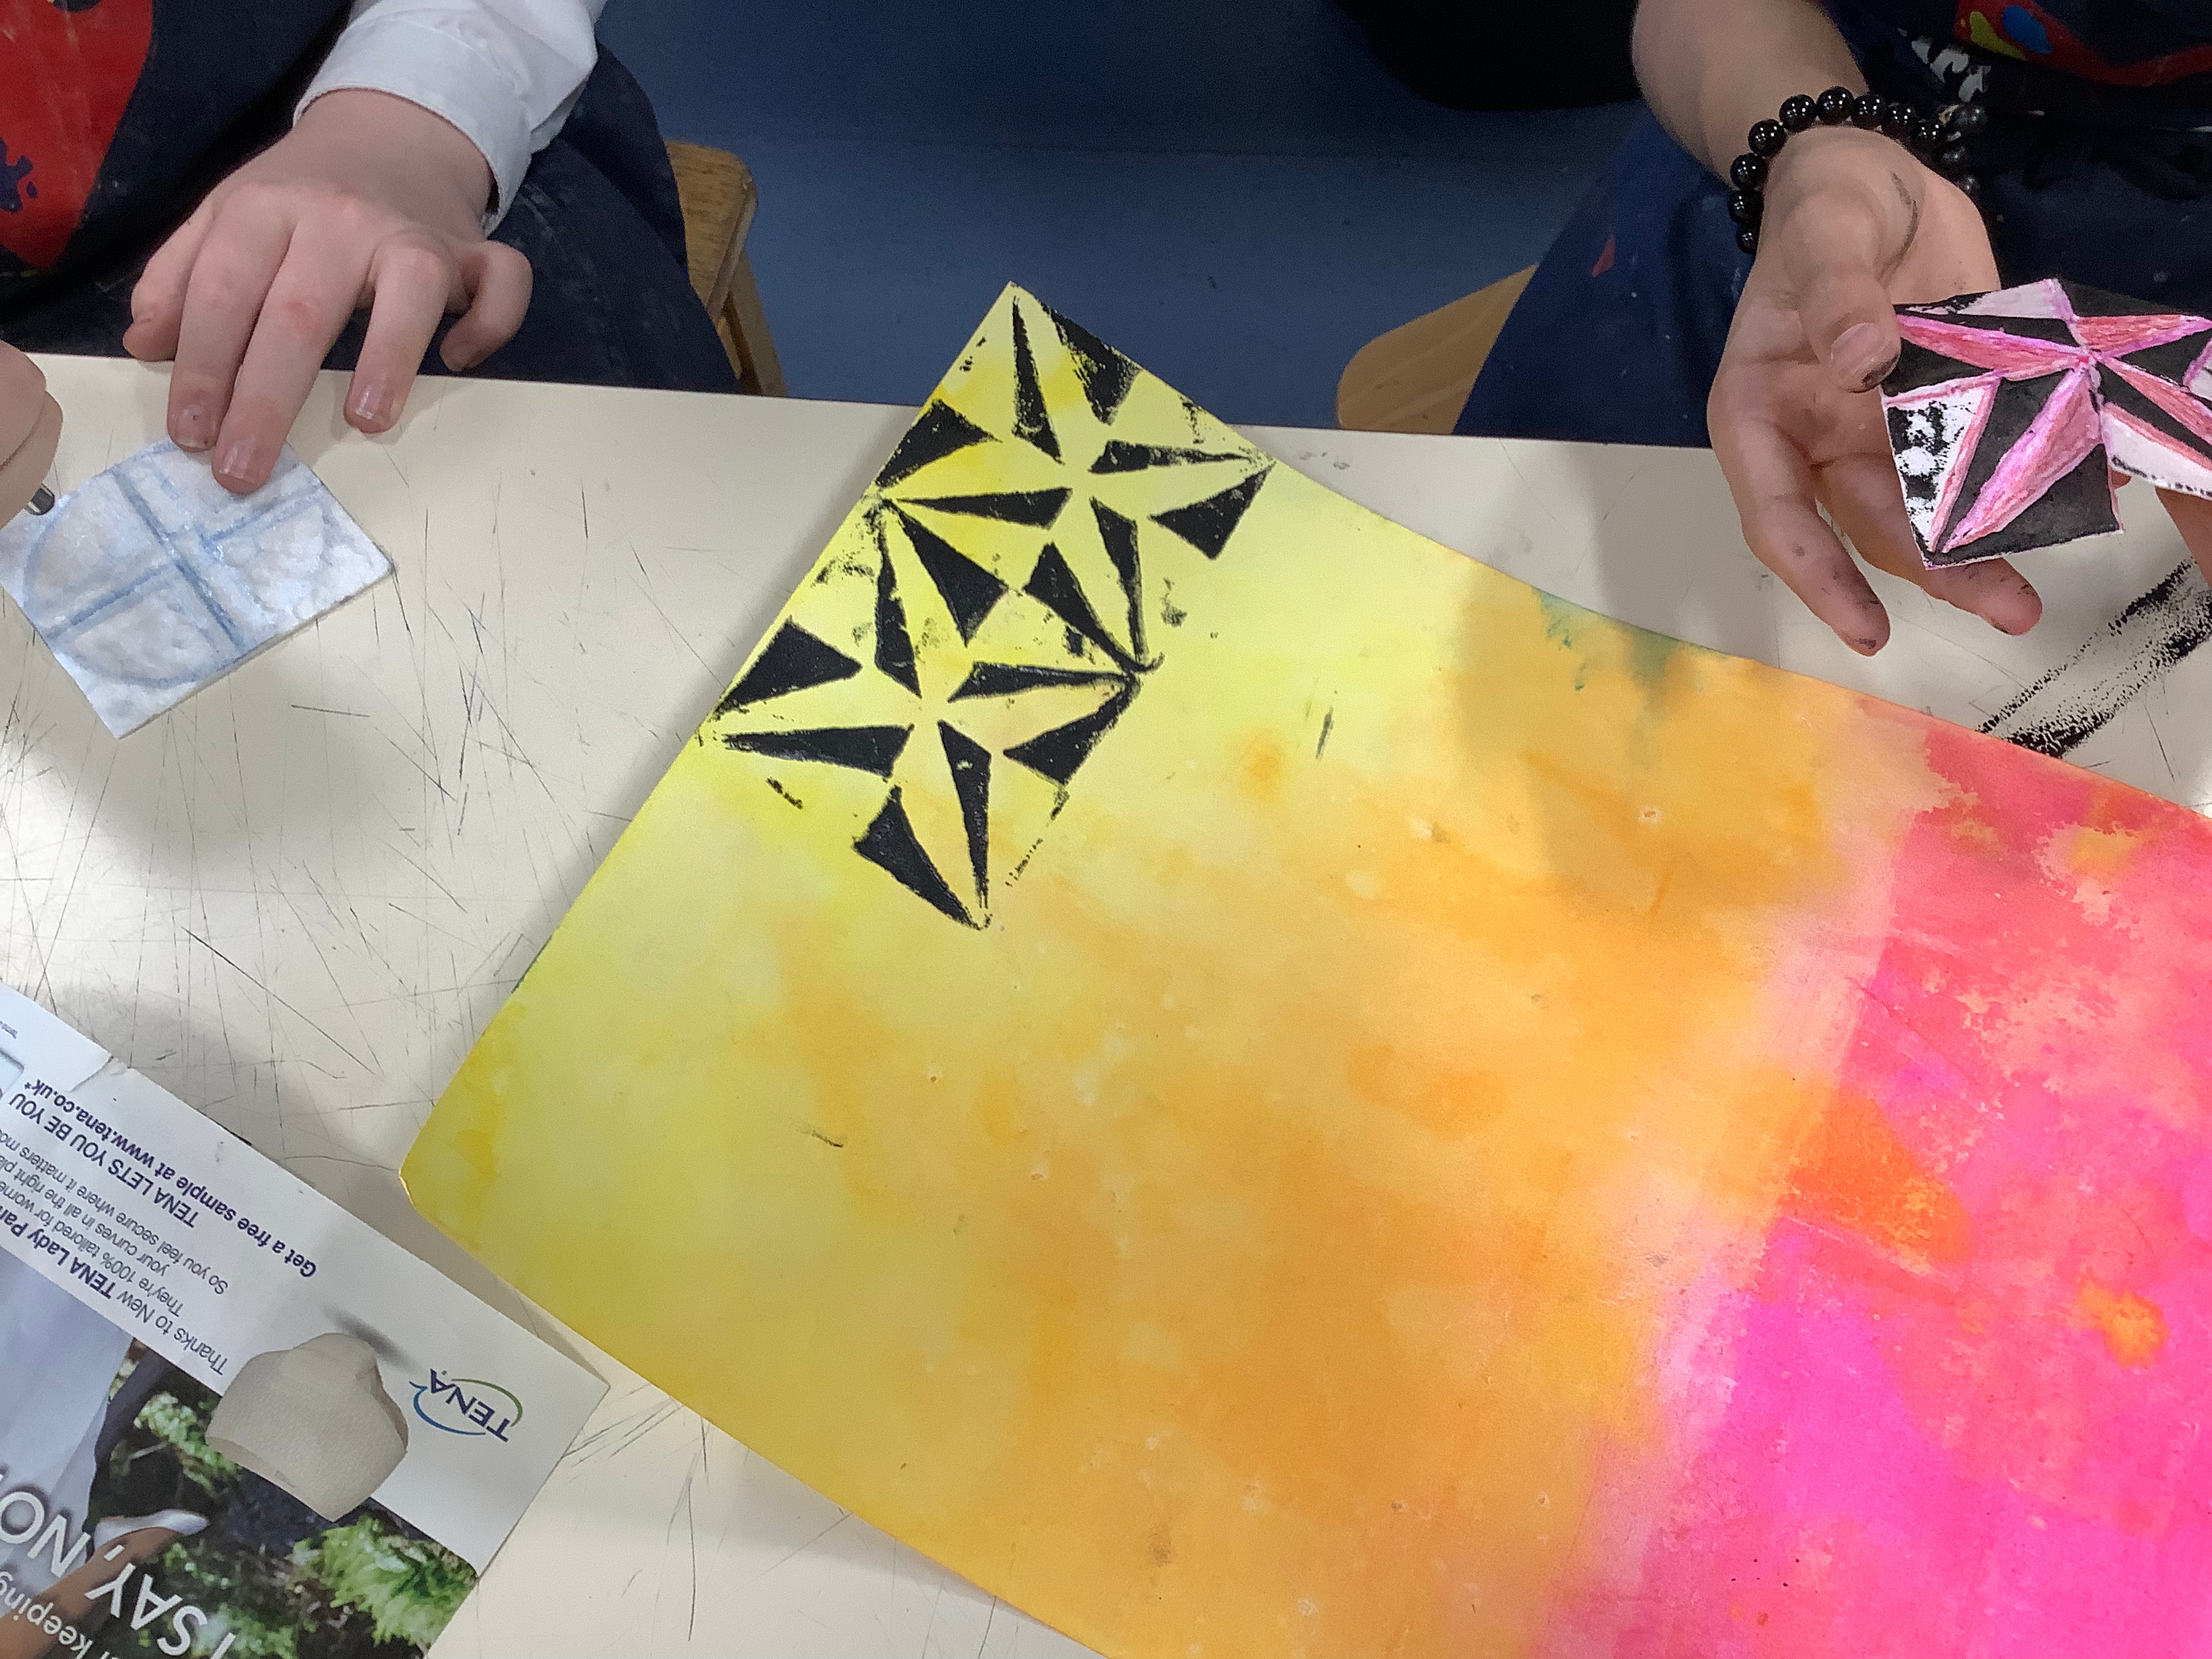
So next is the fun part – the printing! 😍
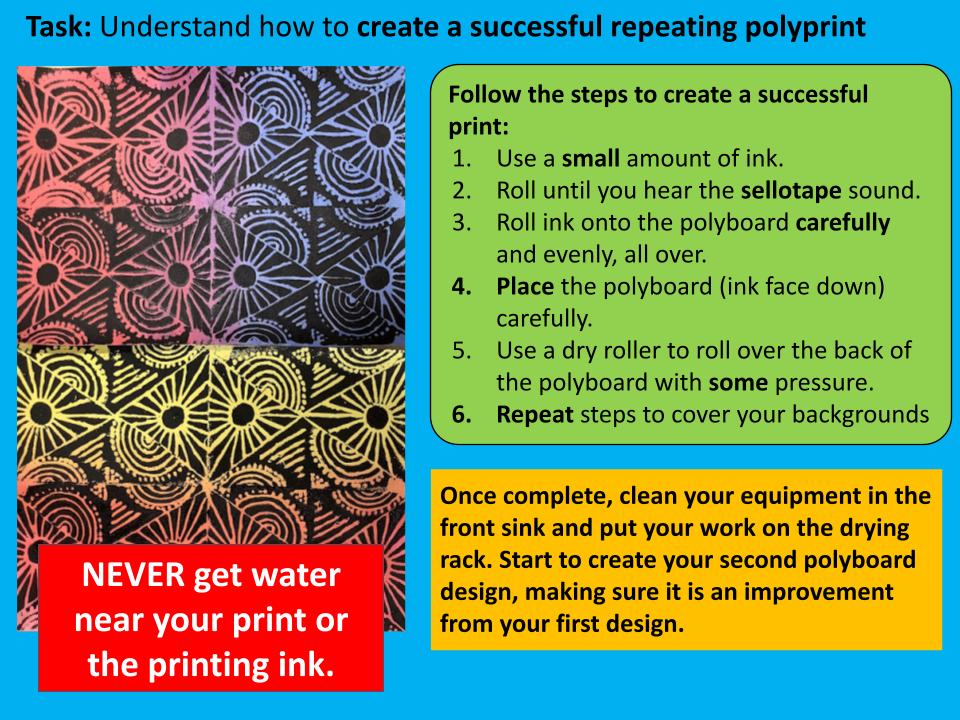
Students print onto their A3 backgrounds and fill the whole paper. Once one piece is complete, they go back to designing a new, improved polyboard and print onto their second A3 background.
These lessons are some of my favourite to teach as students can see how all of their research and design work comes to fruition! I absolutely love their prints too.
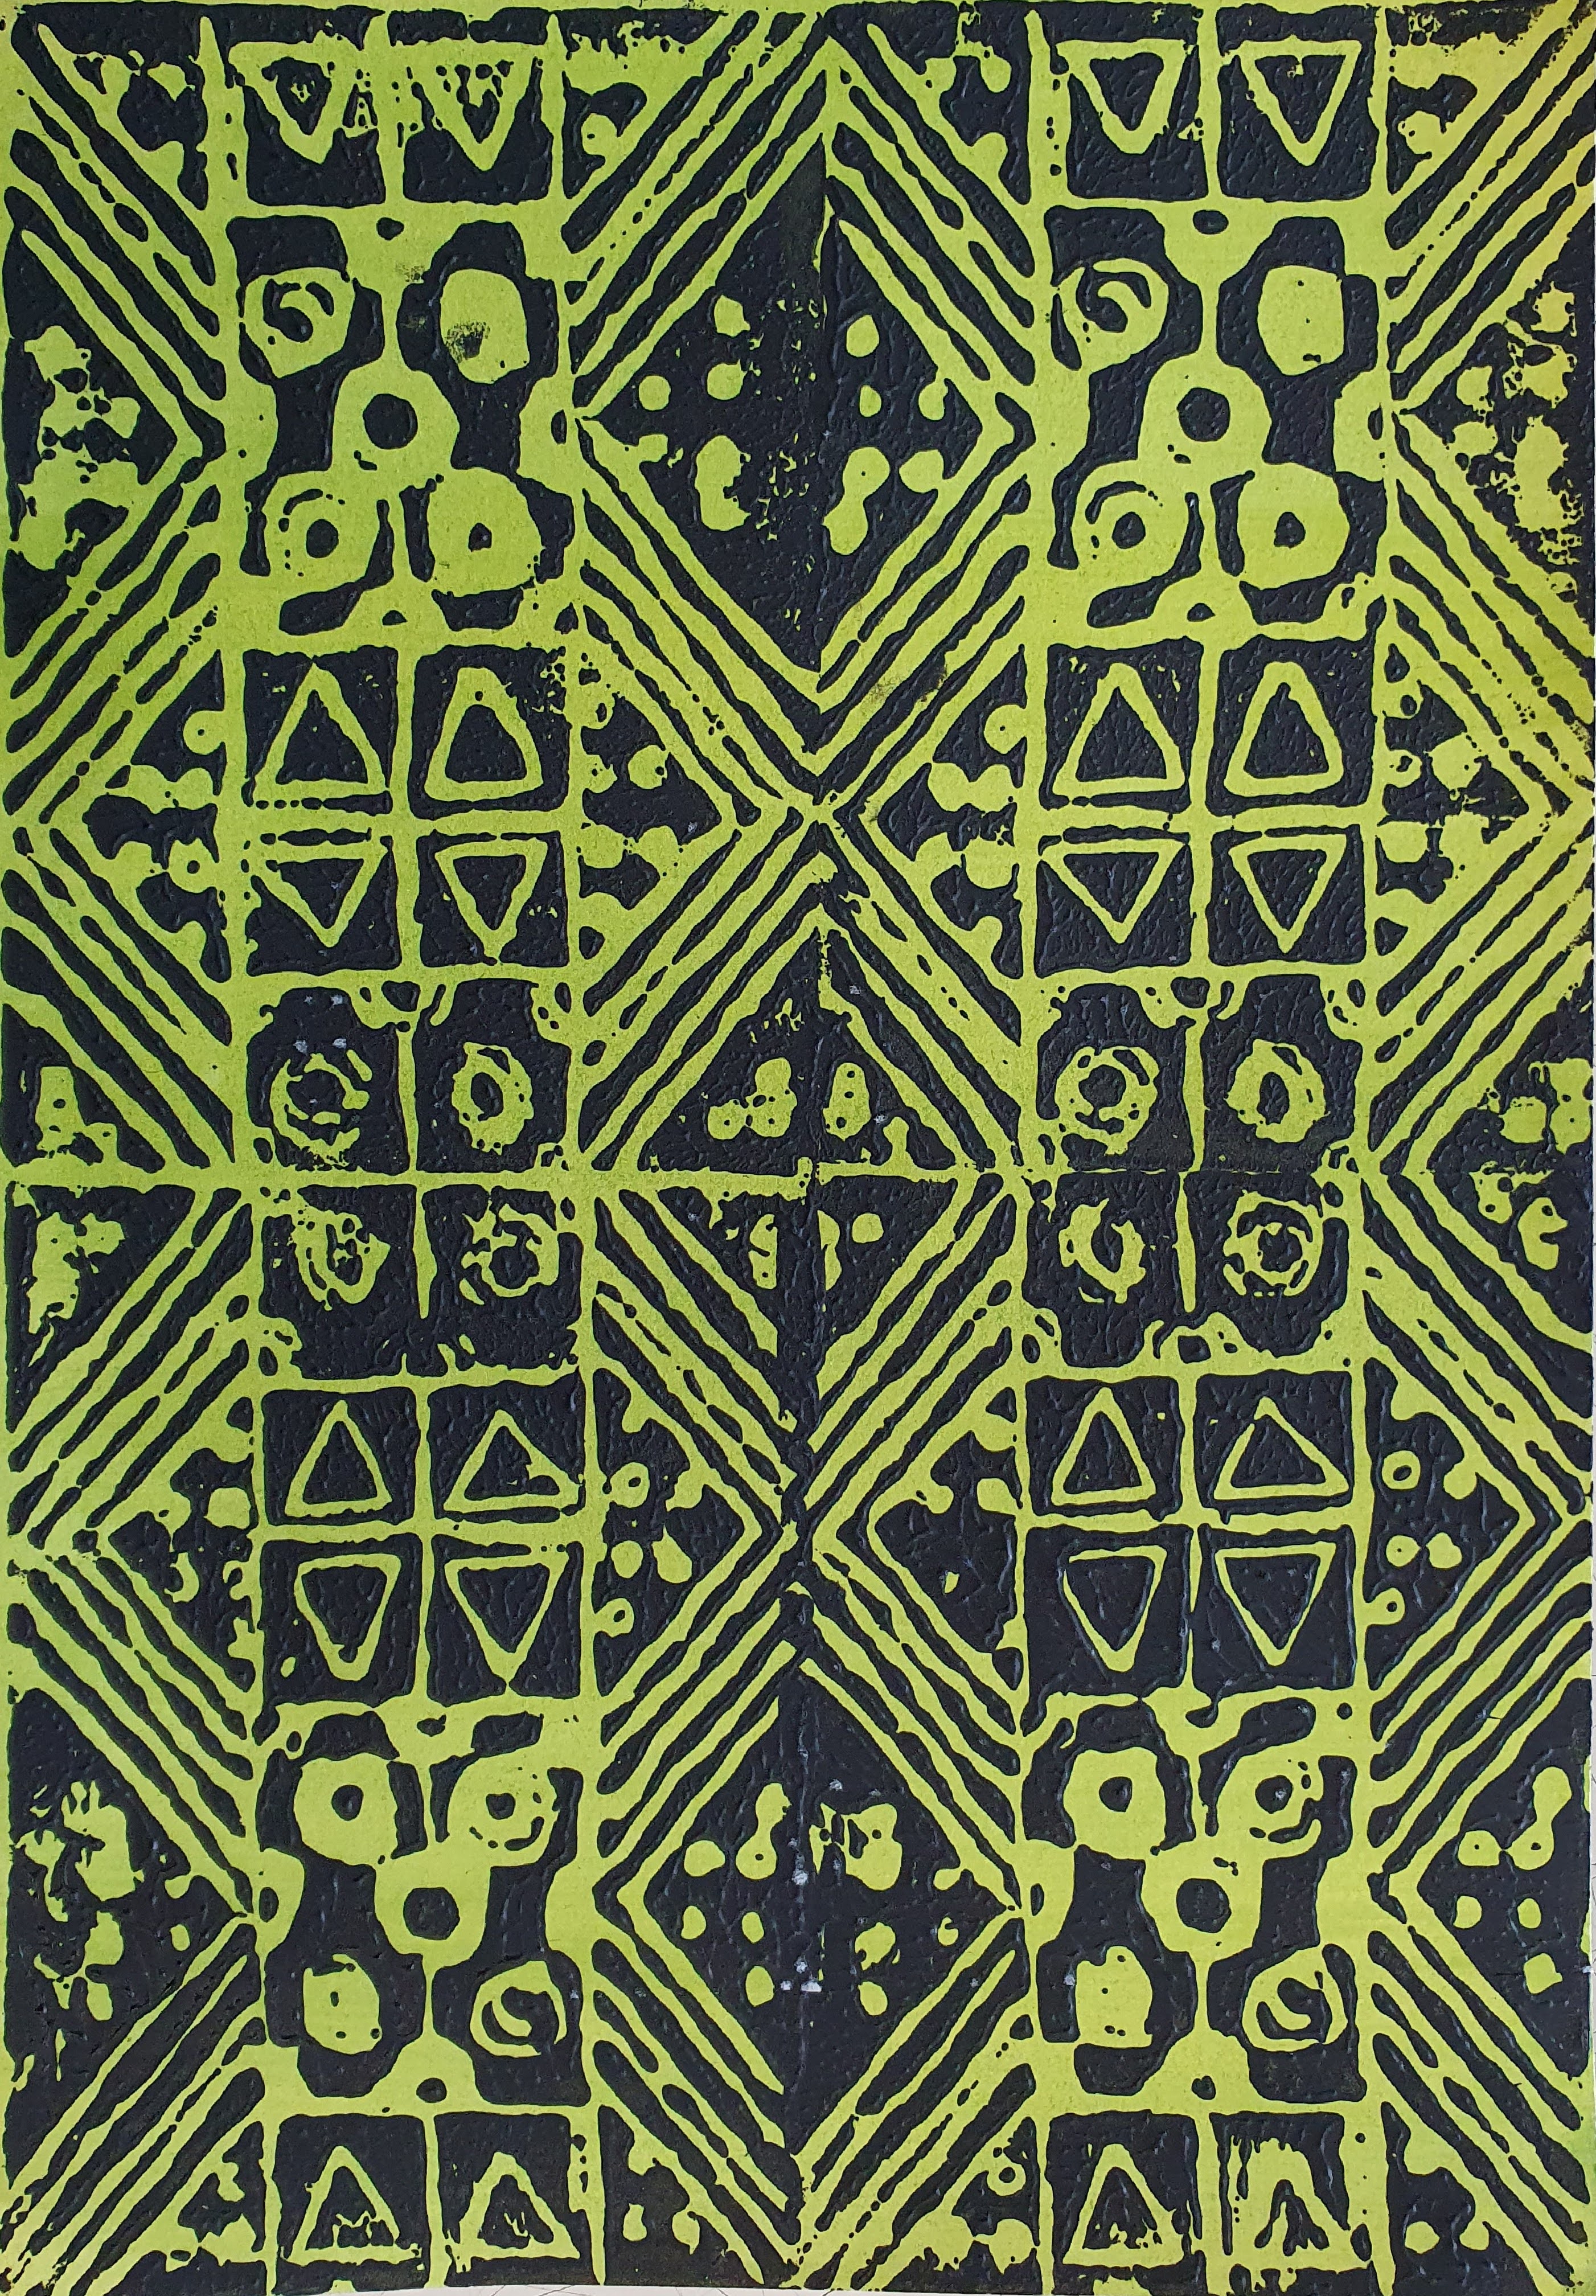
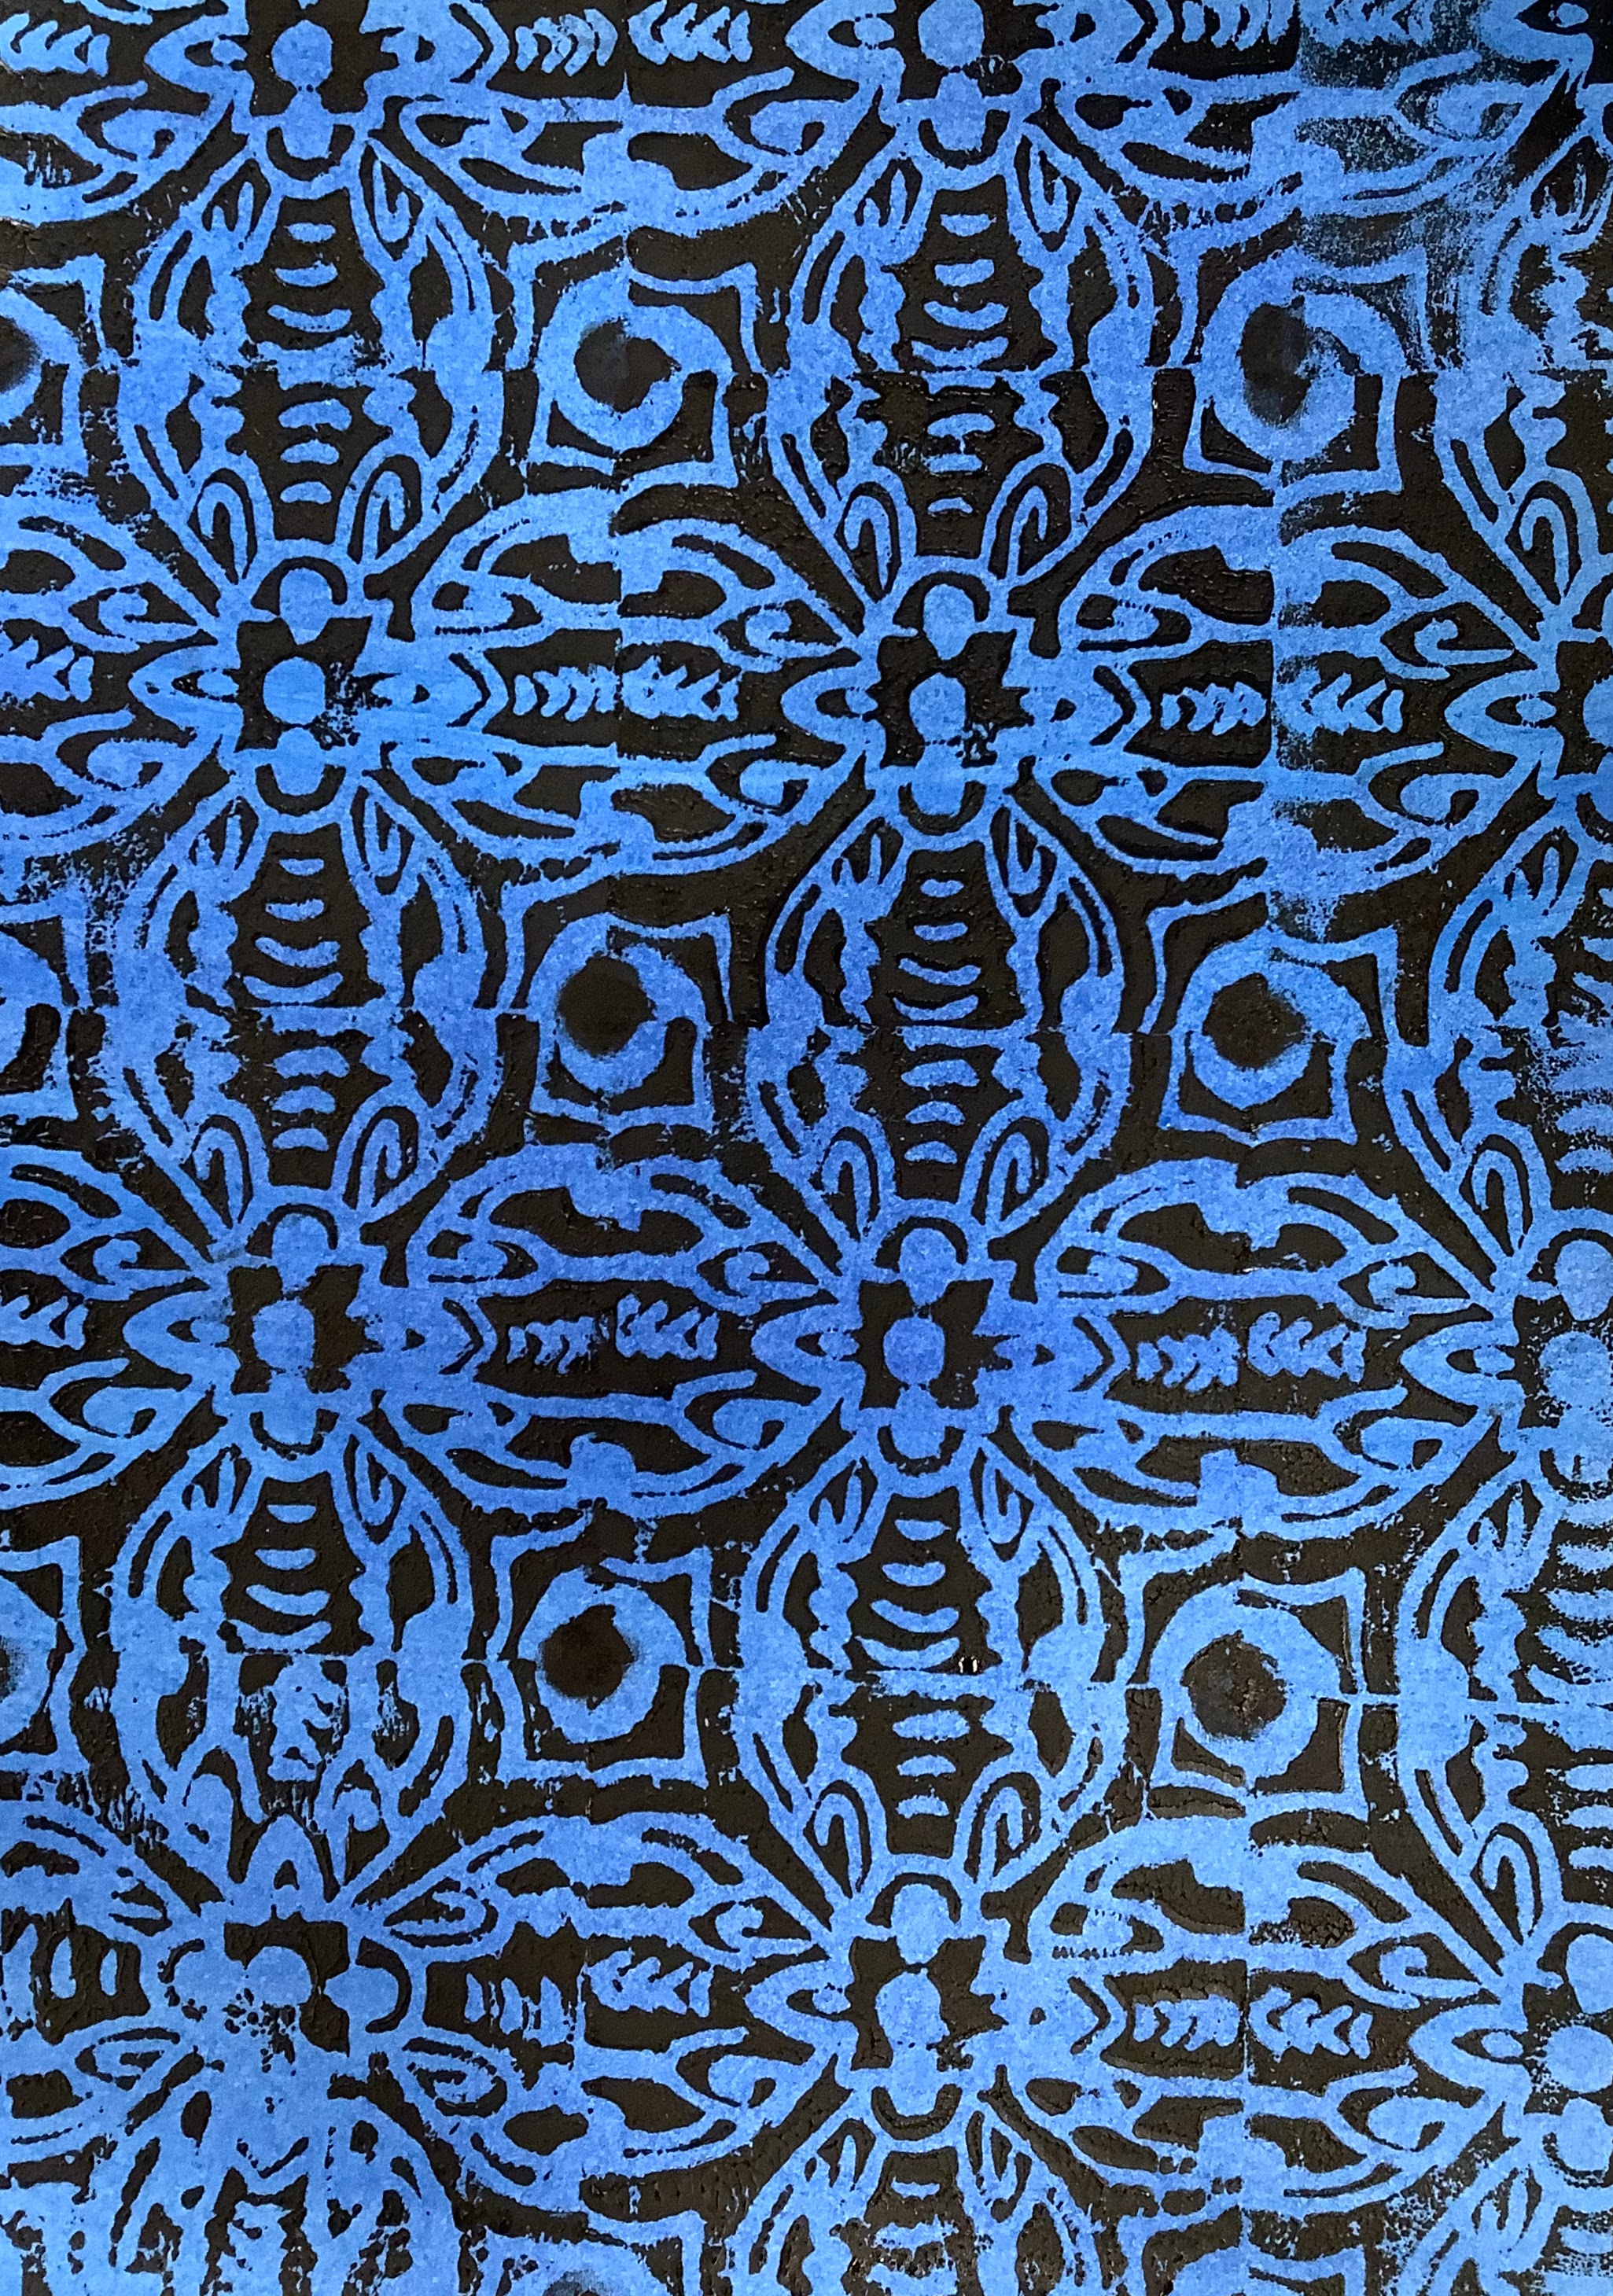
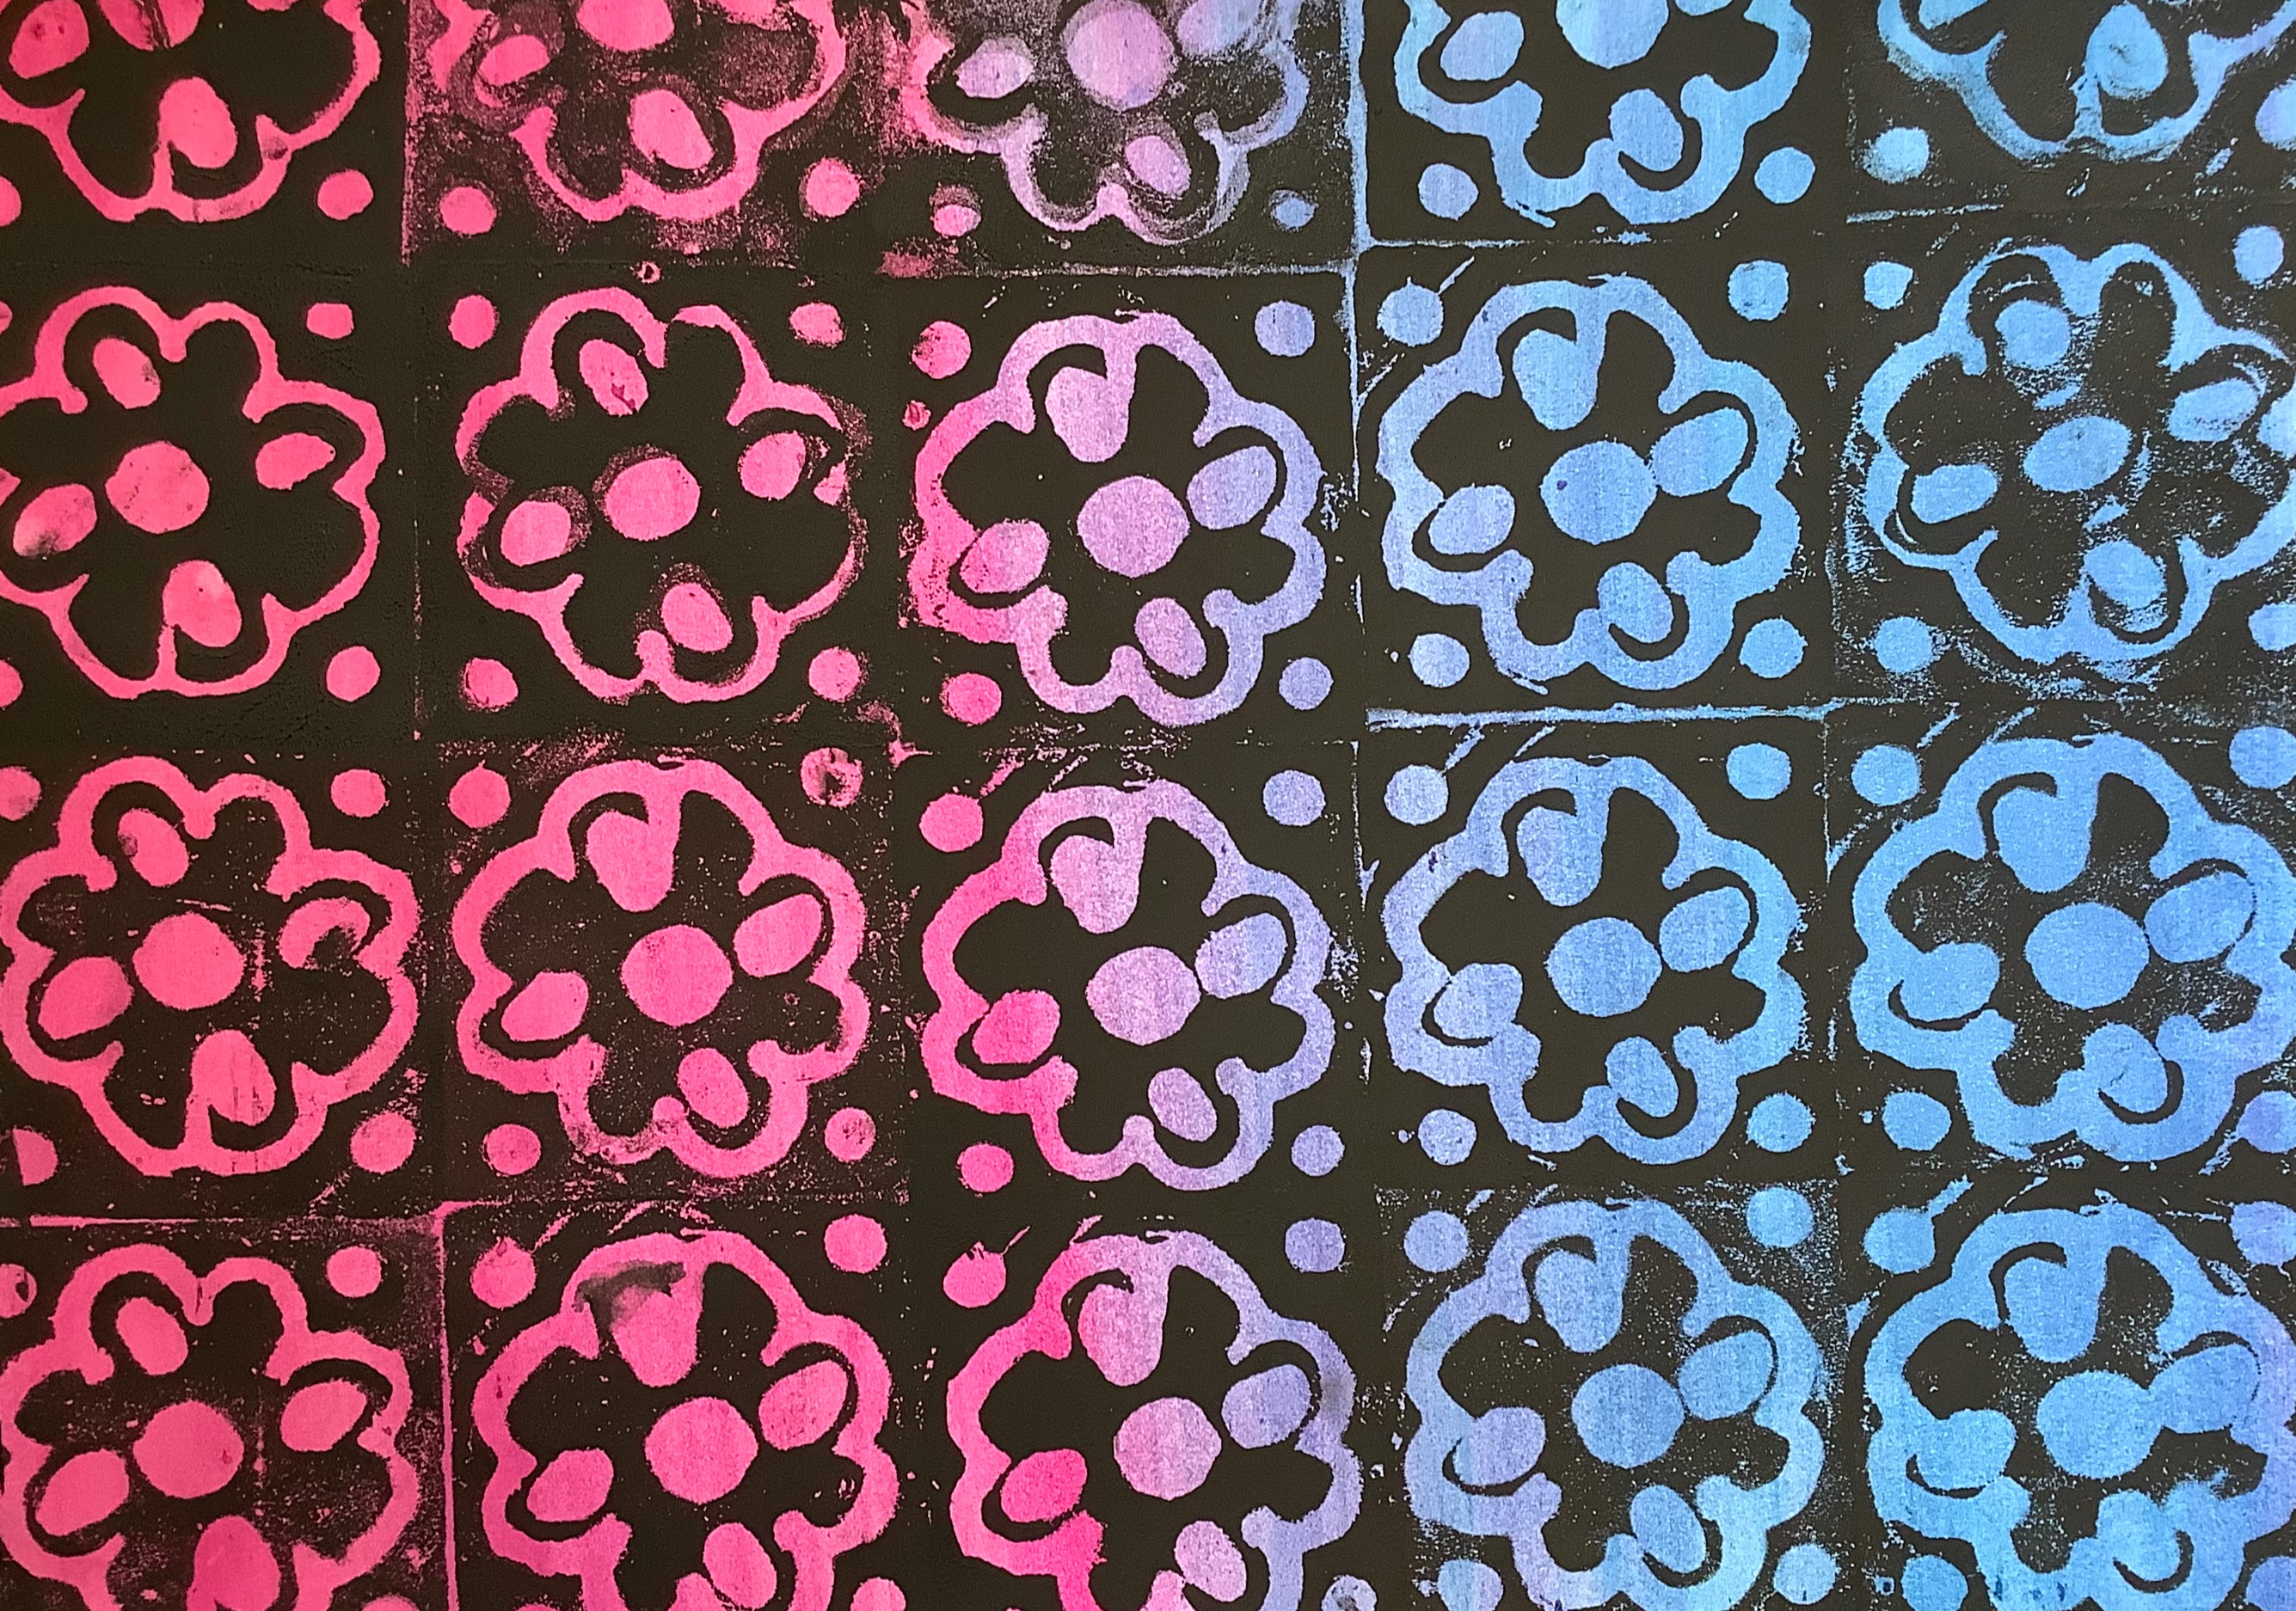
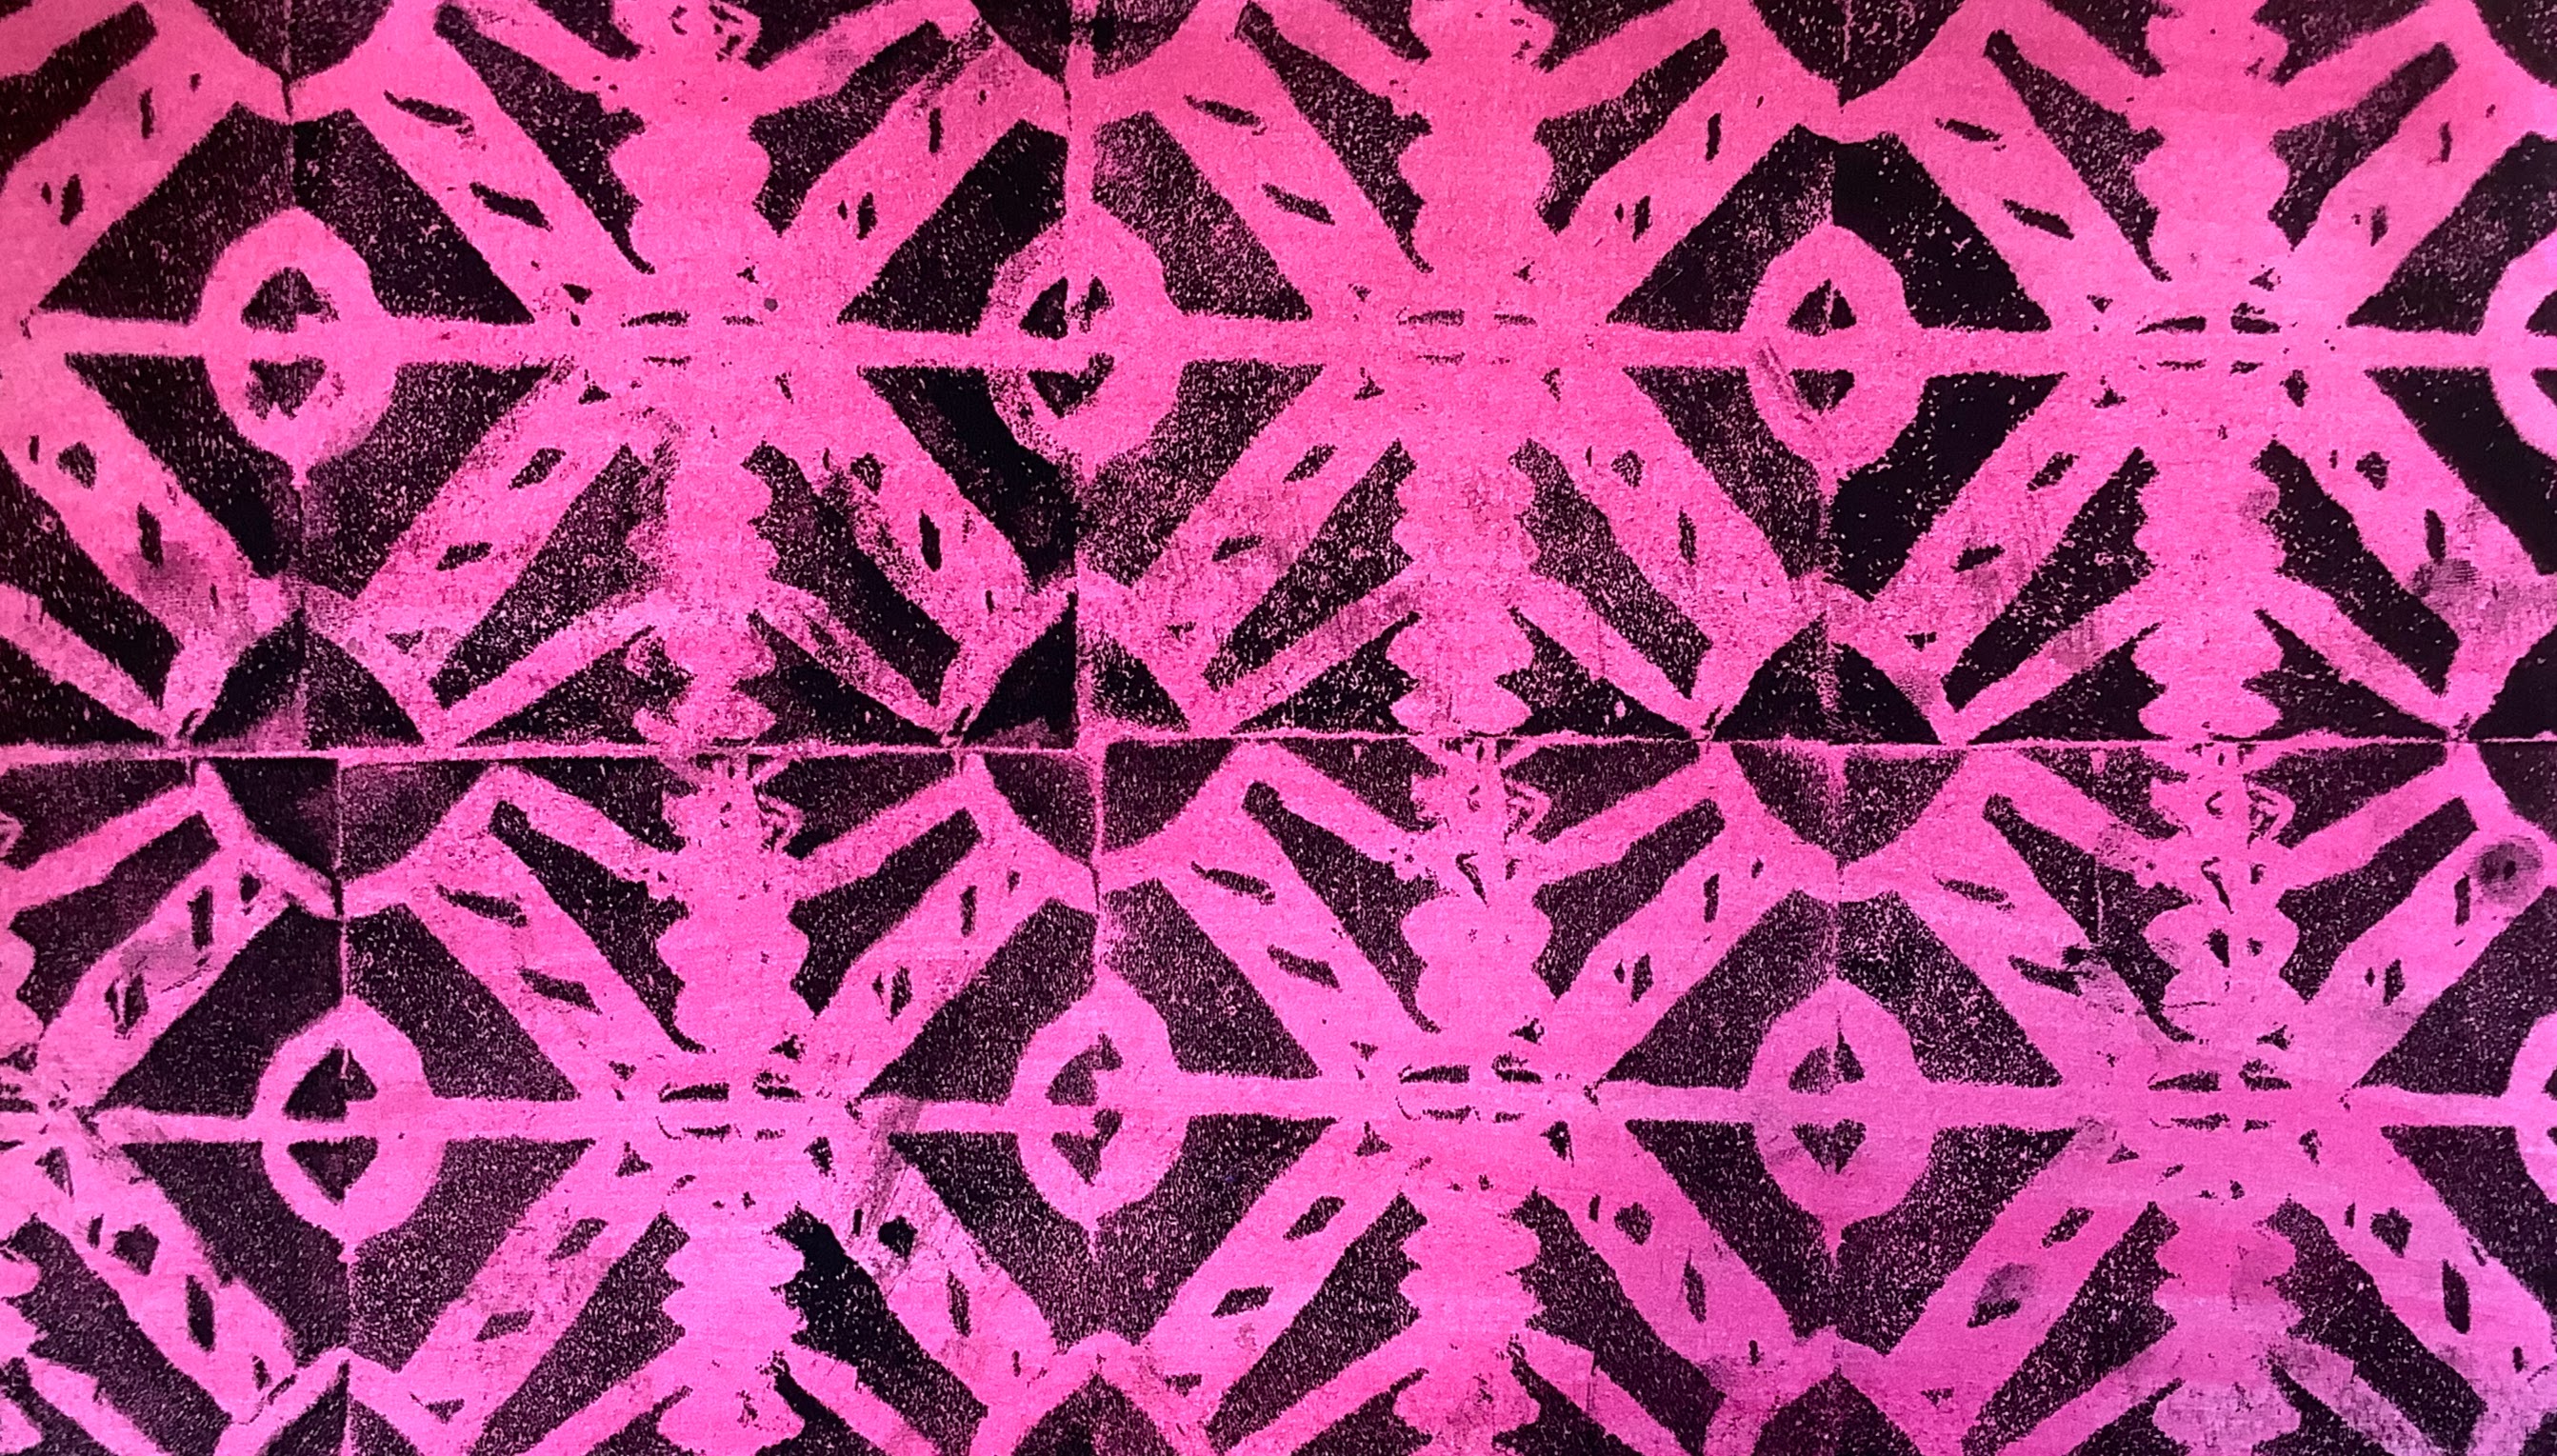
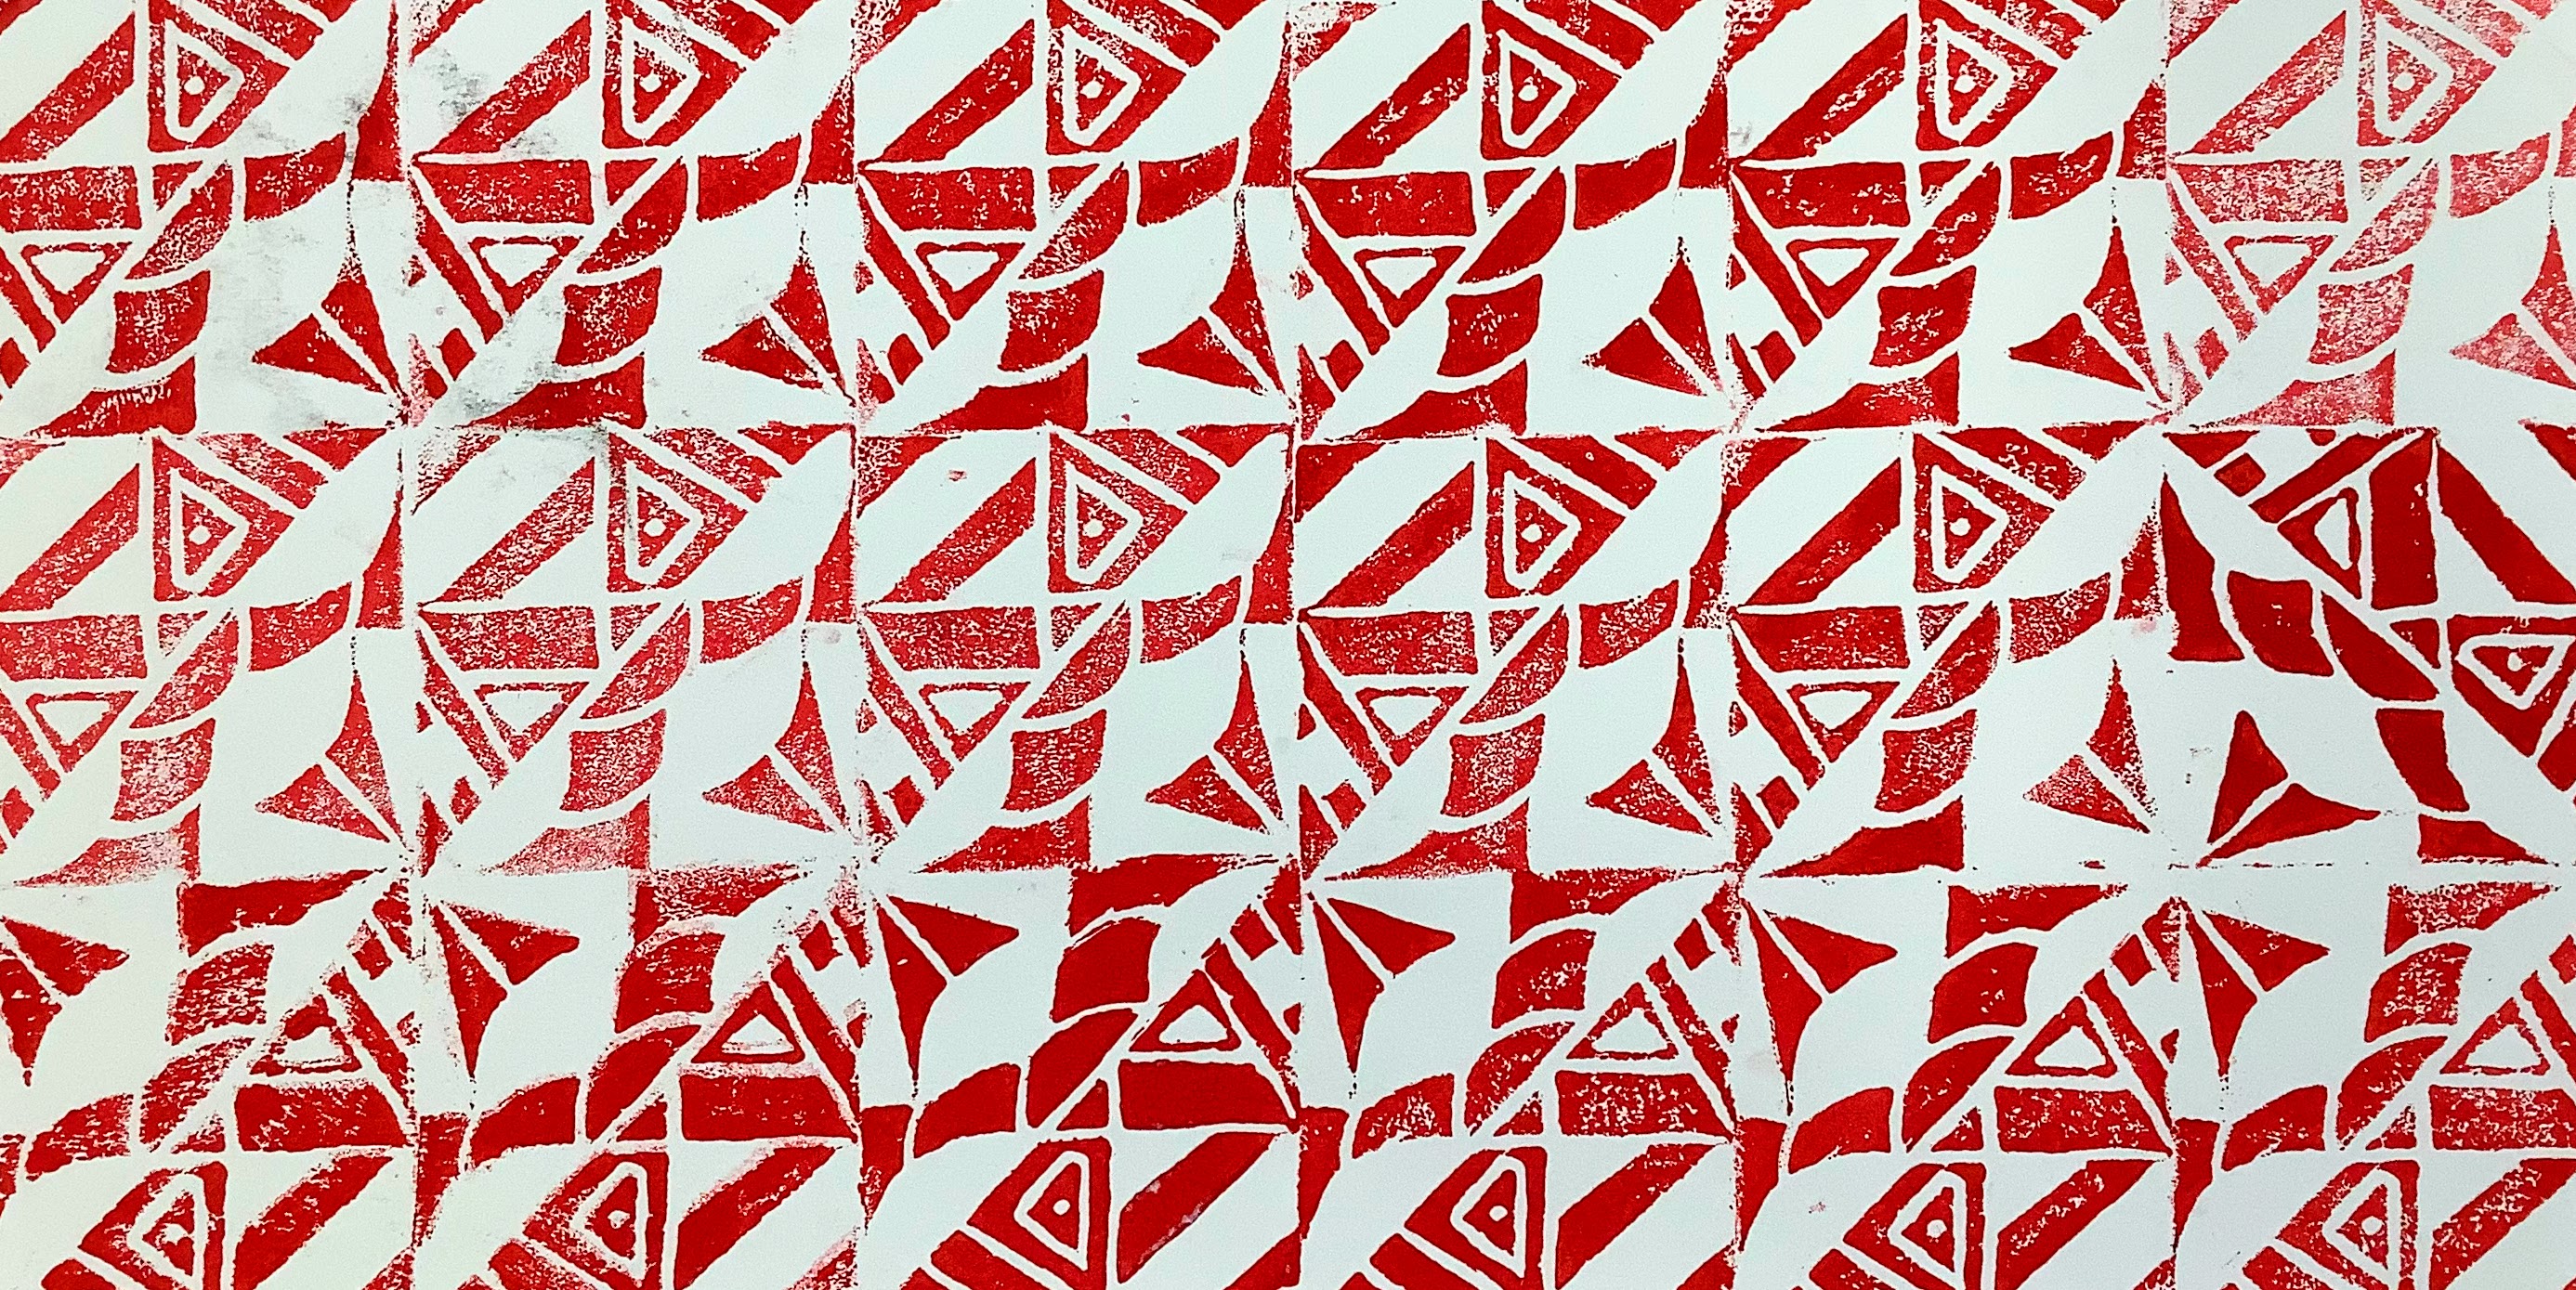
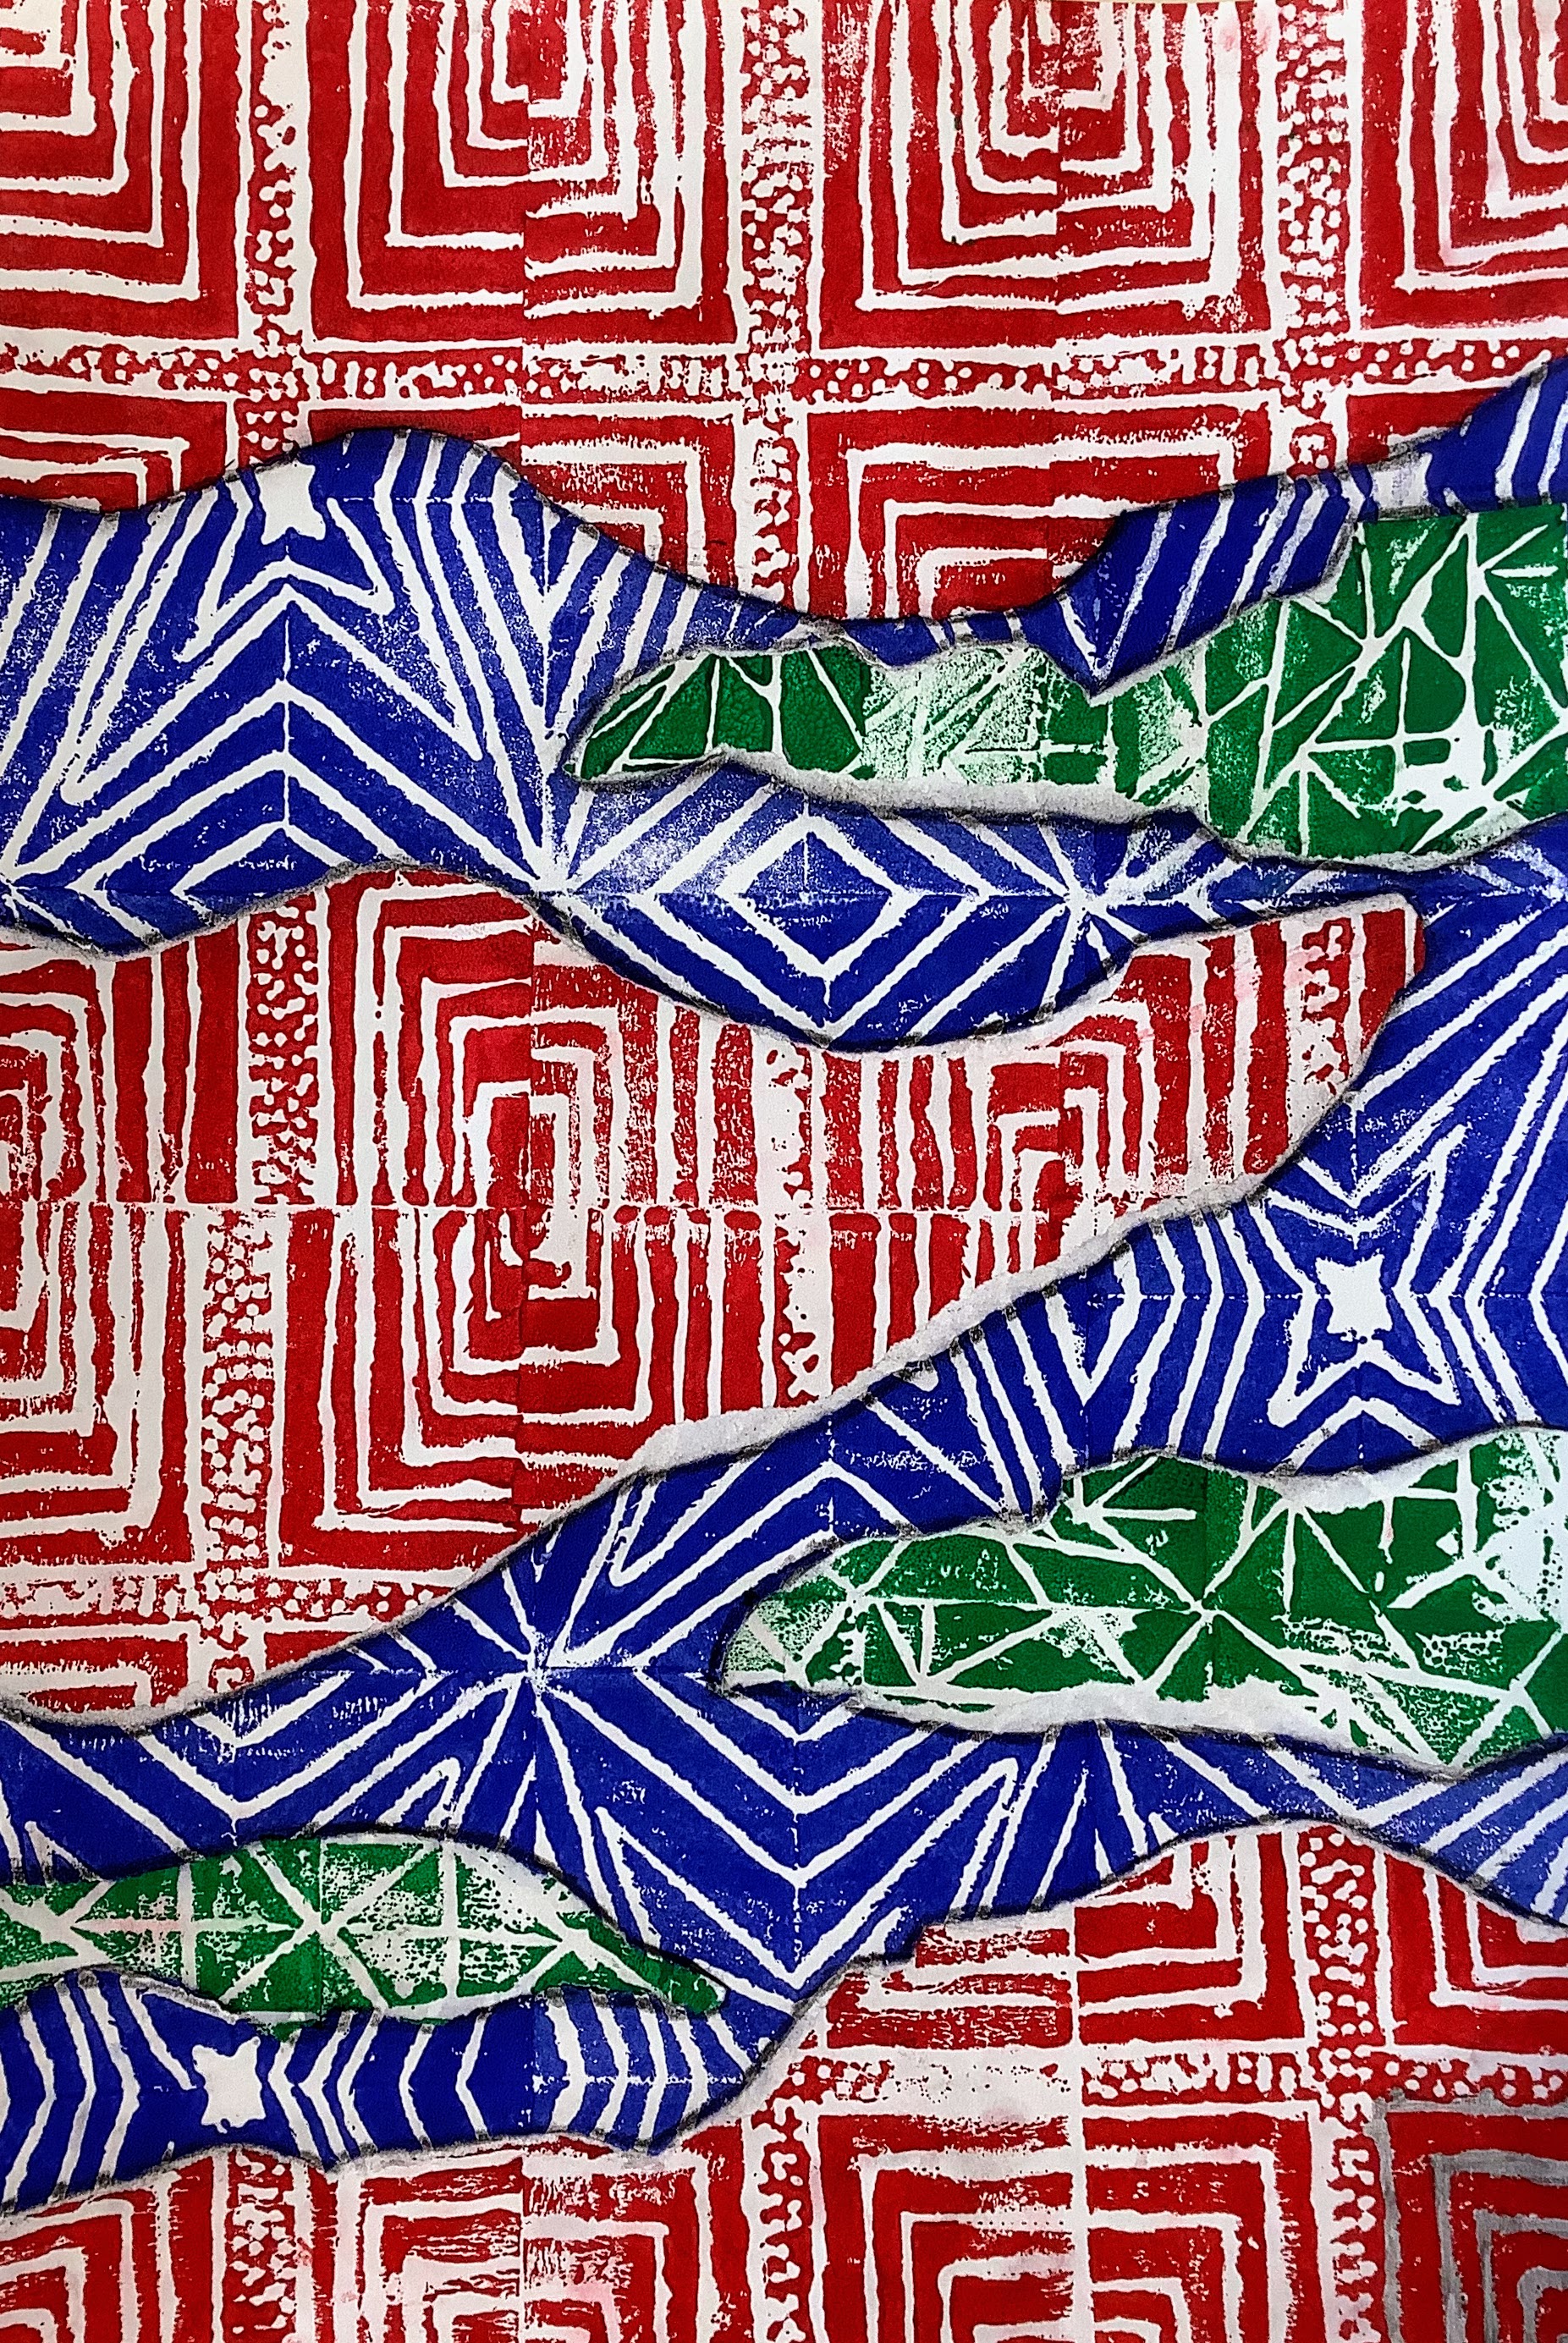
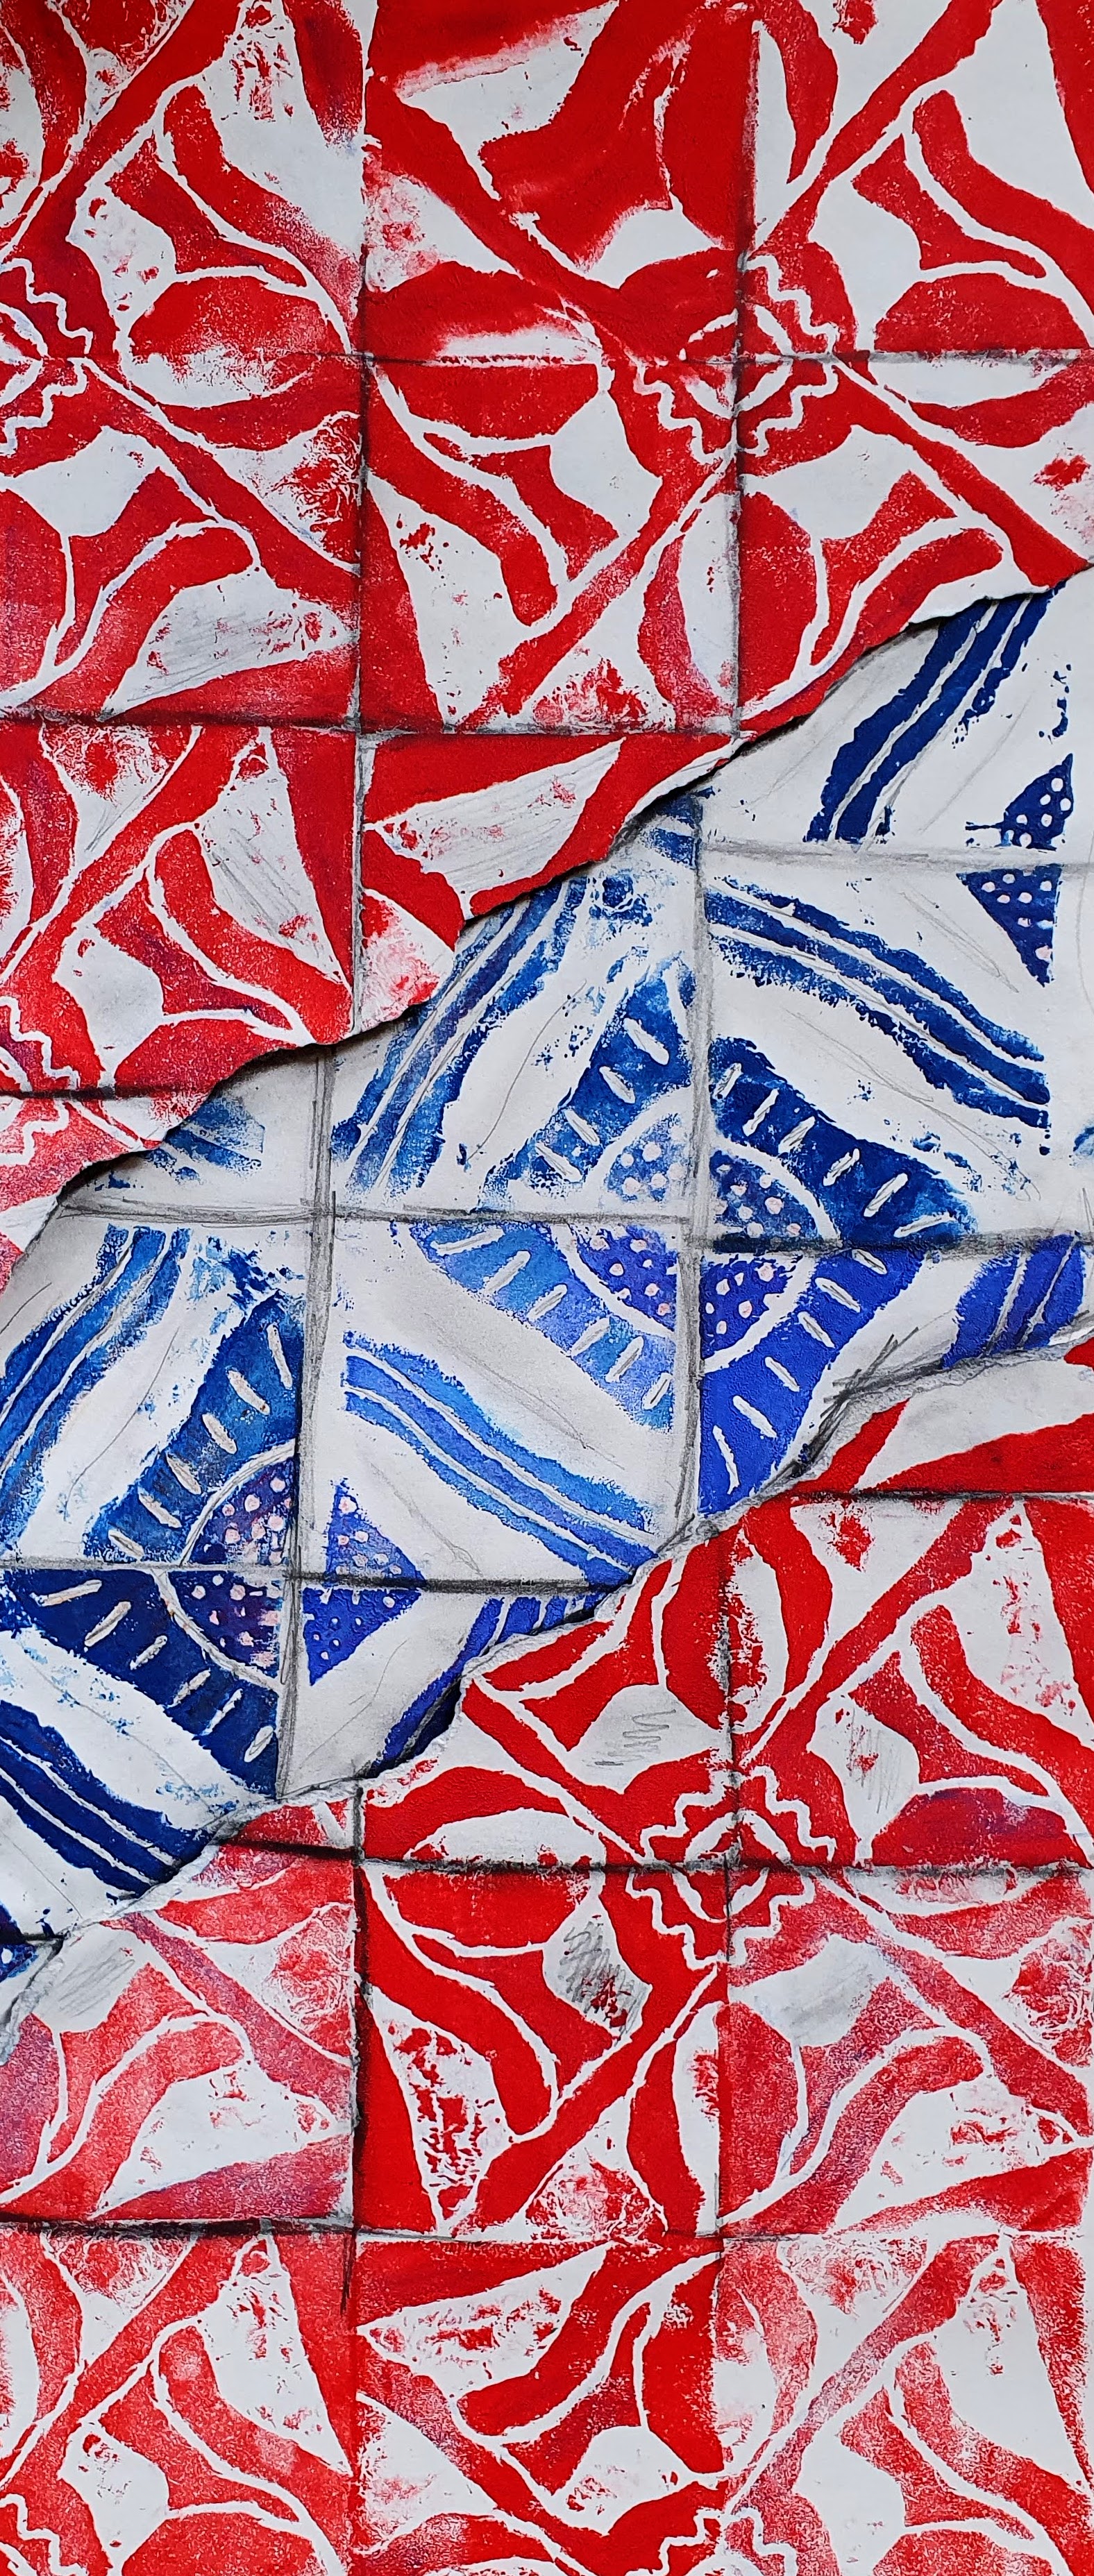
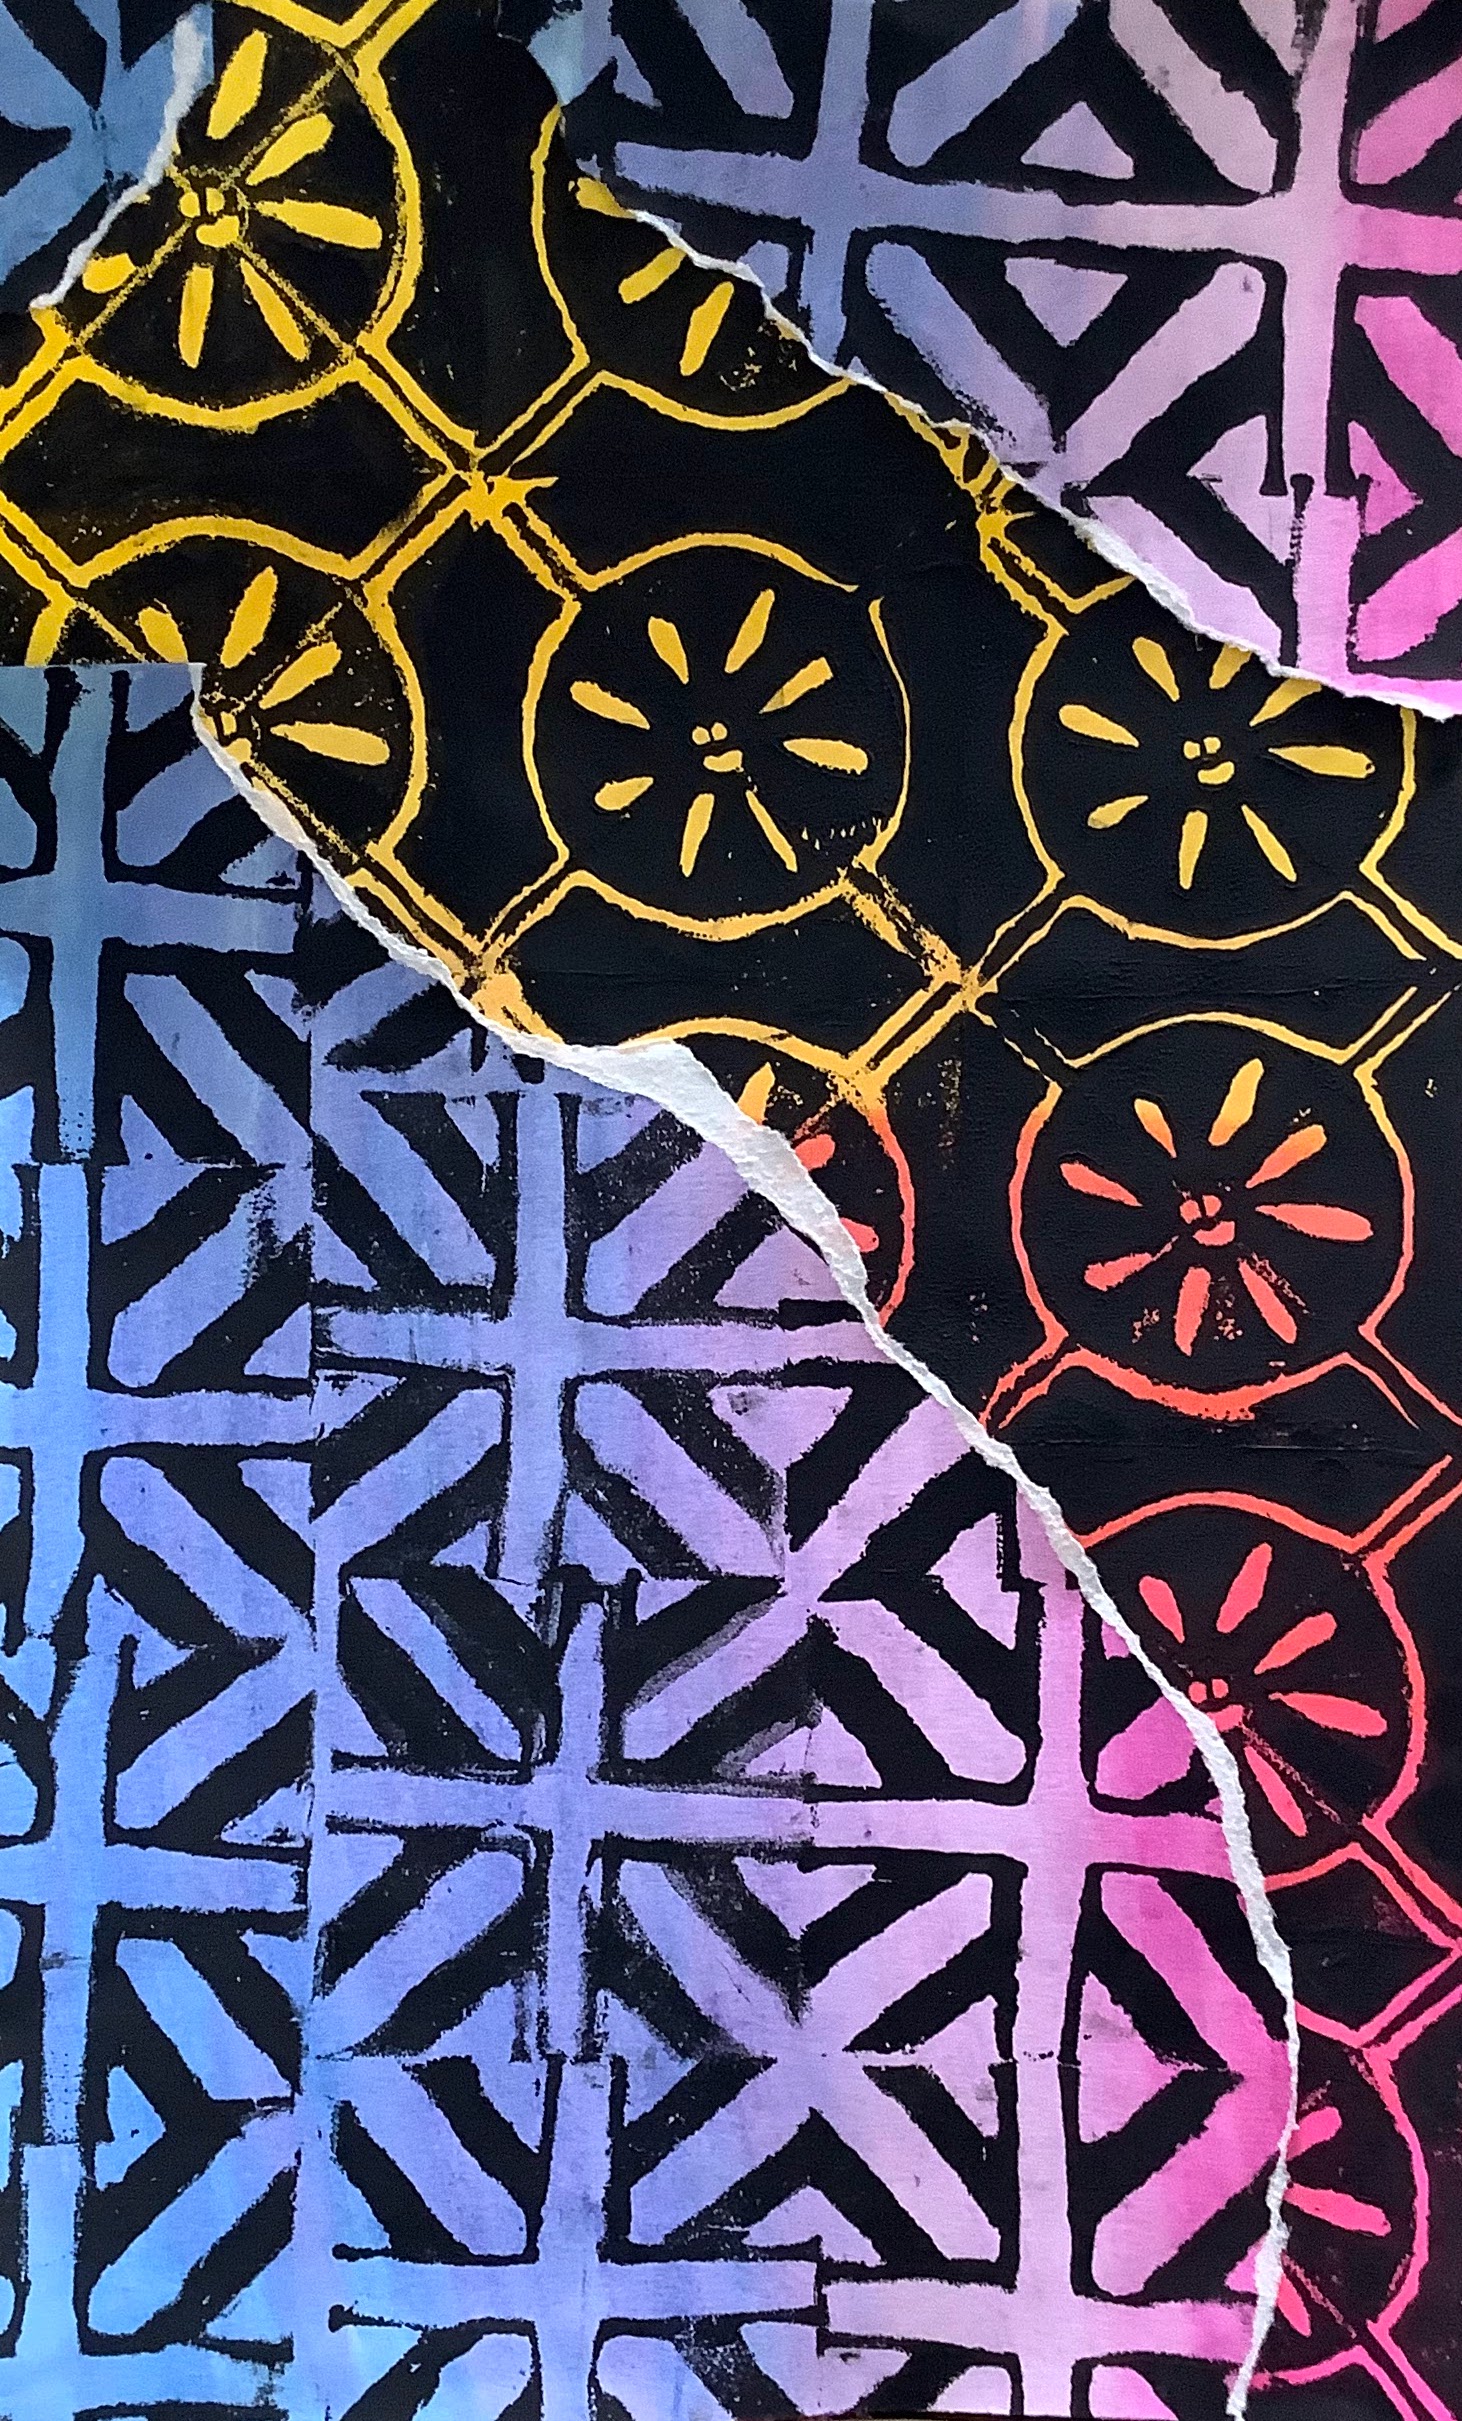
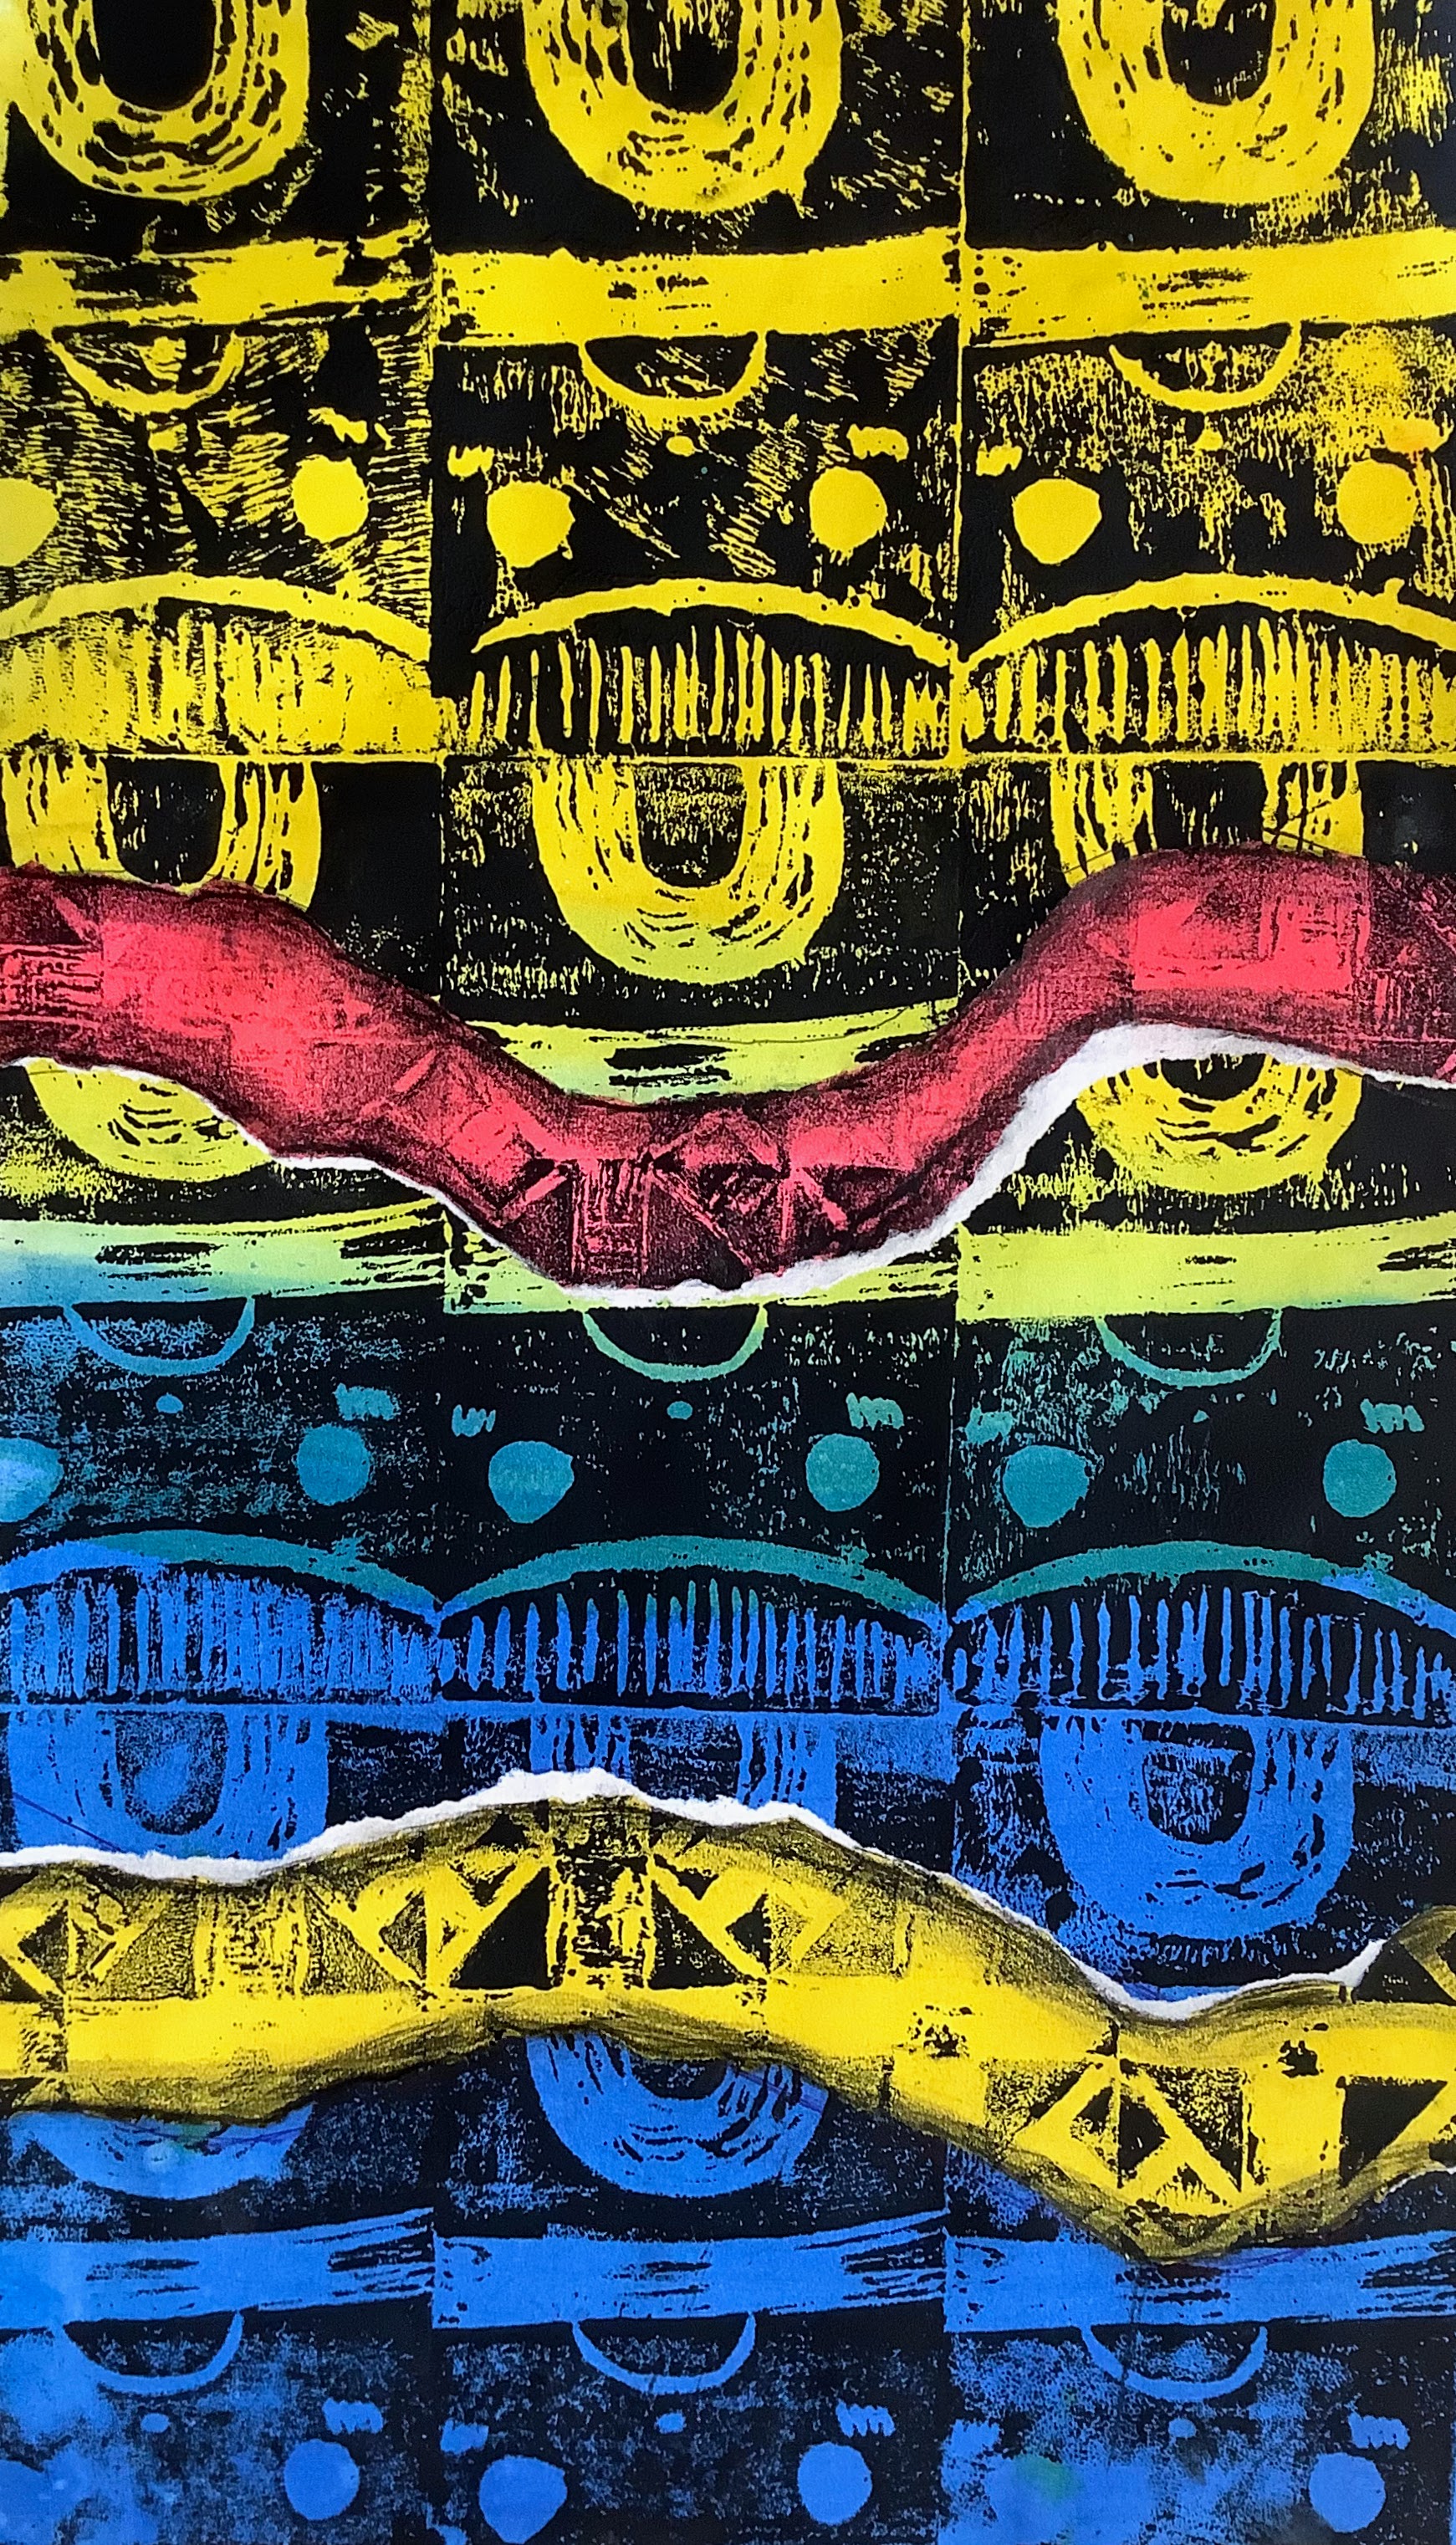
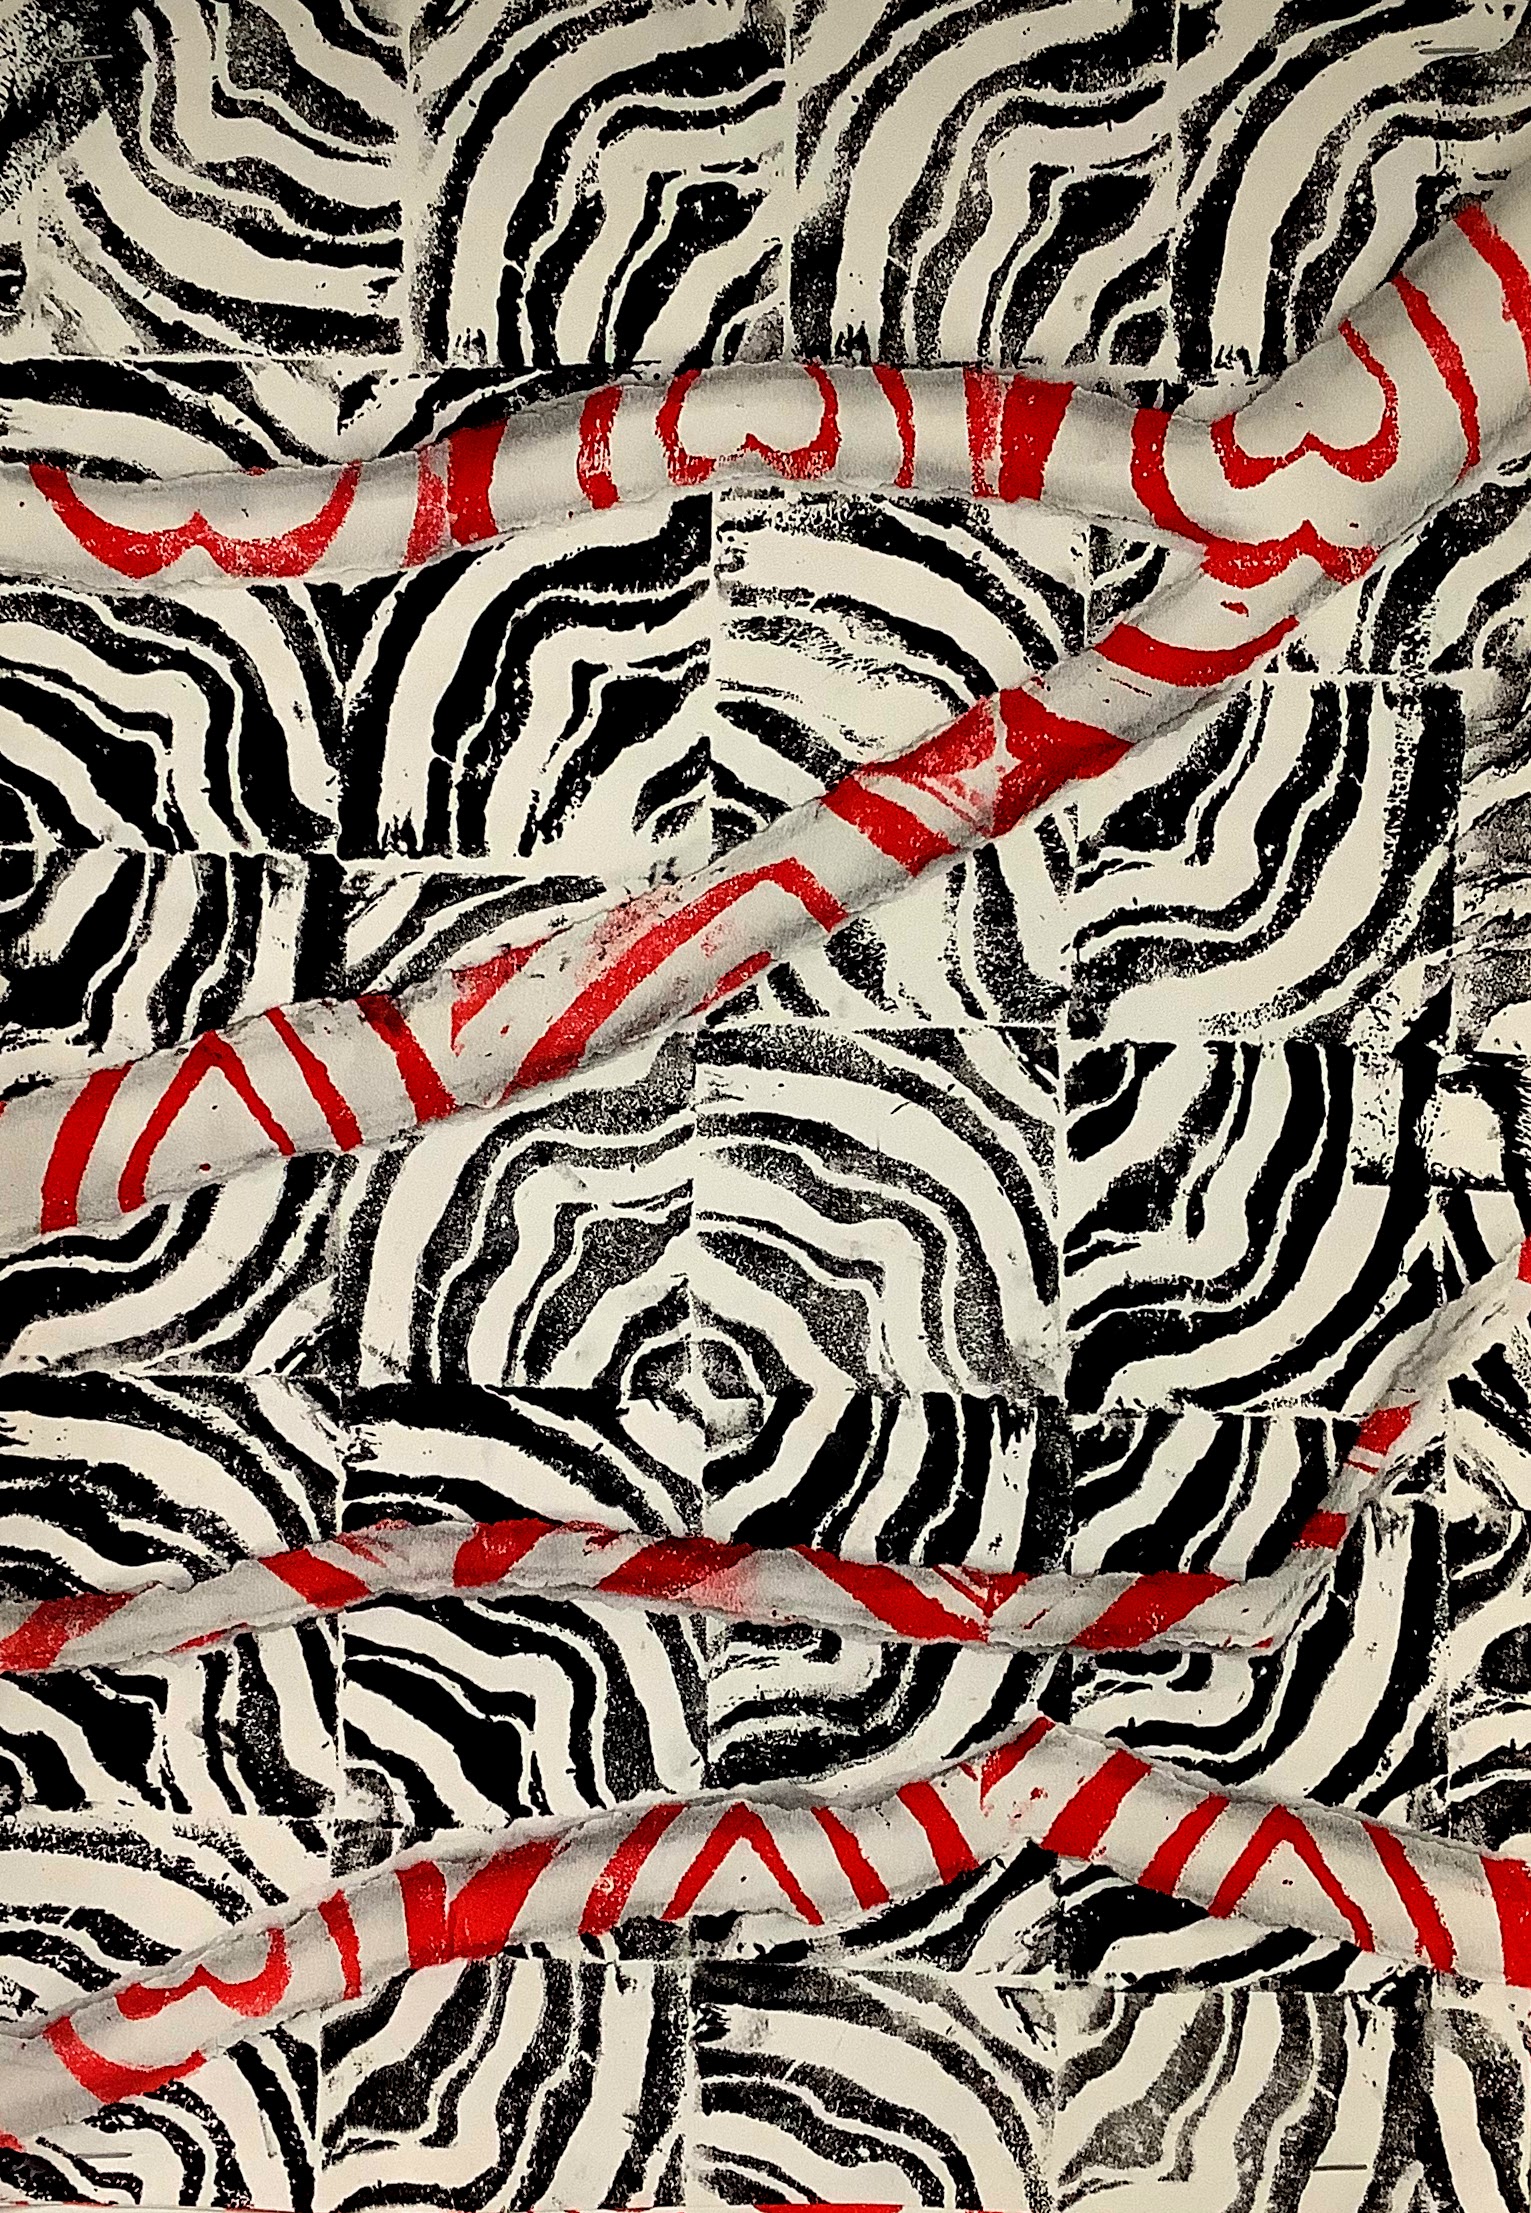
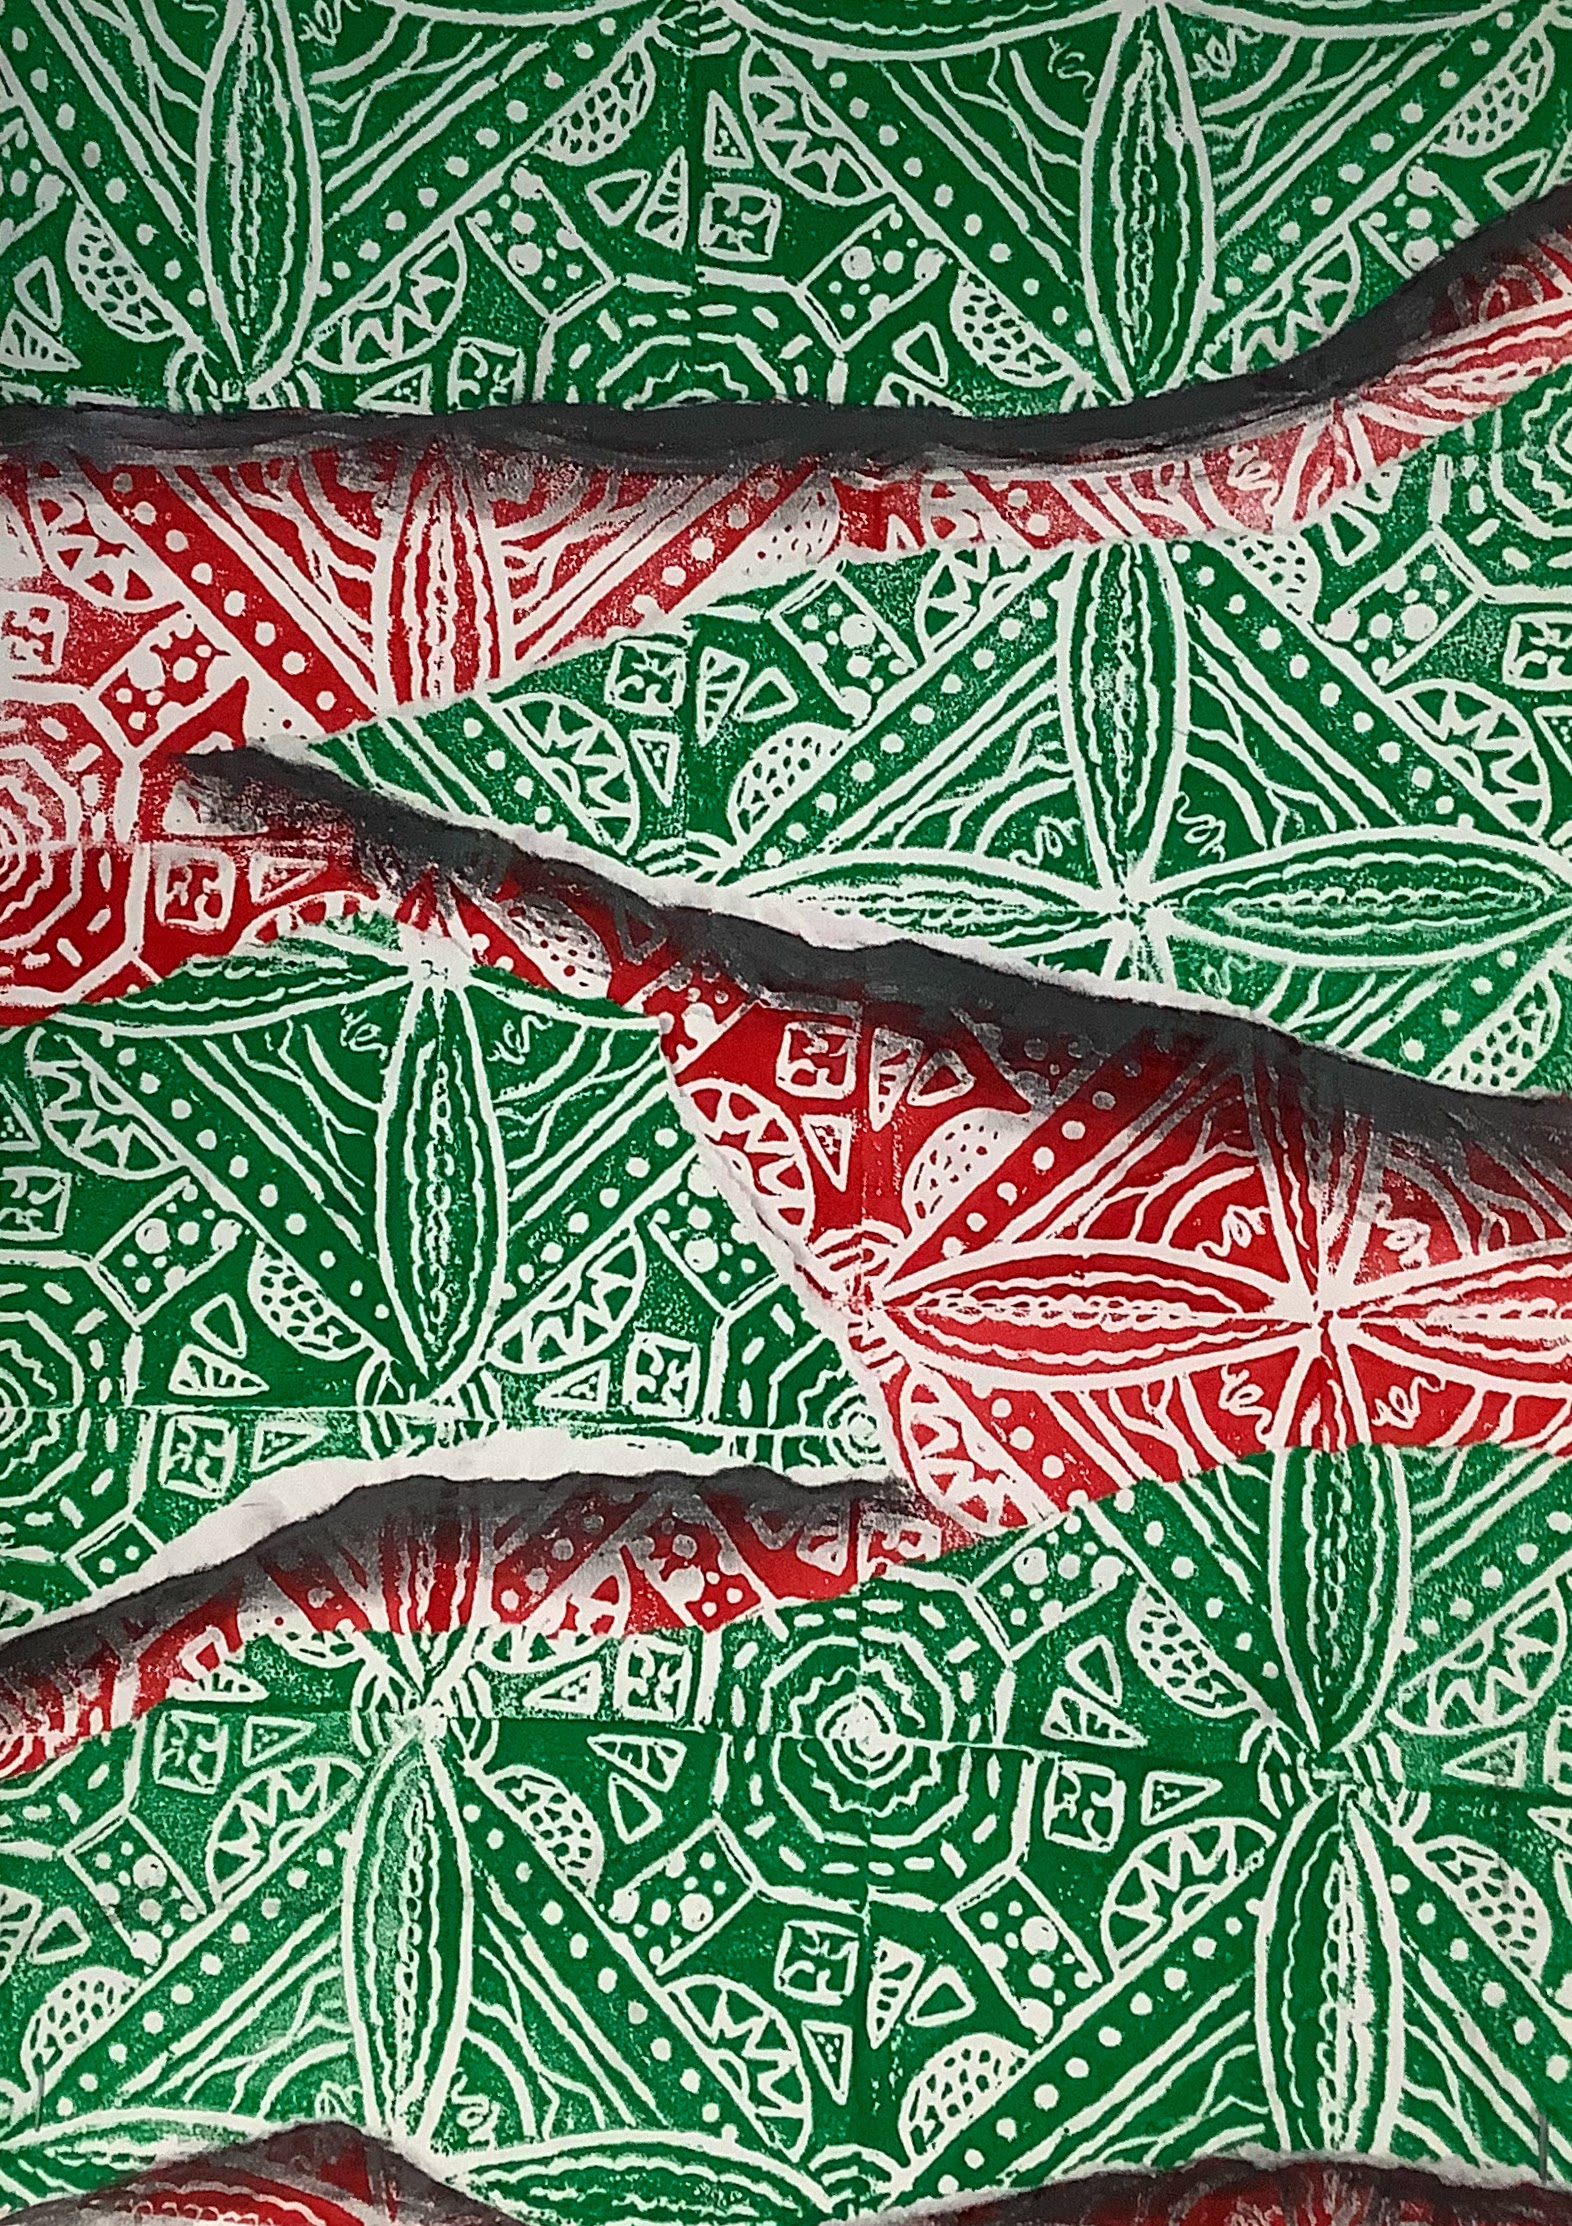
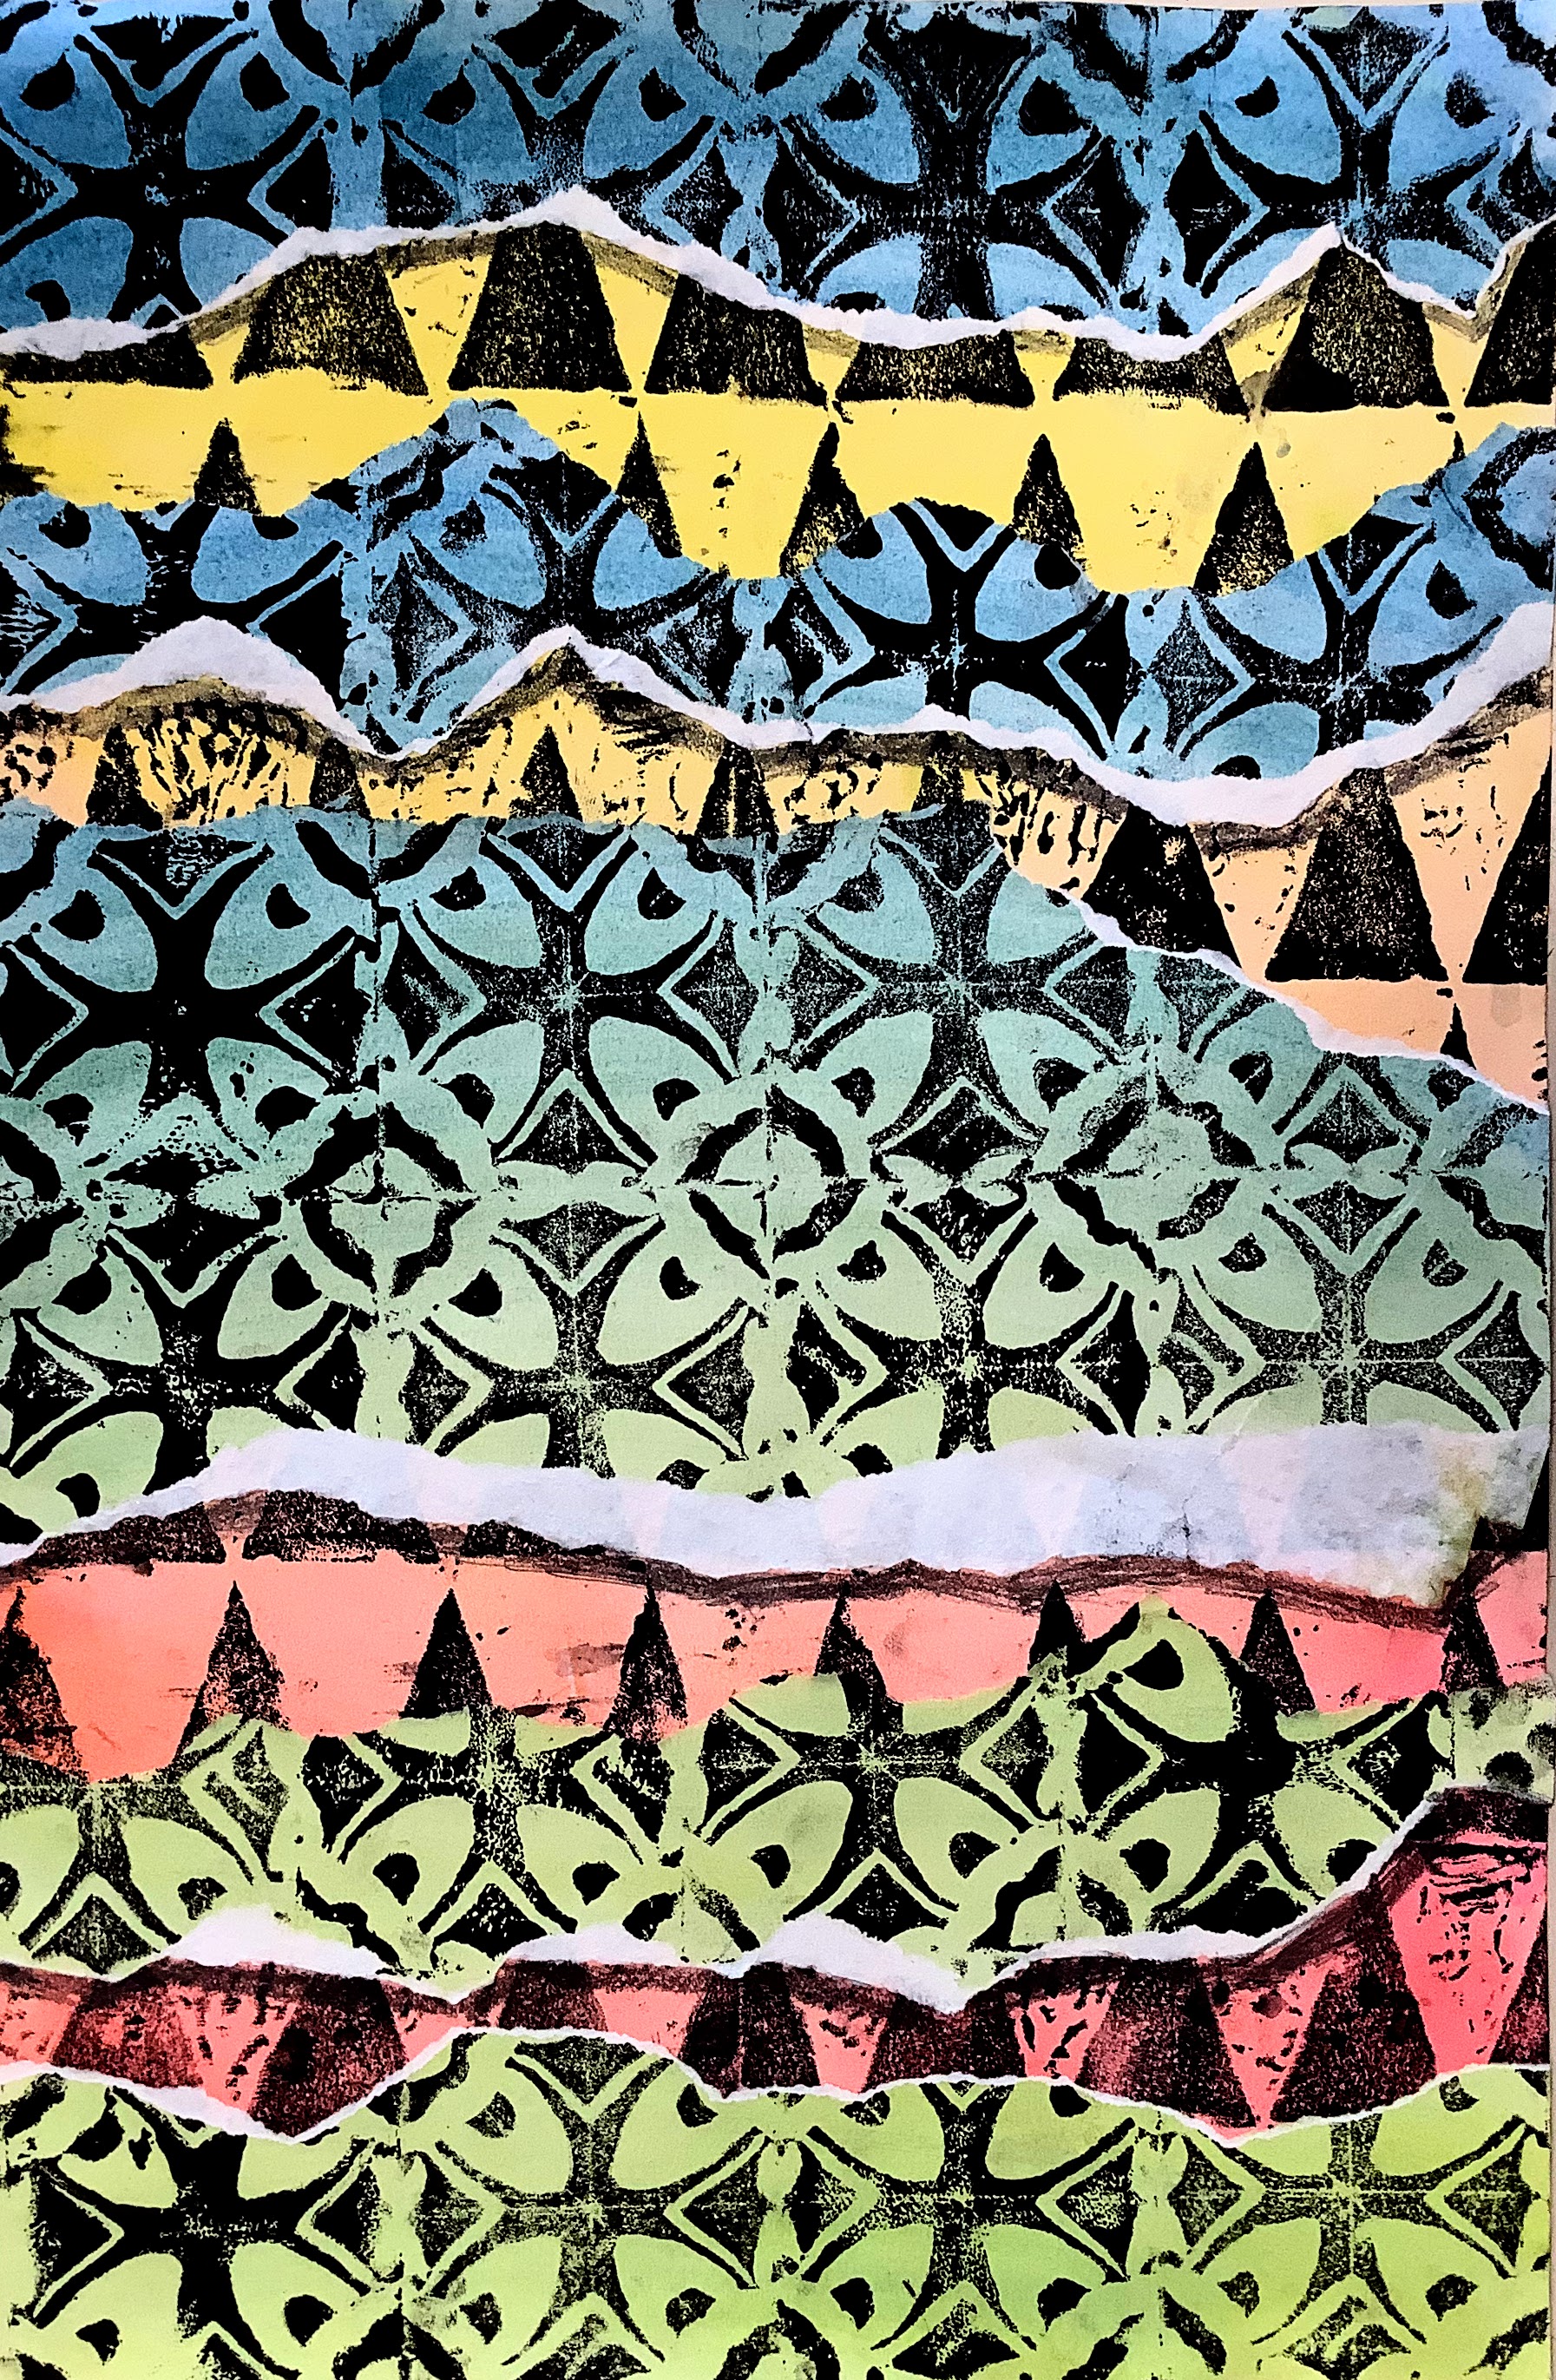
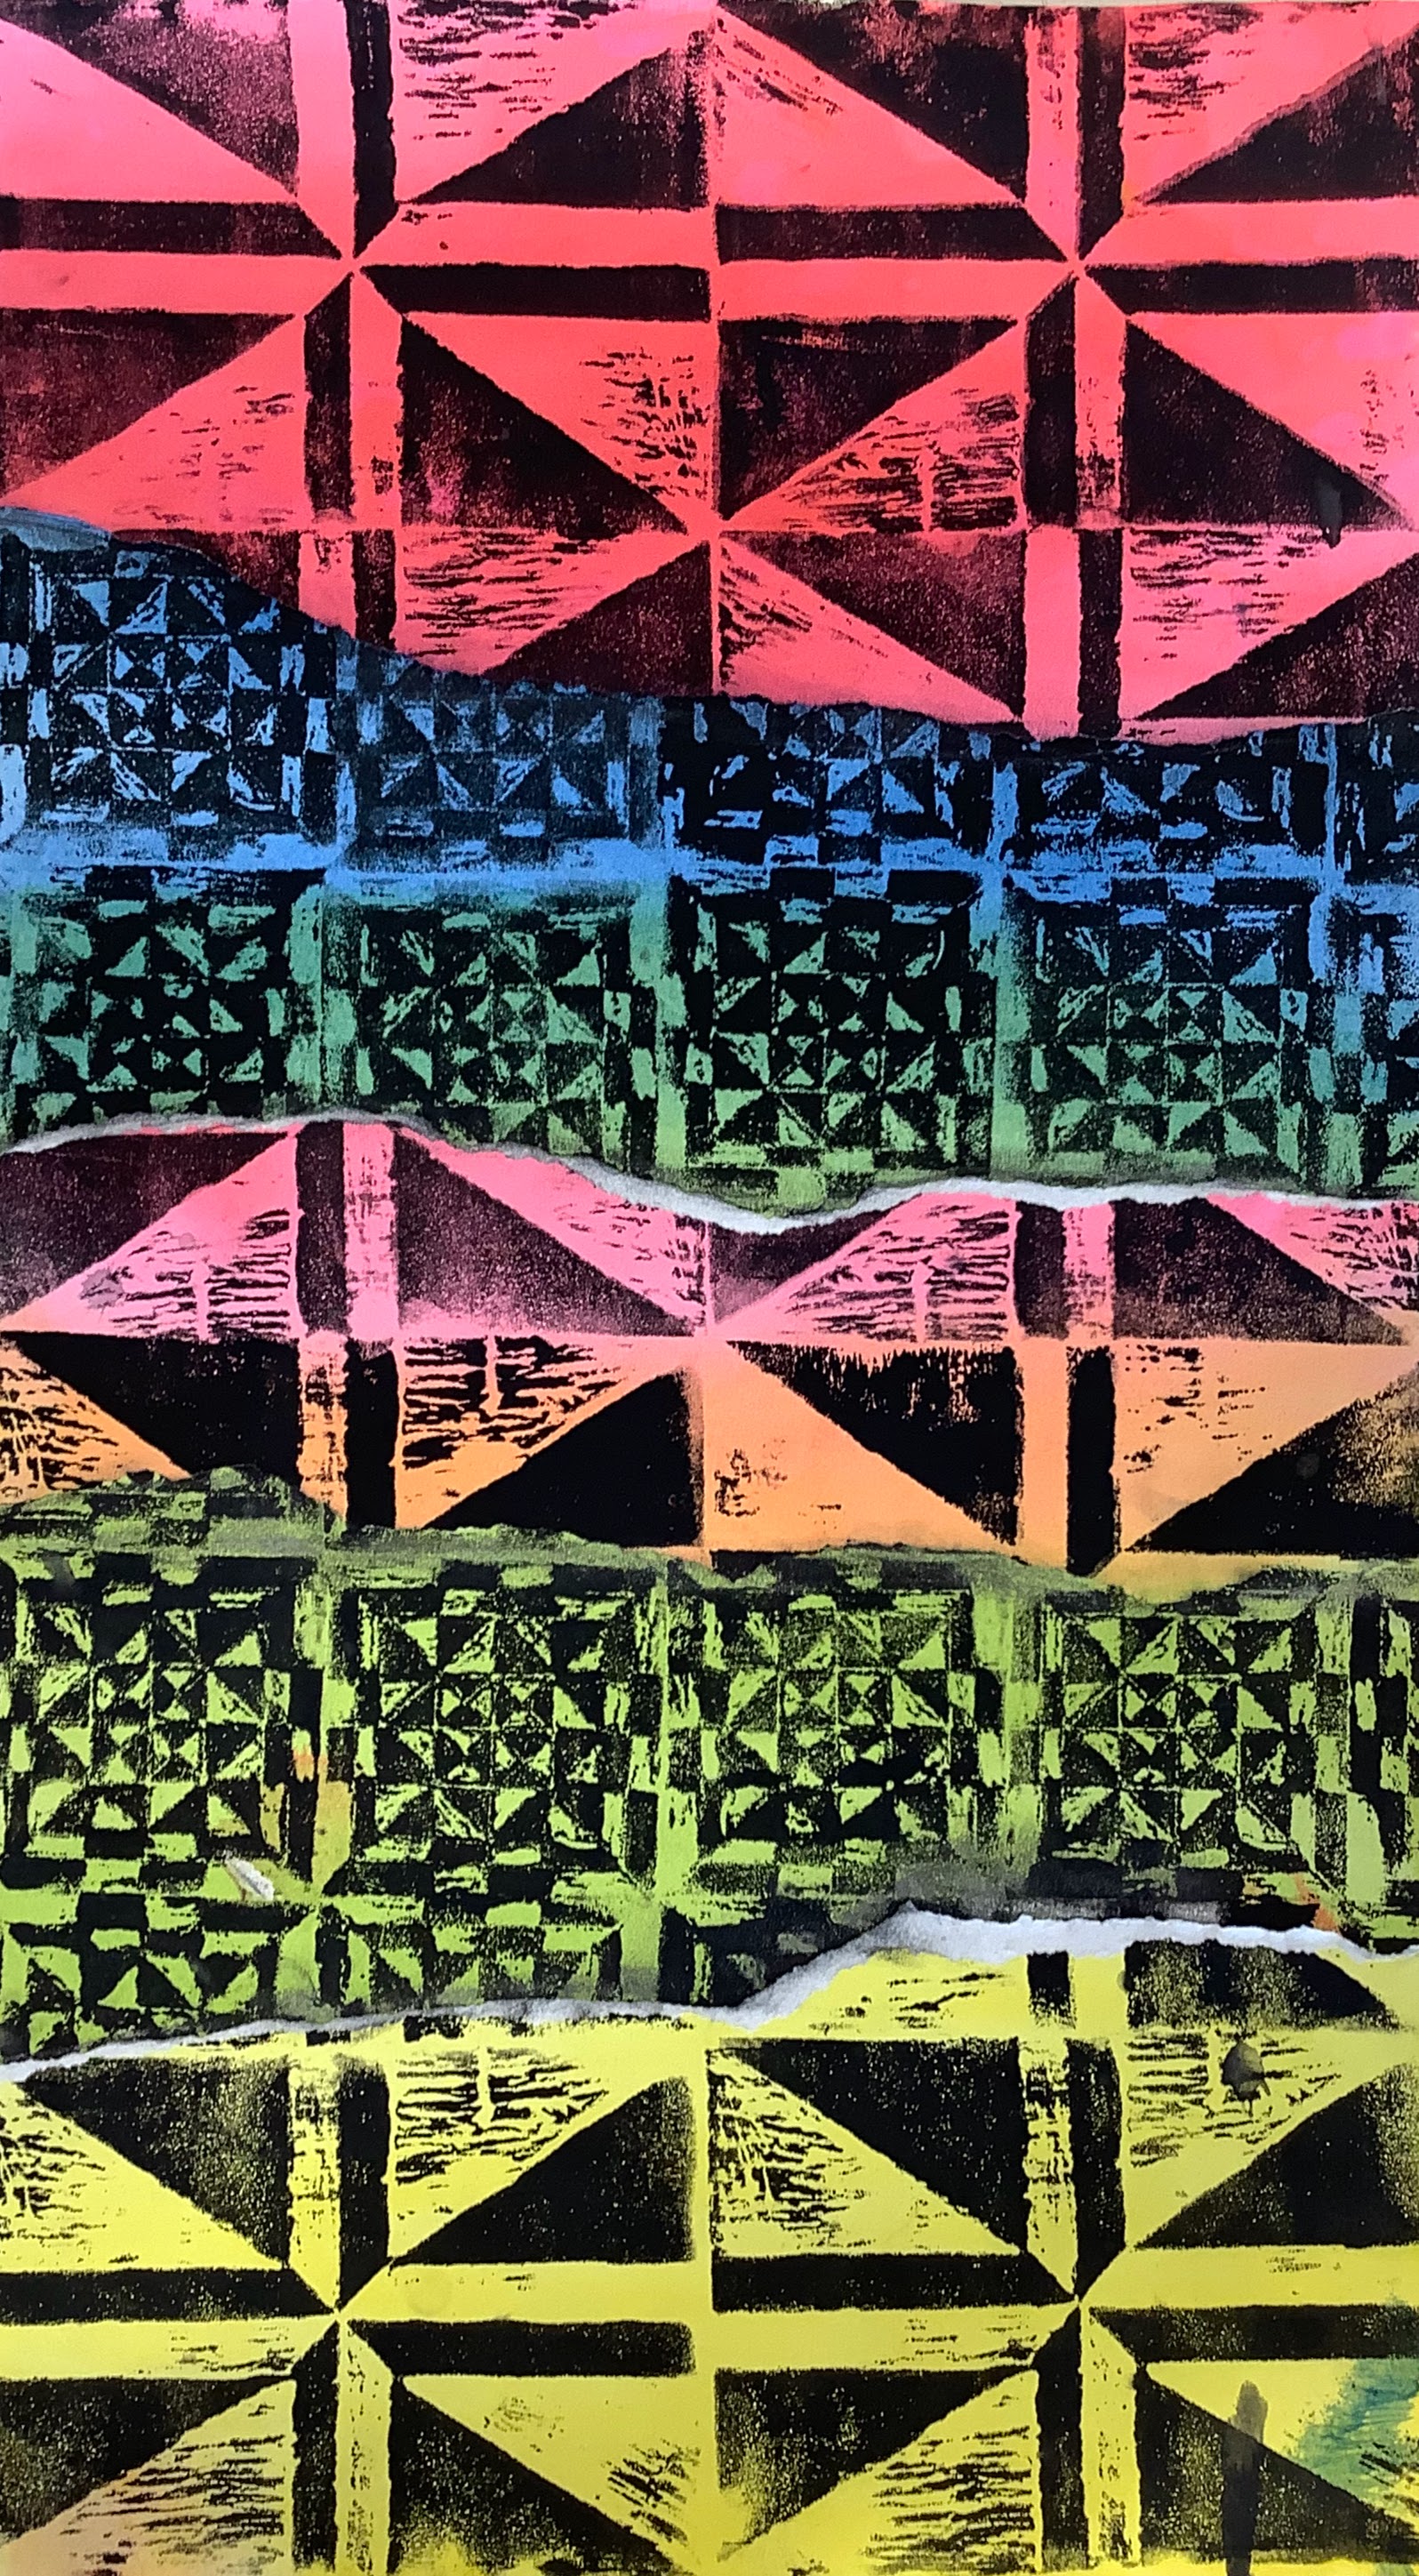
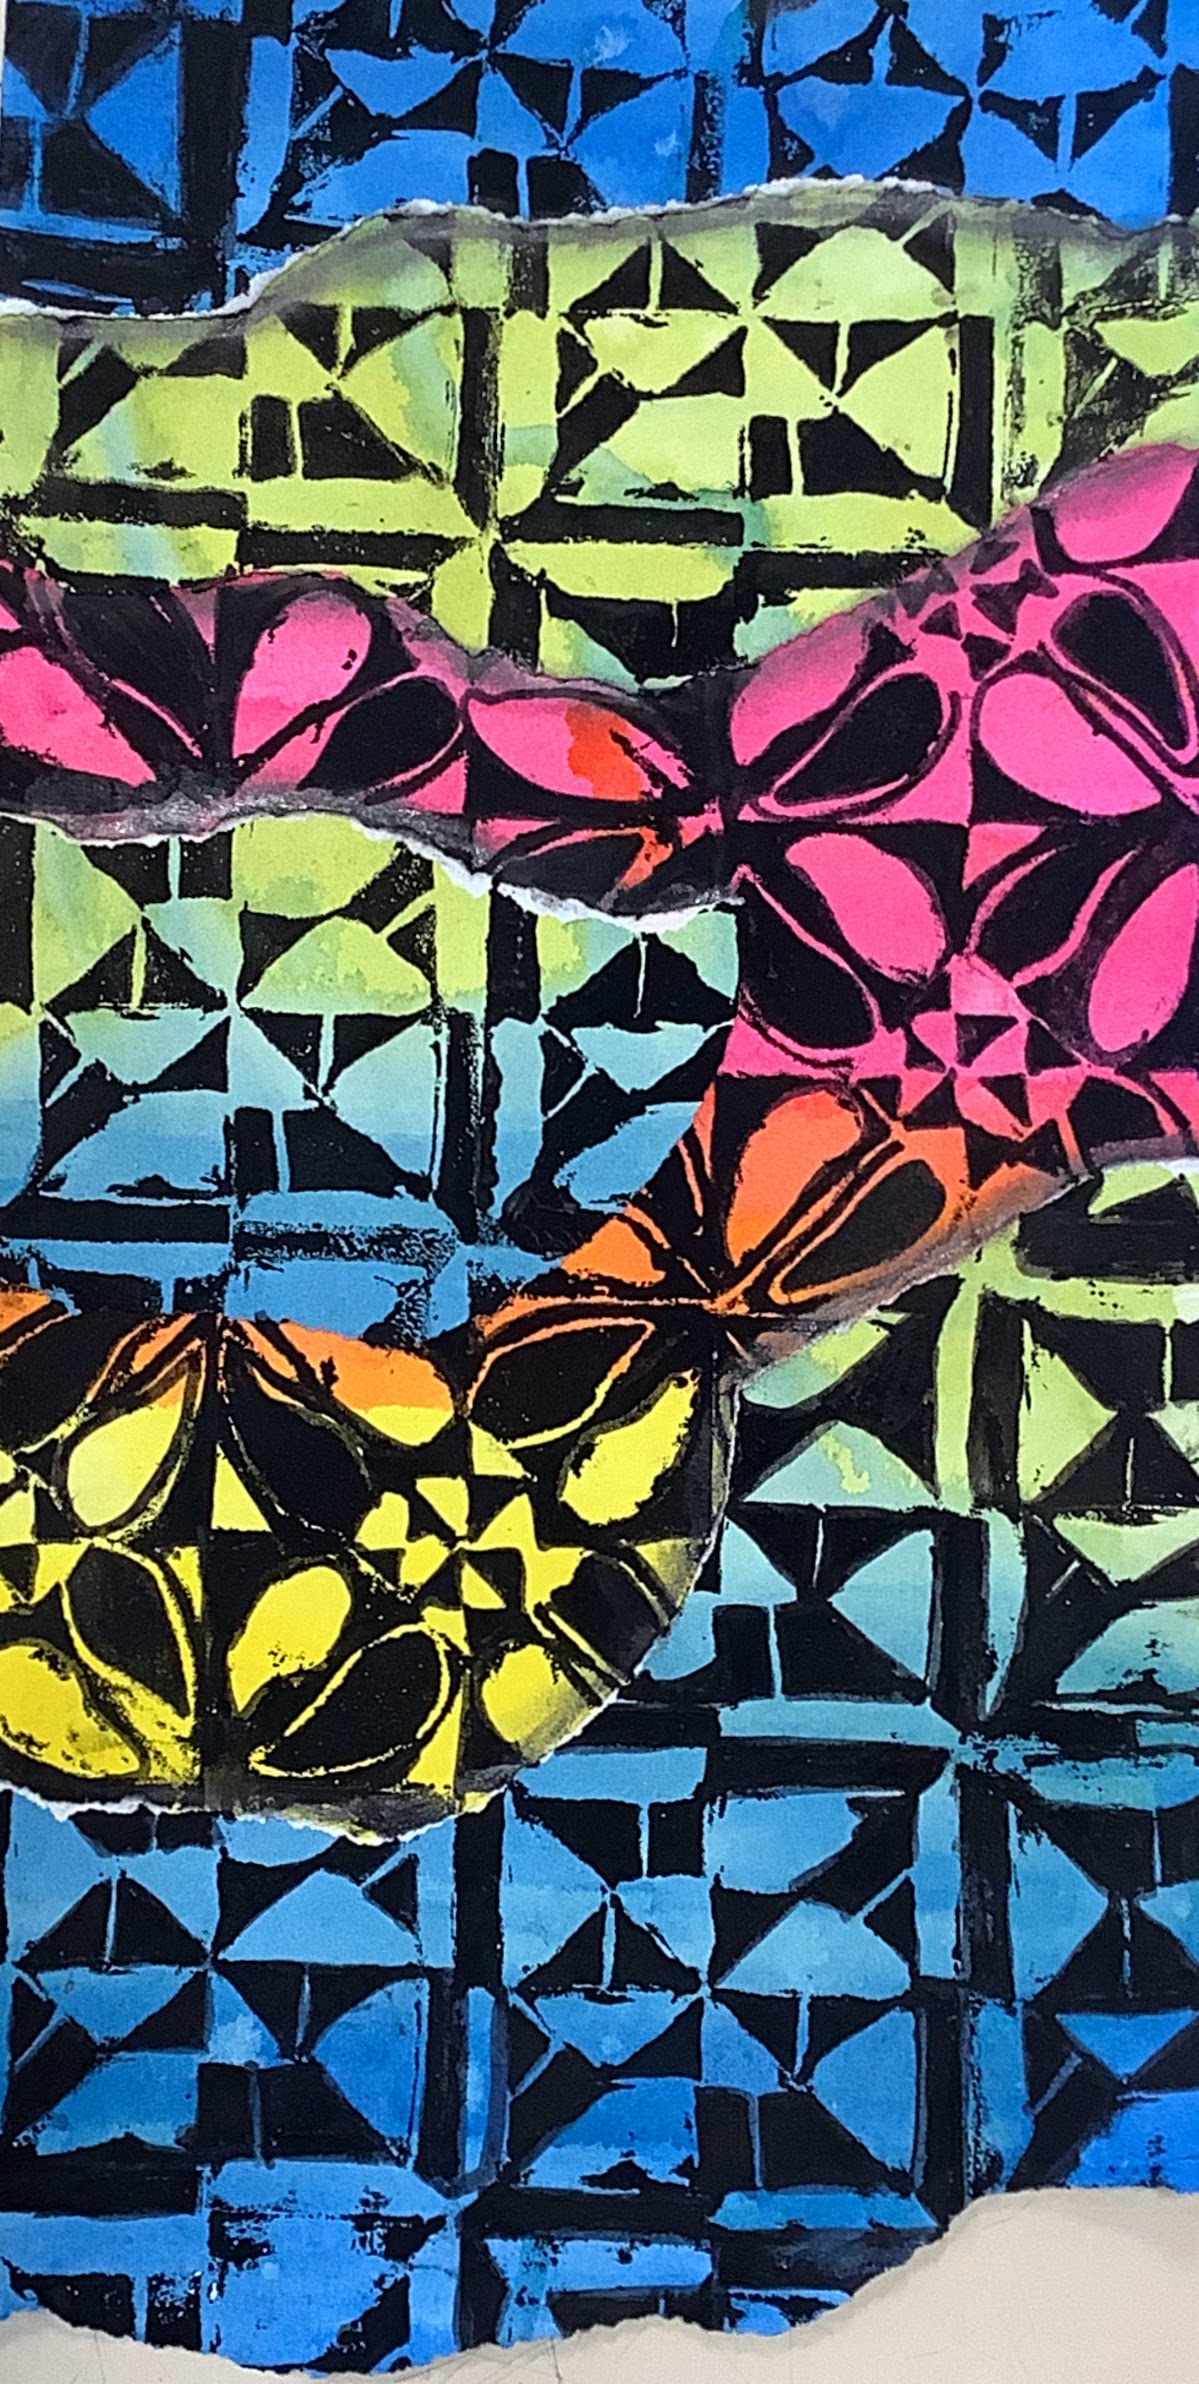
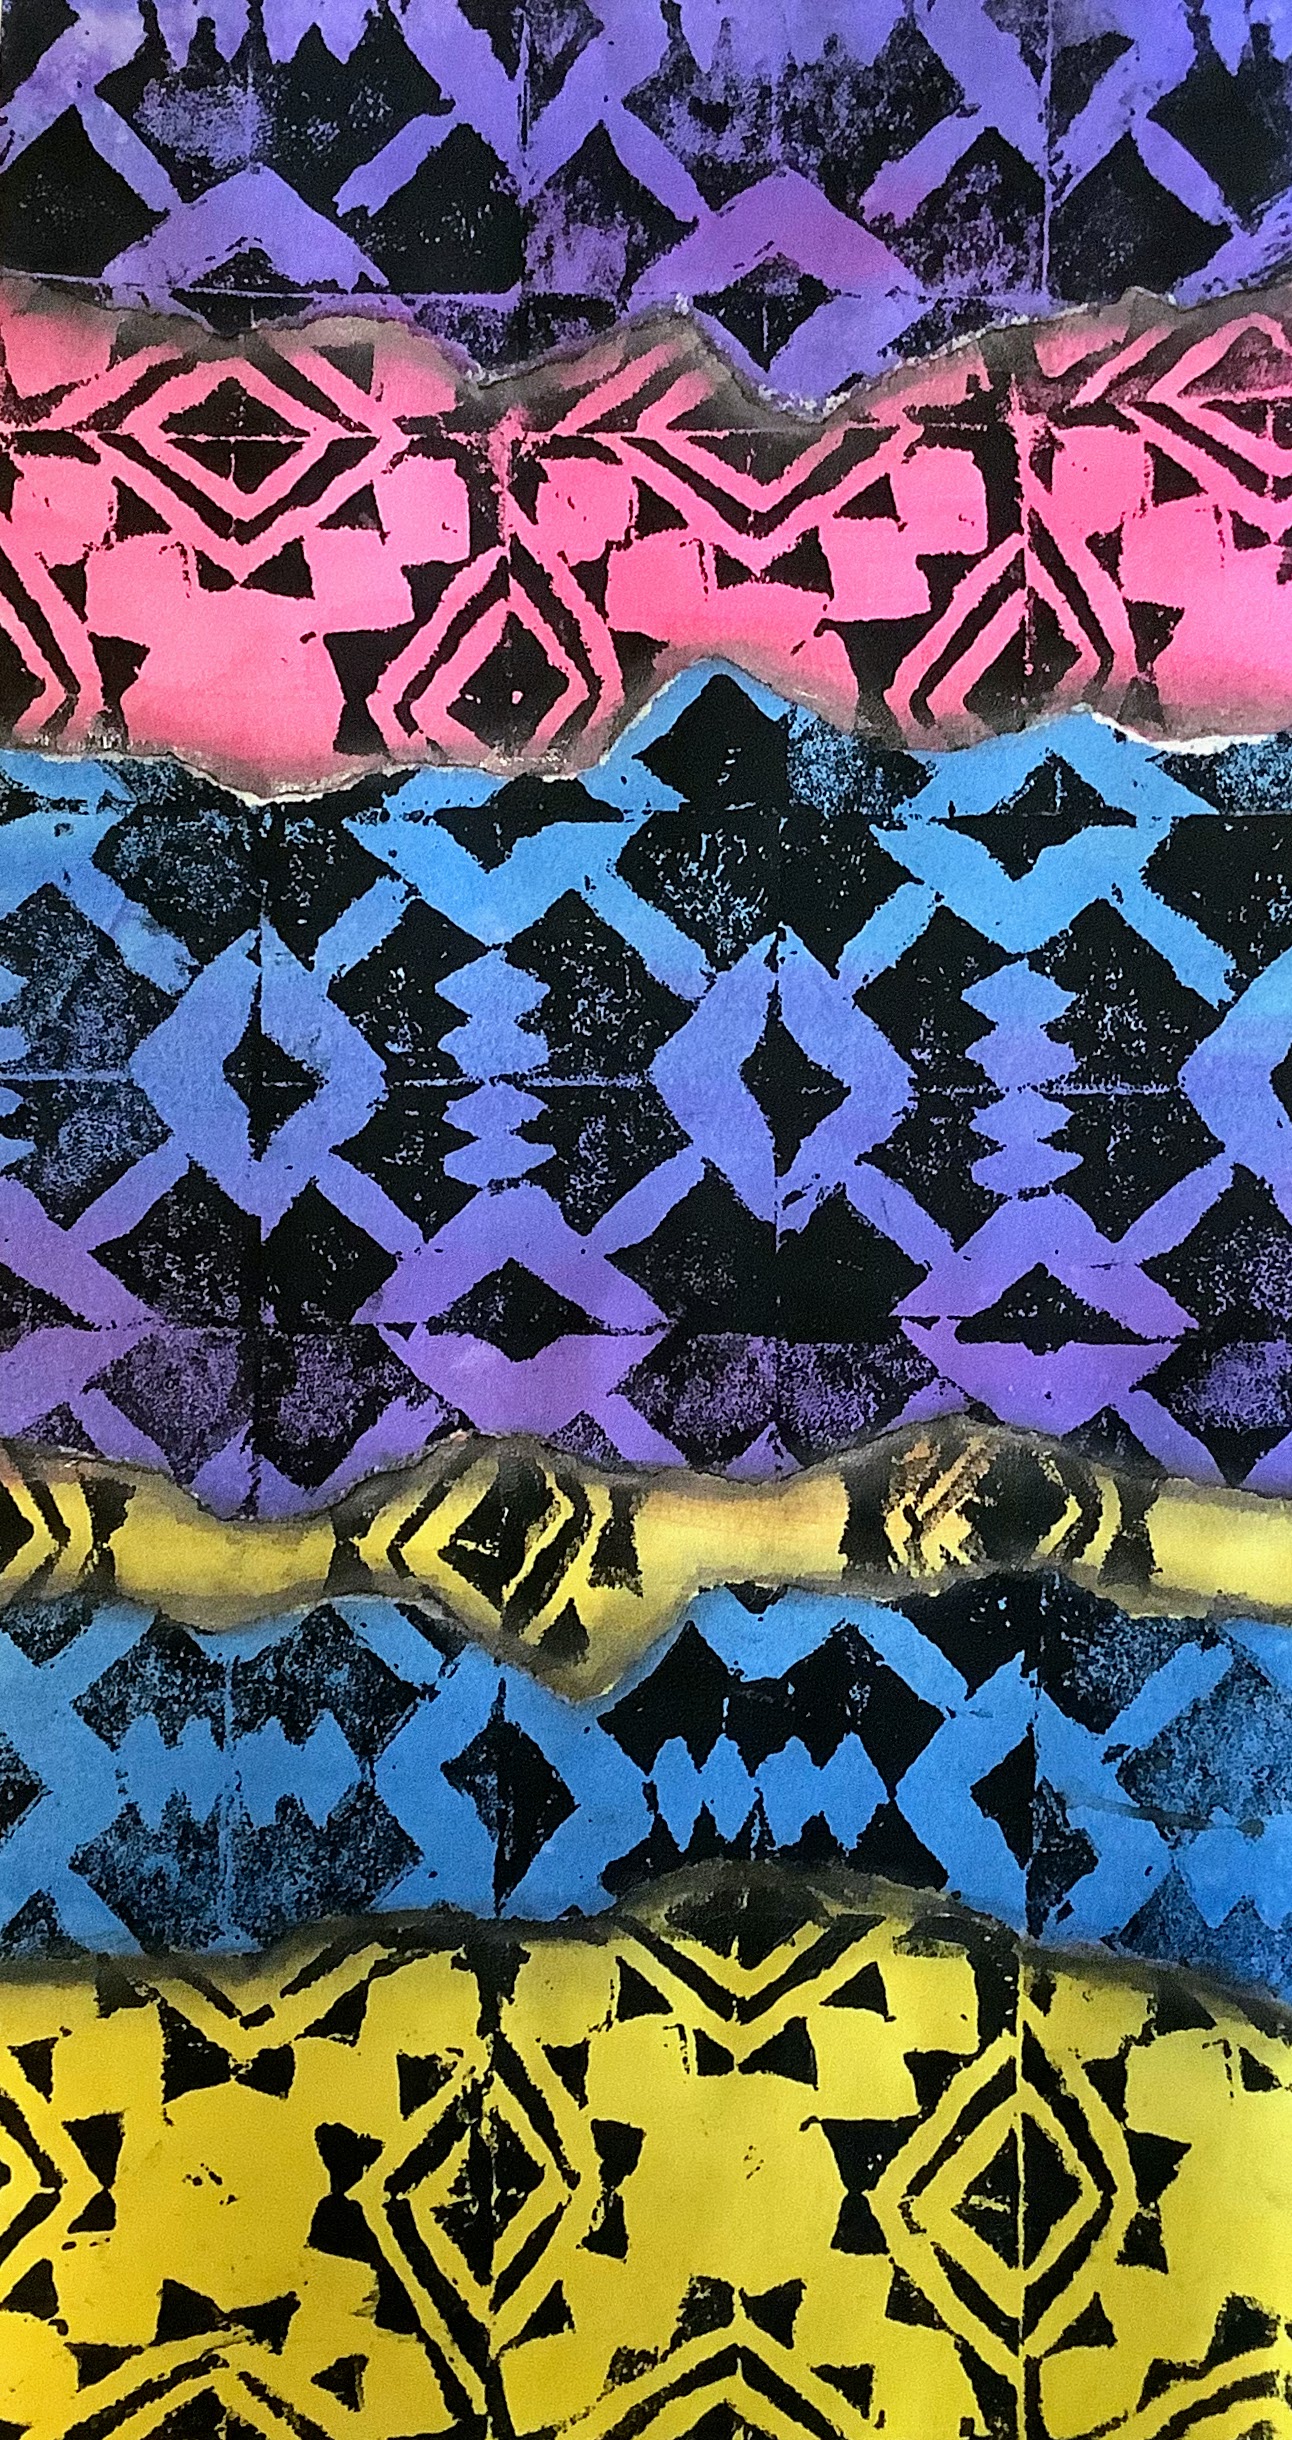
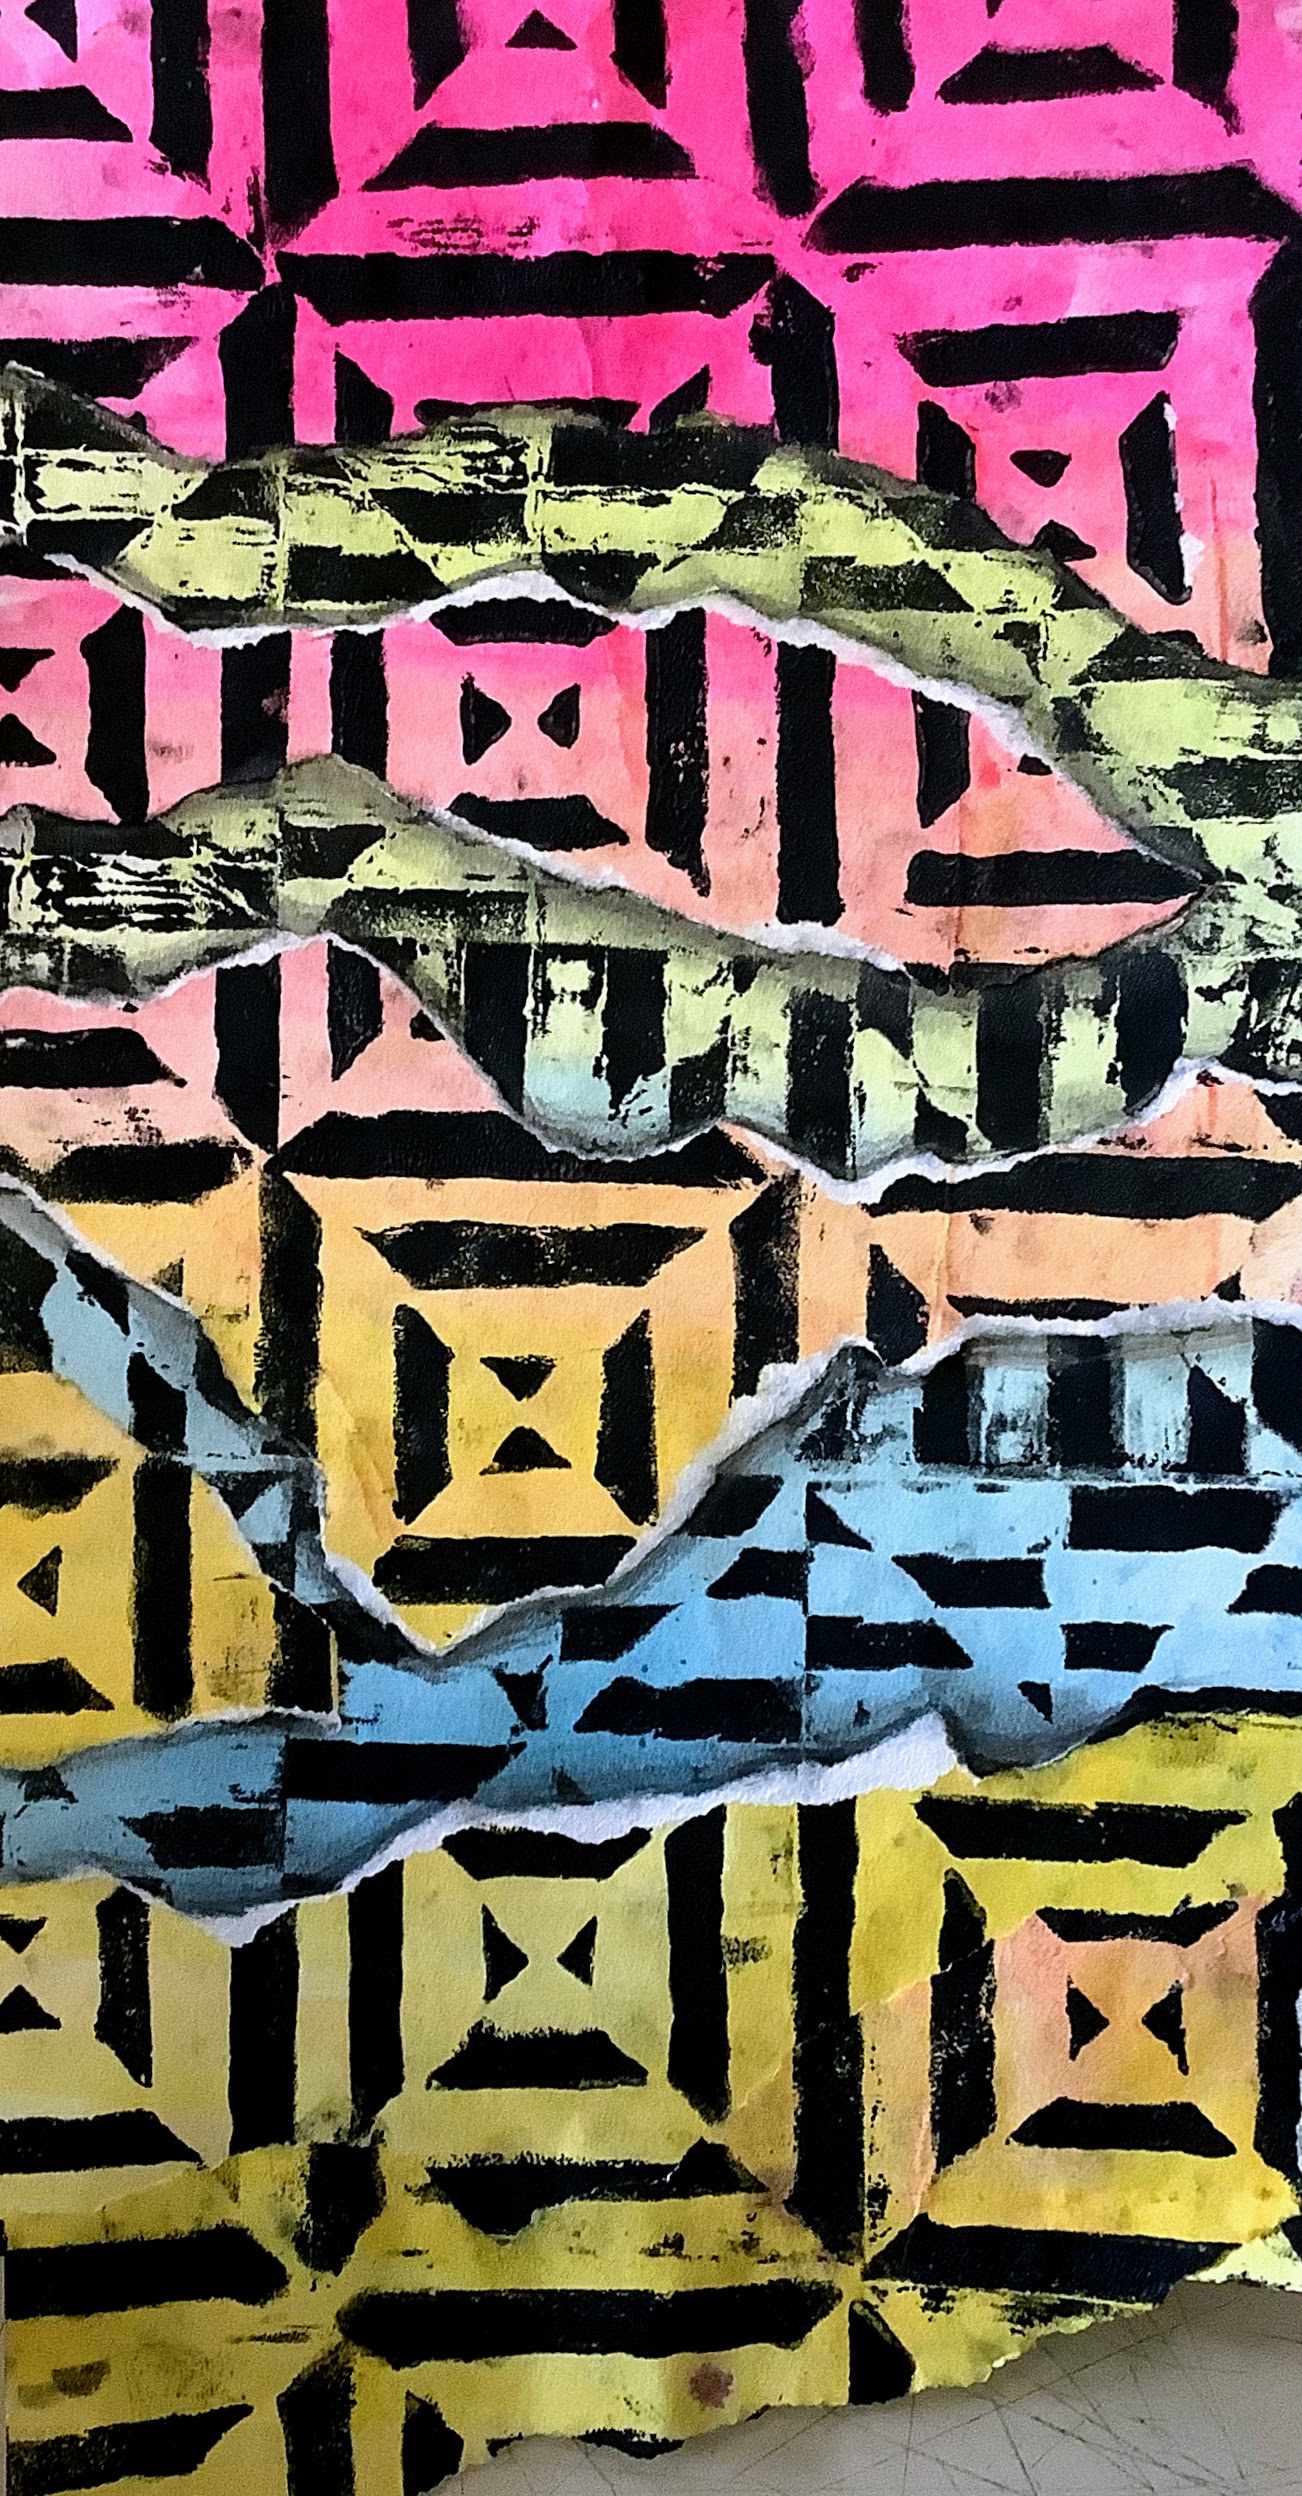
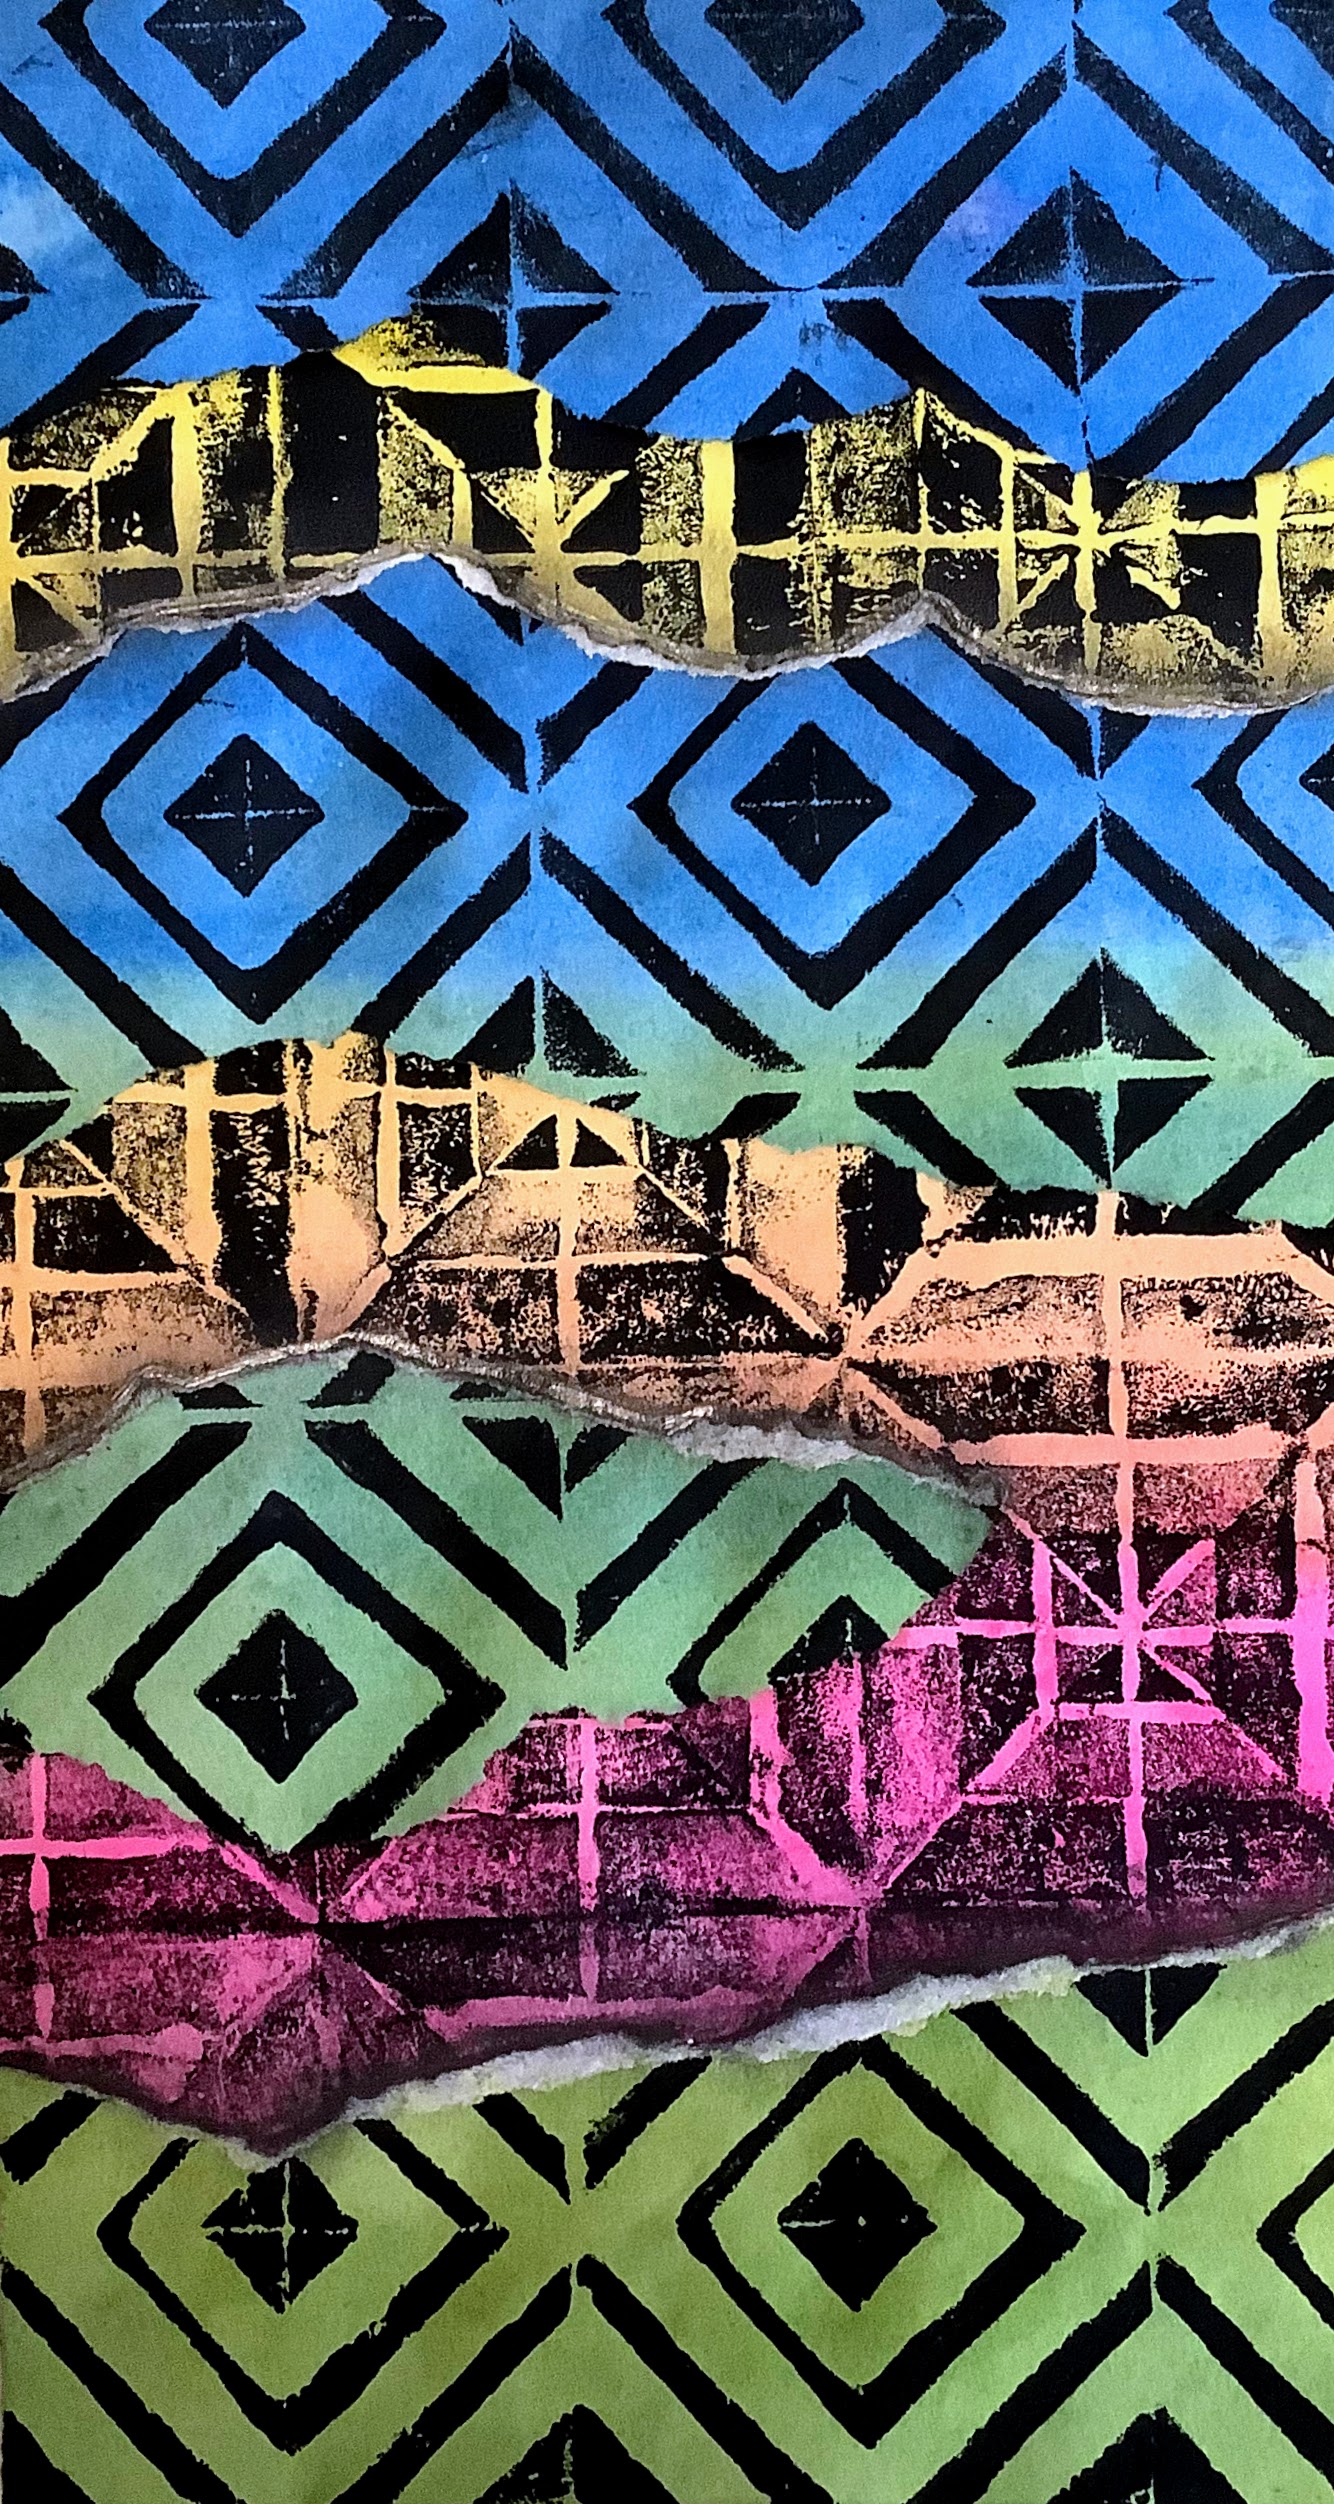
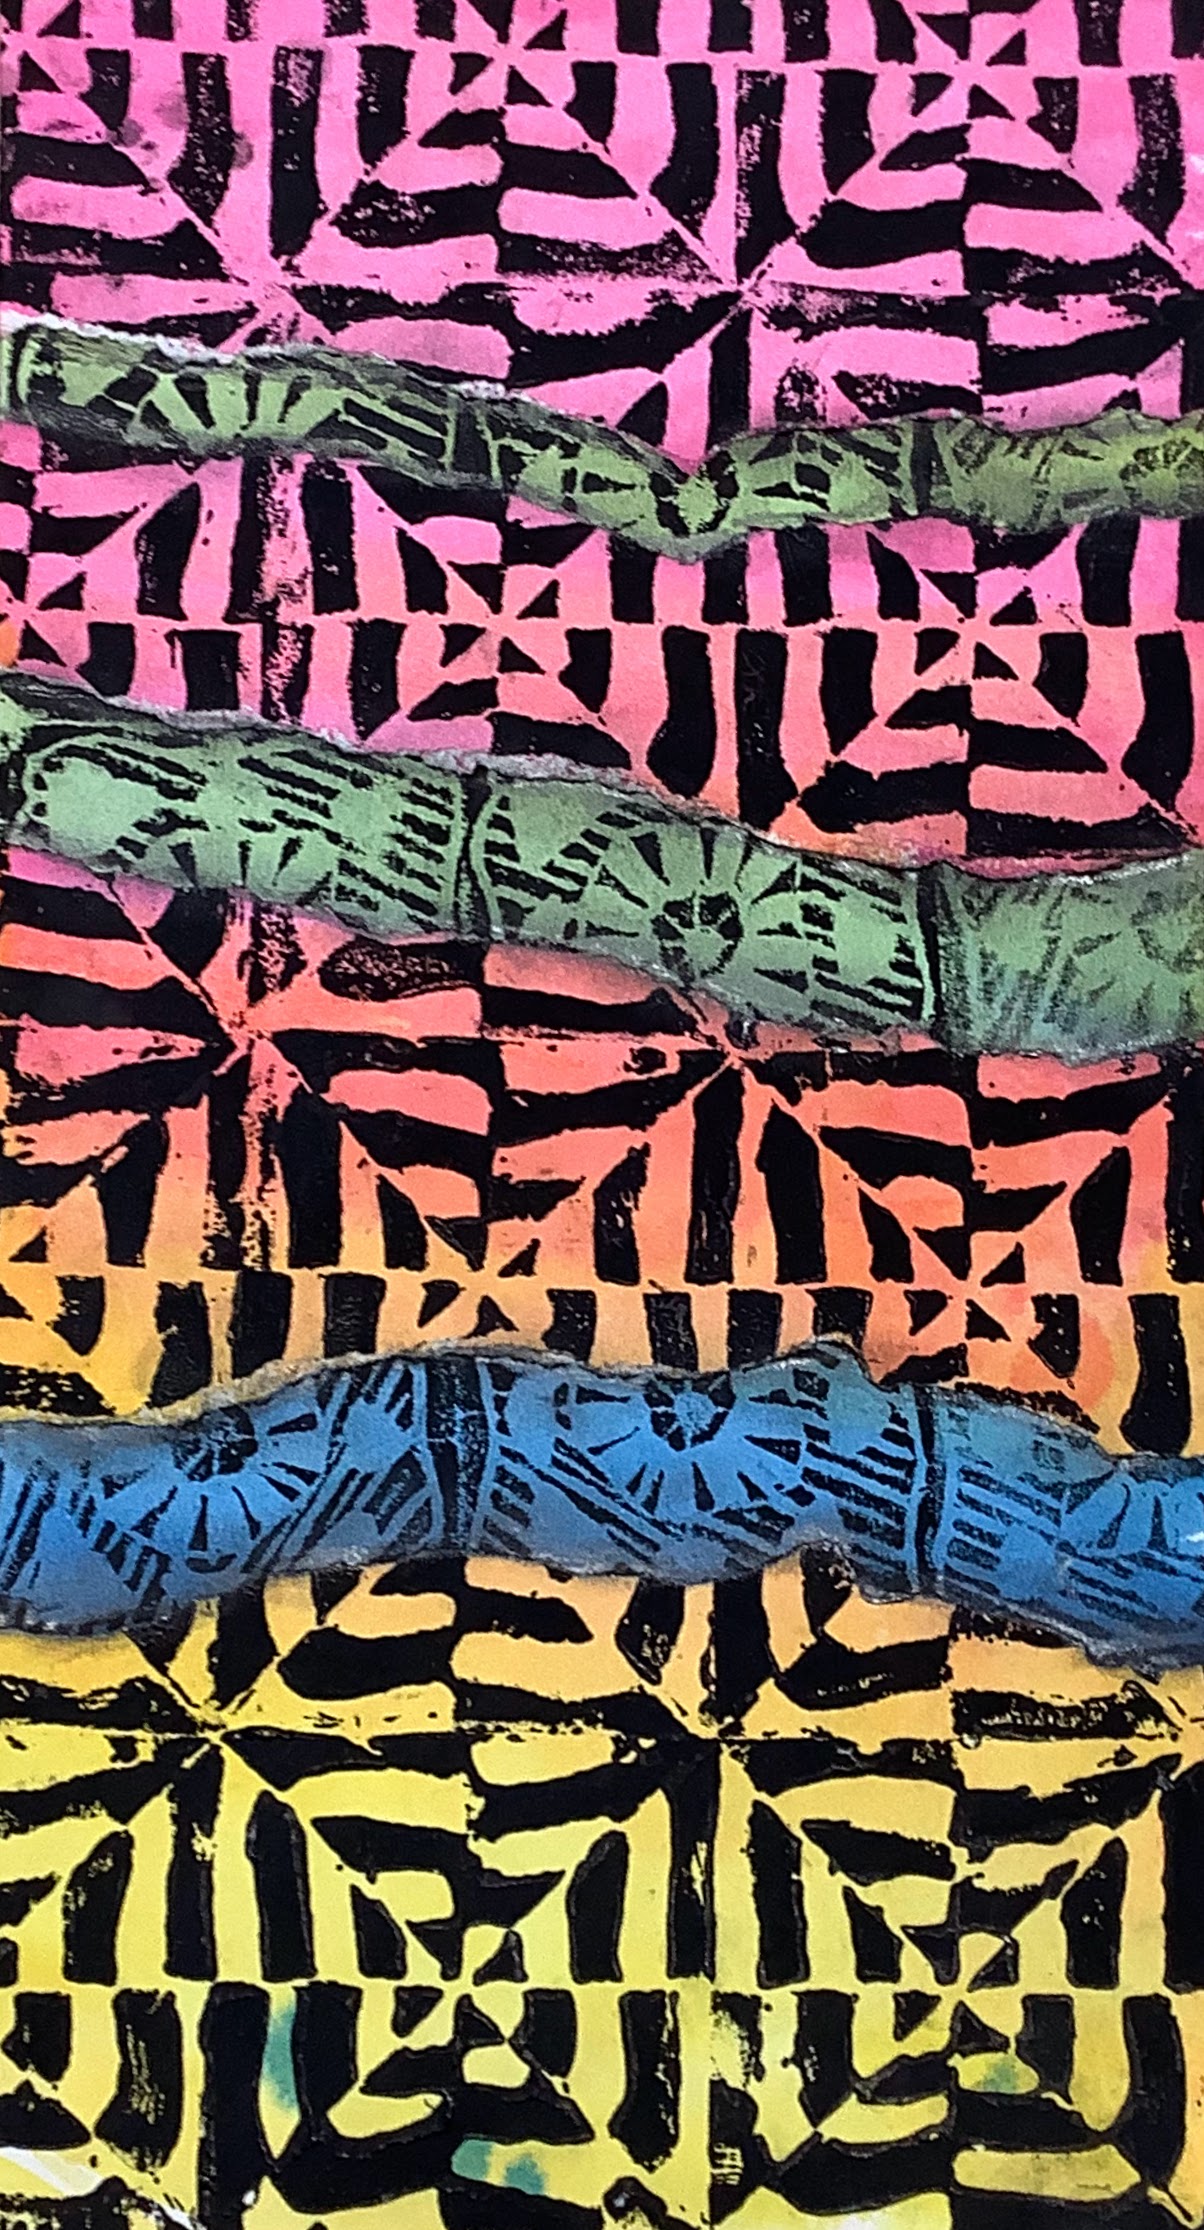
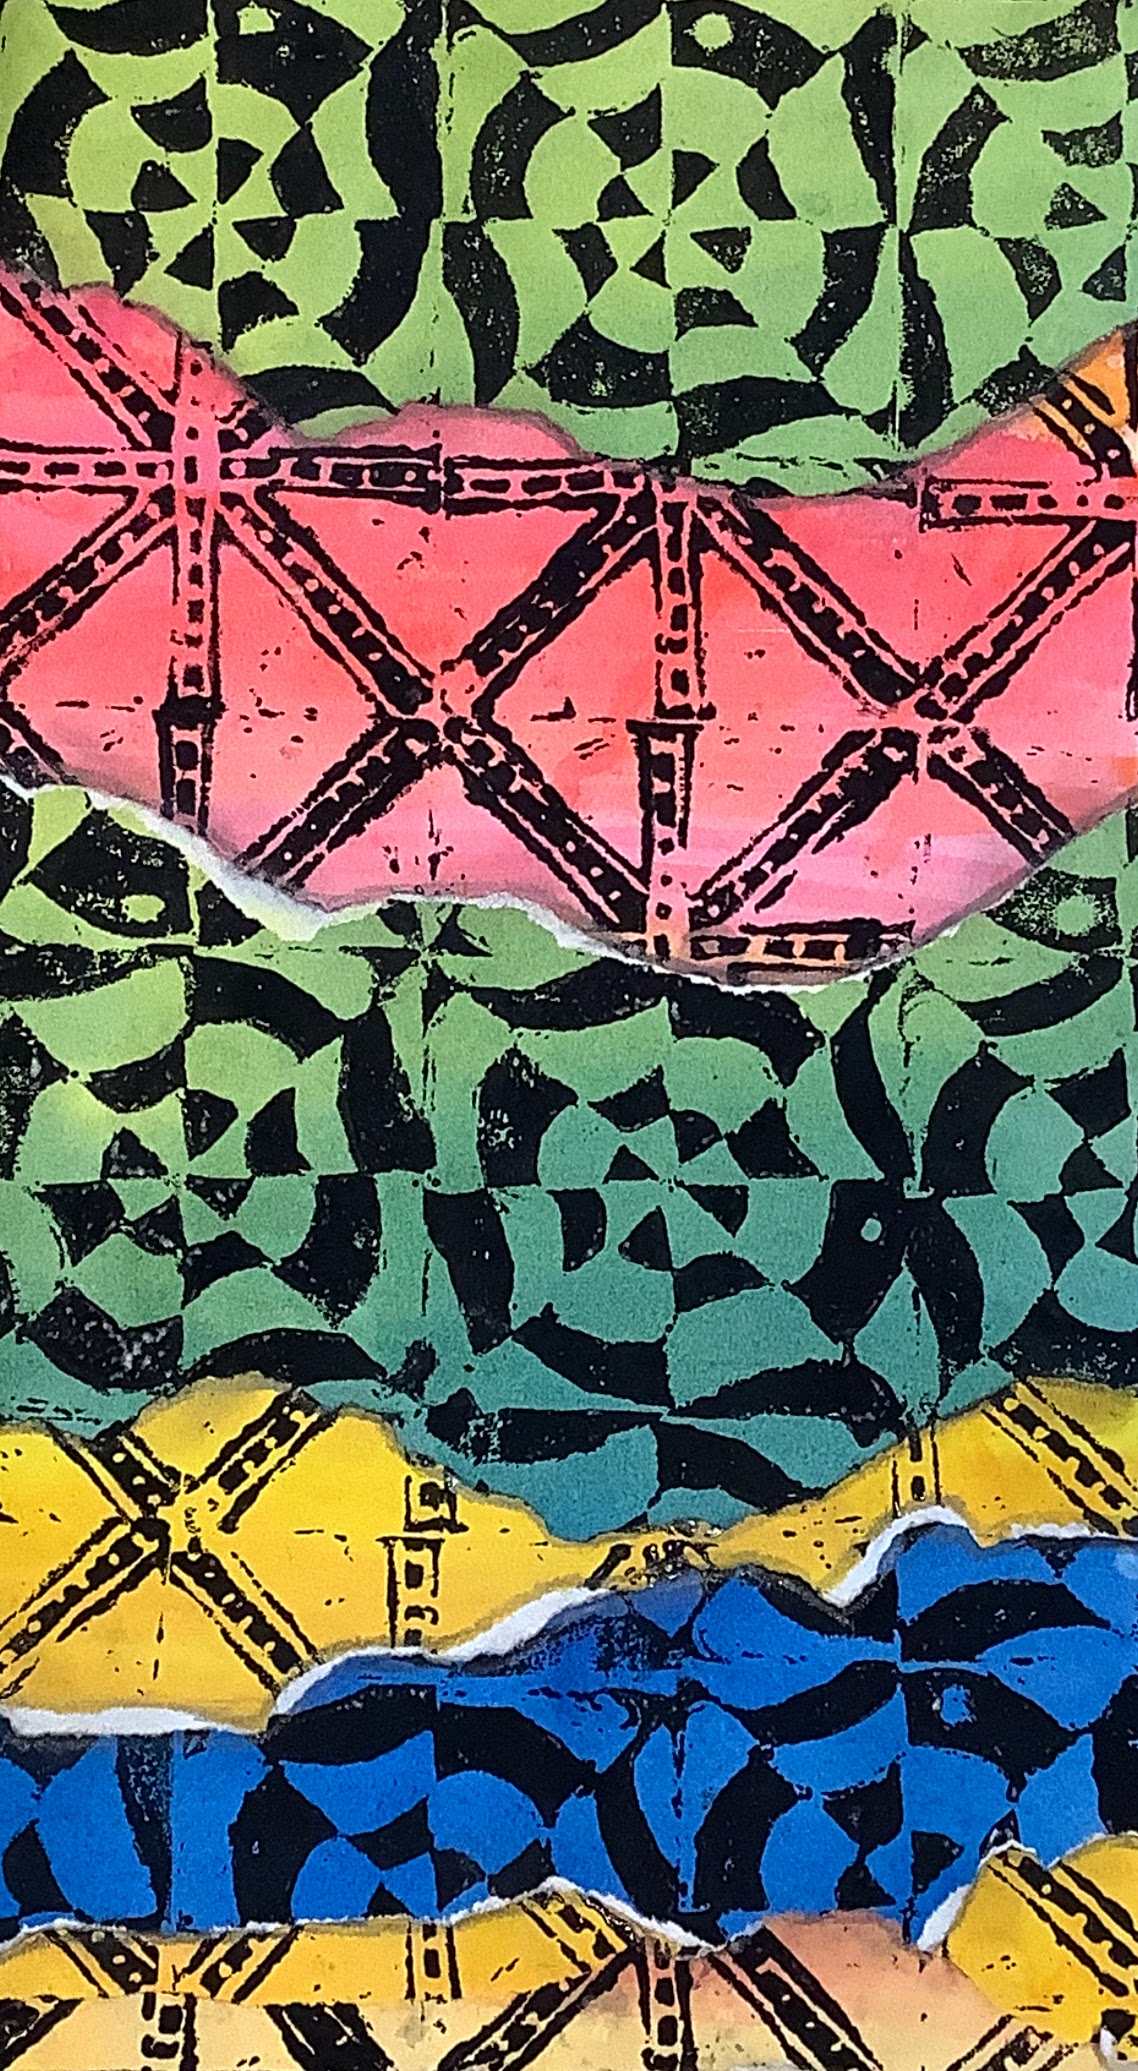
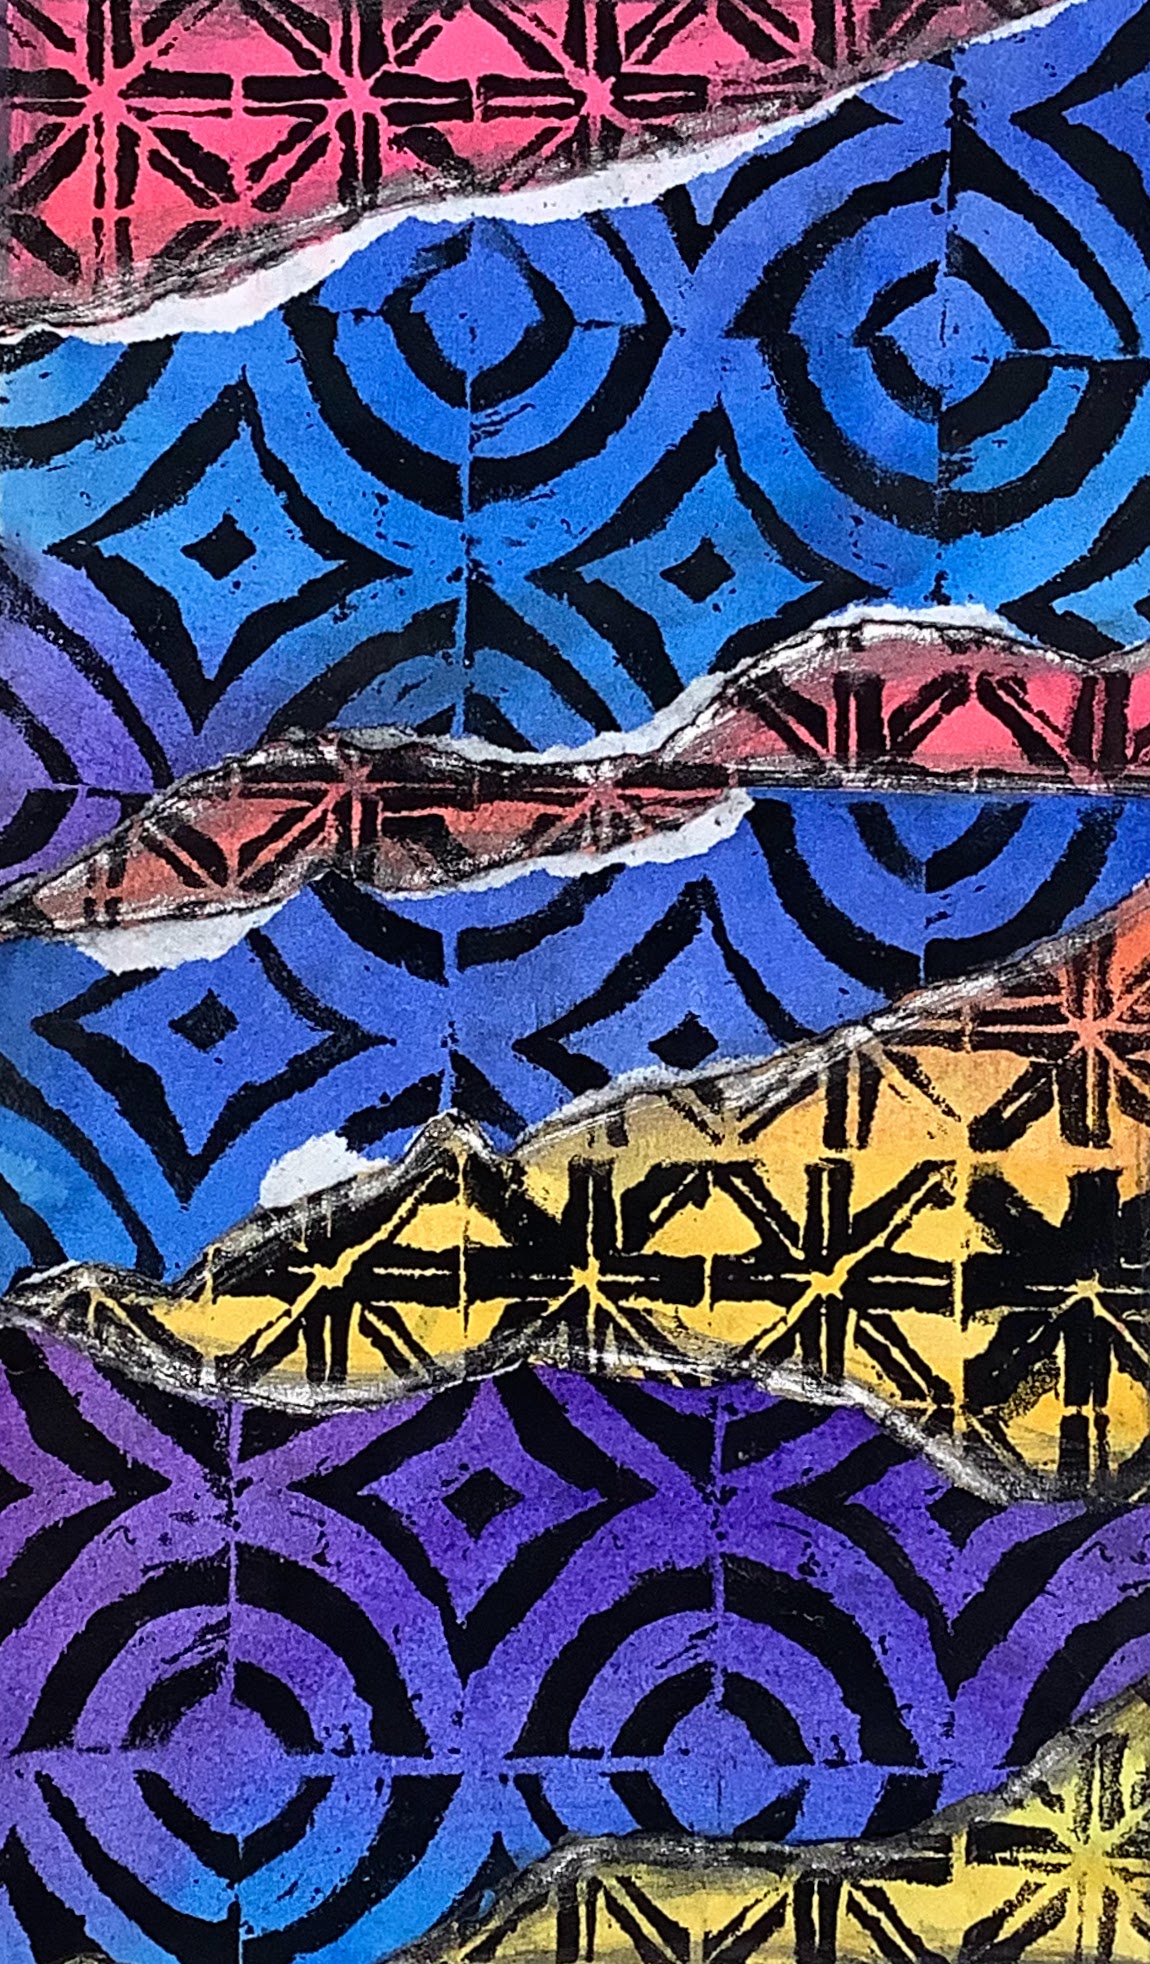
Here are some of the prints that students produced. I love the range of outcomes and designs – some complex, some simple. Some students created rotational designs (like in their sketchbooks) and some placed their block at random. I also really love how other teachers in the department used colour but in a completely different way!

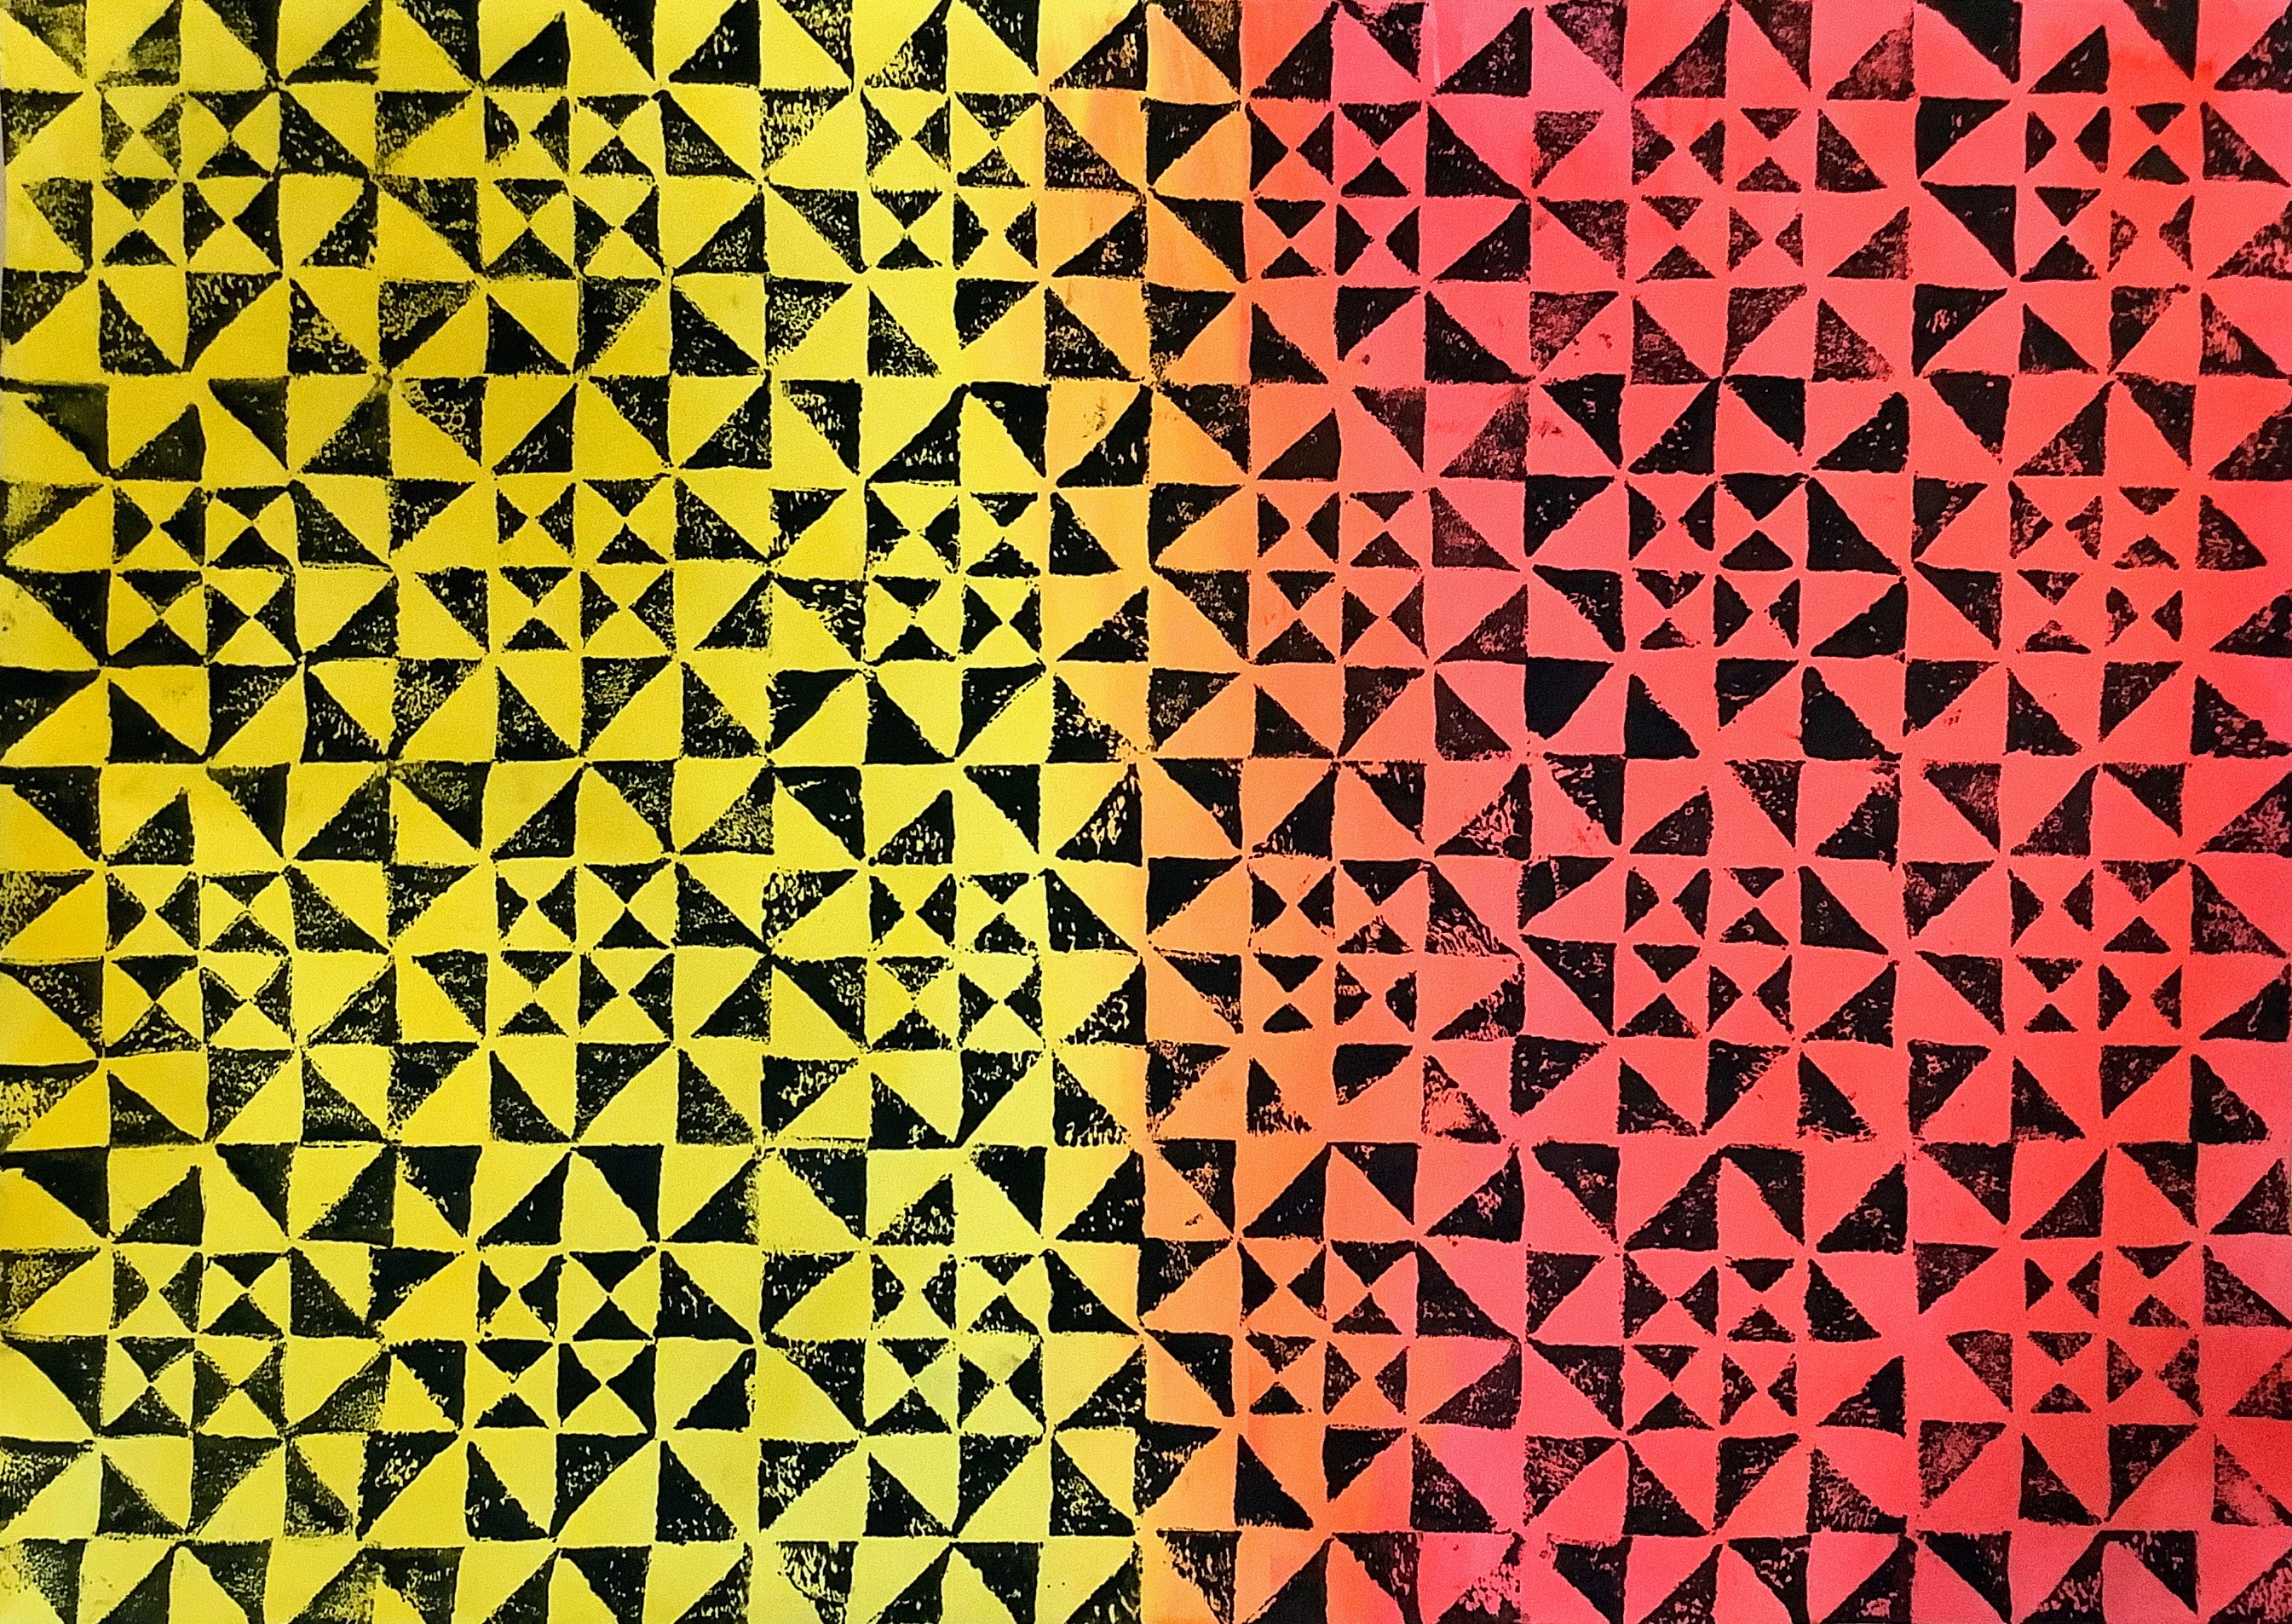
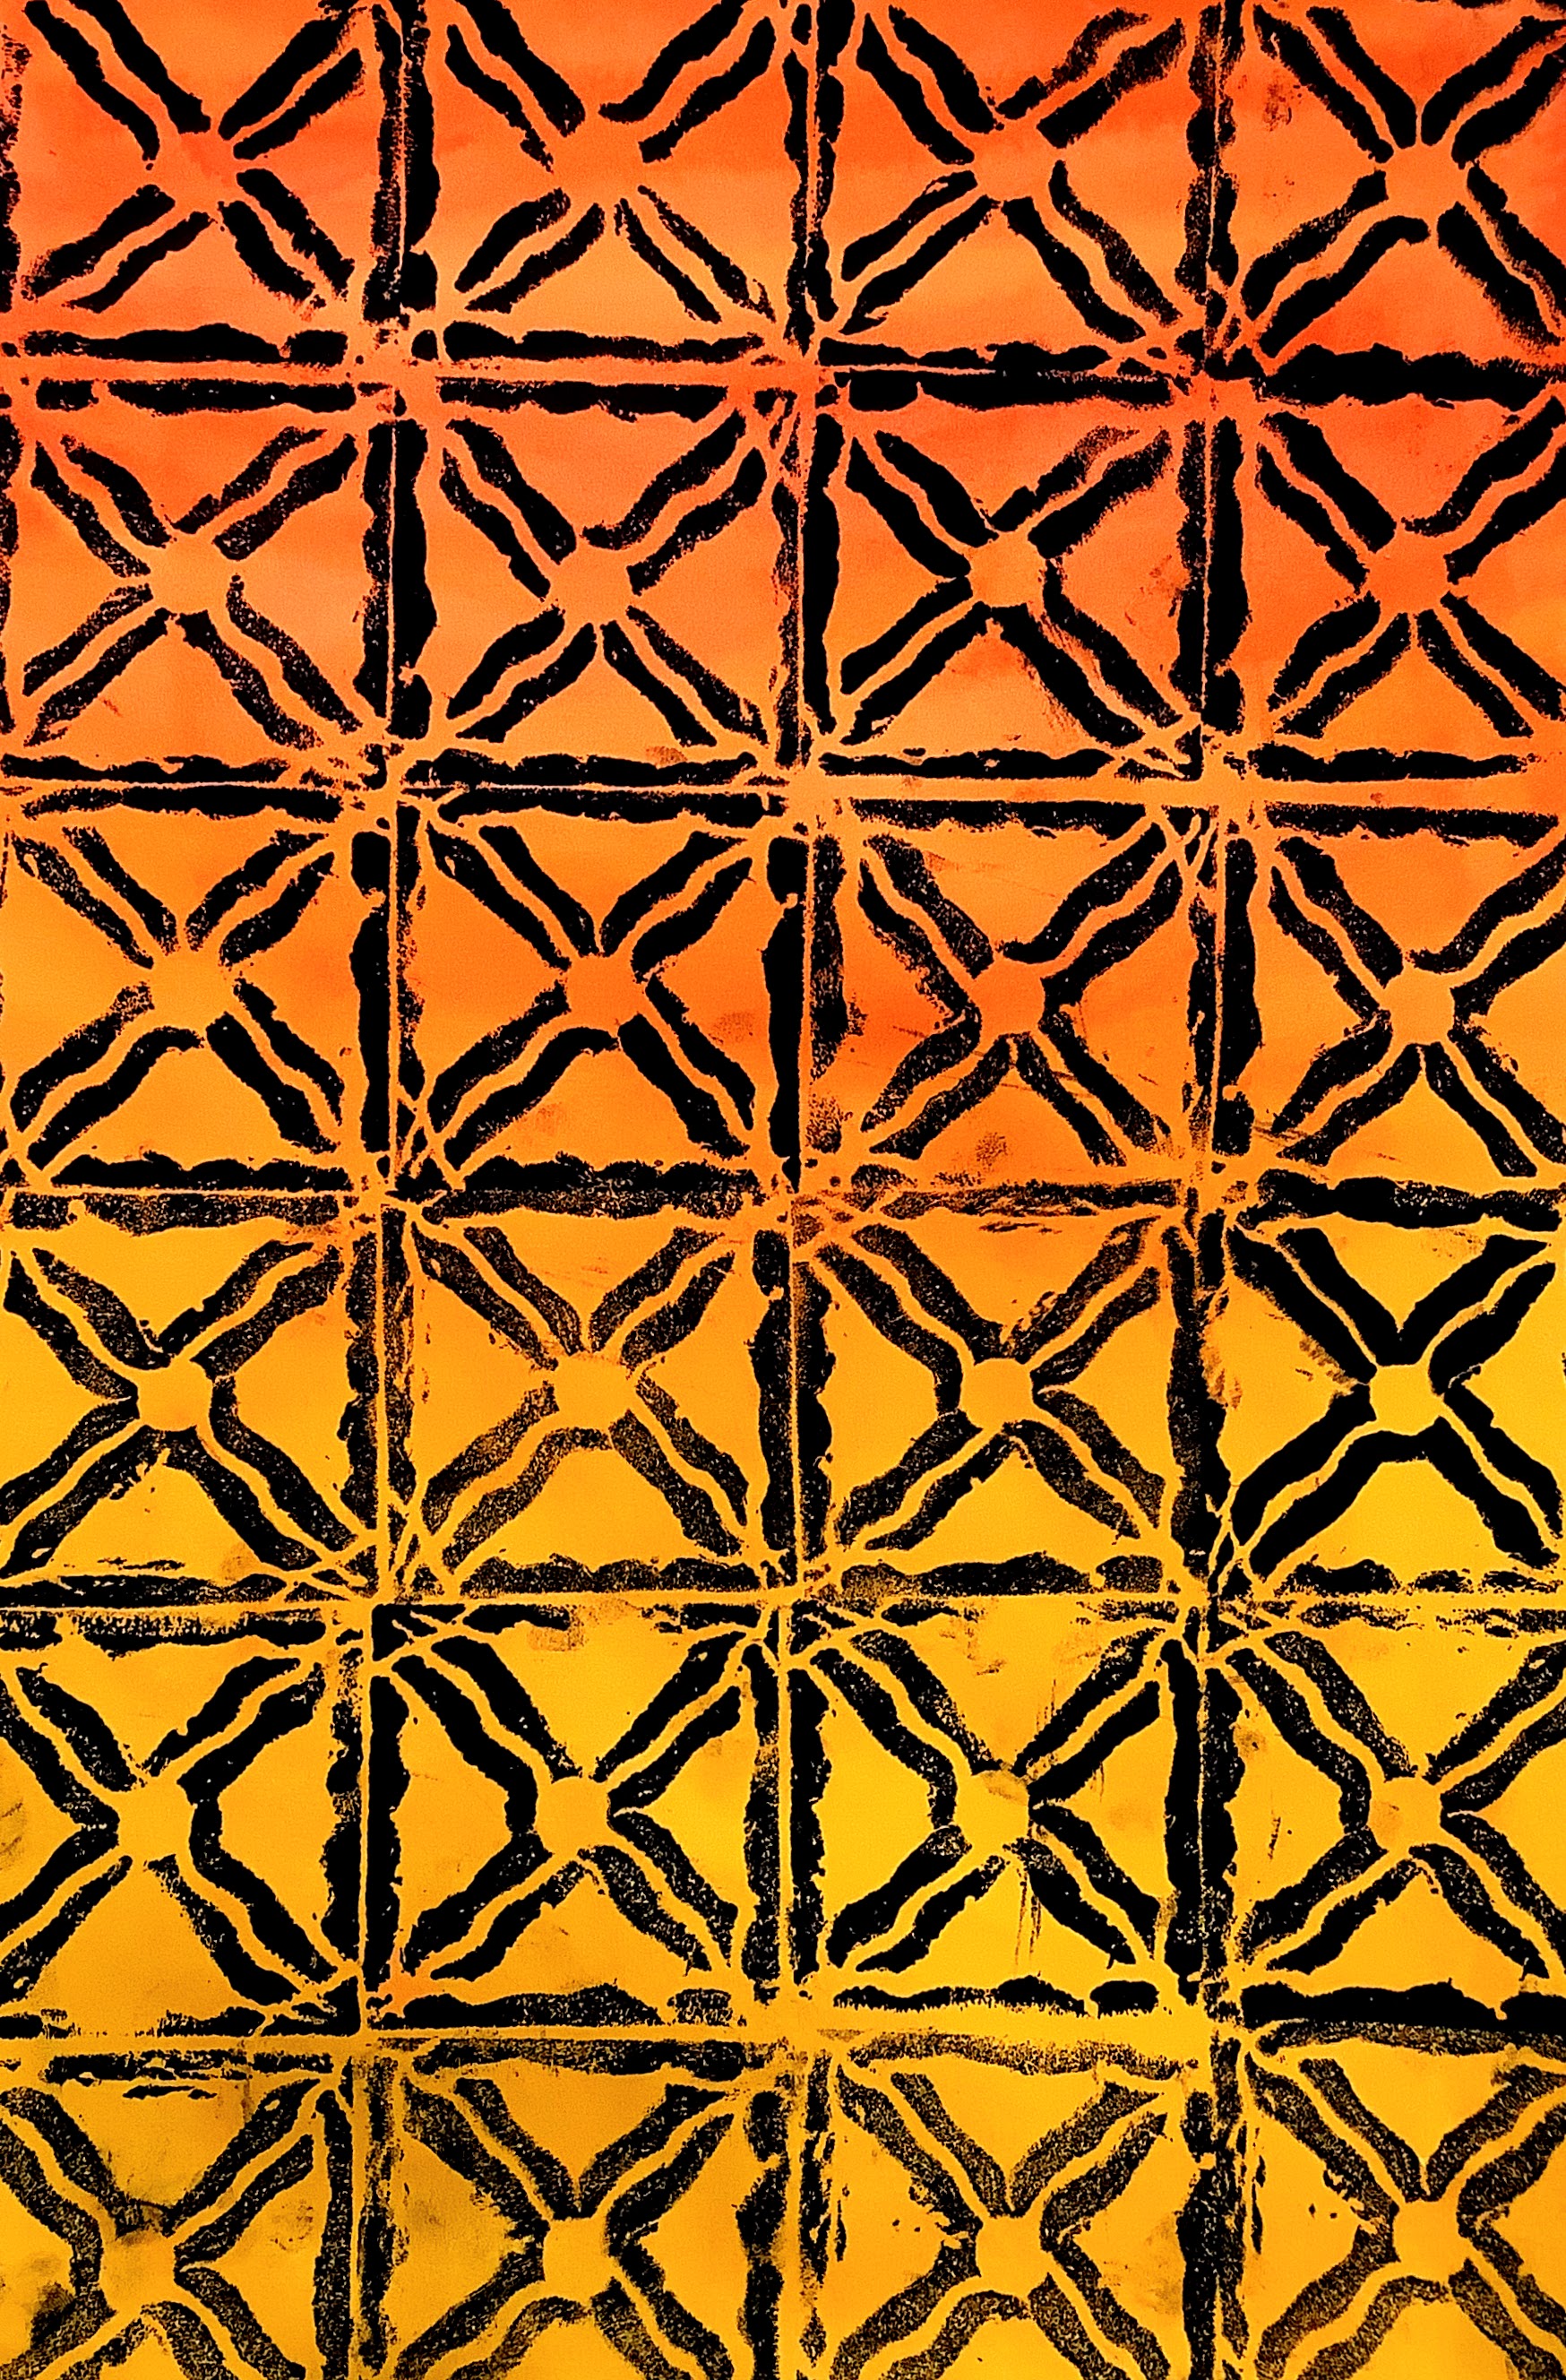
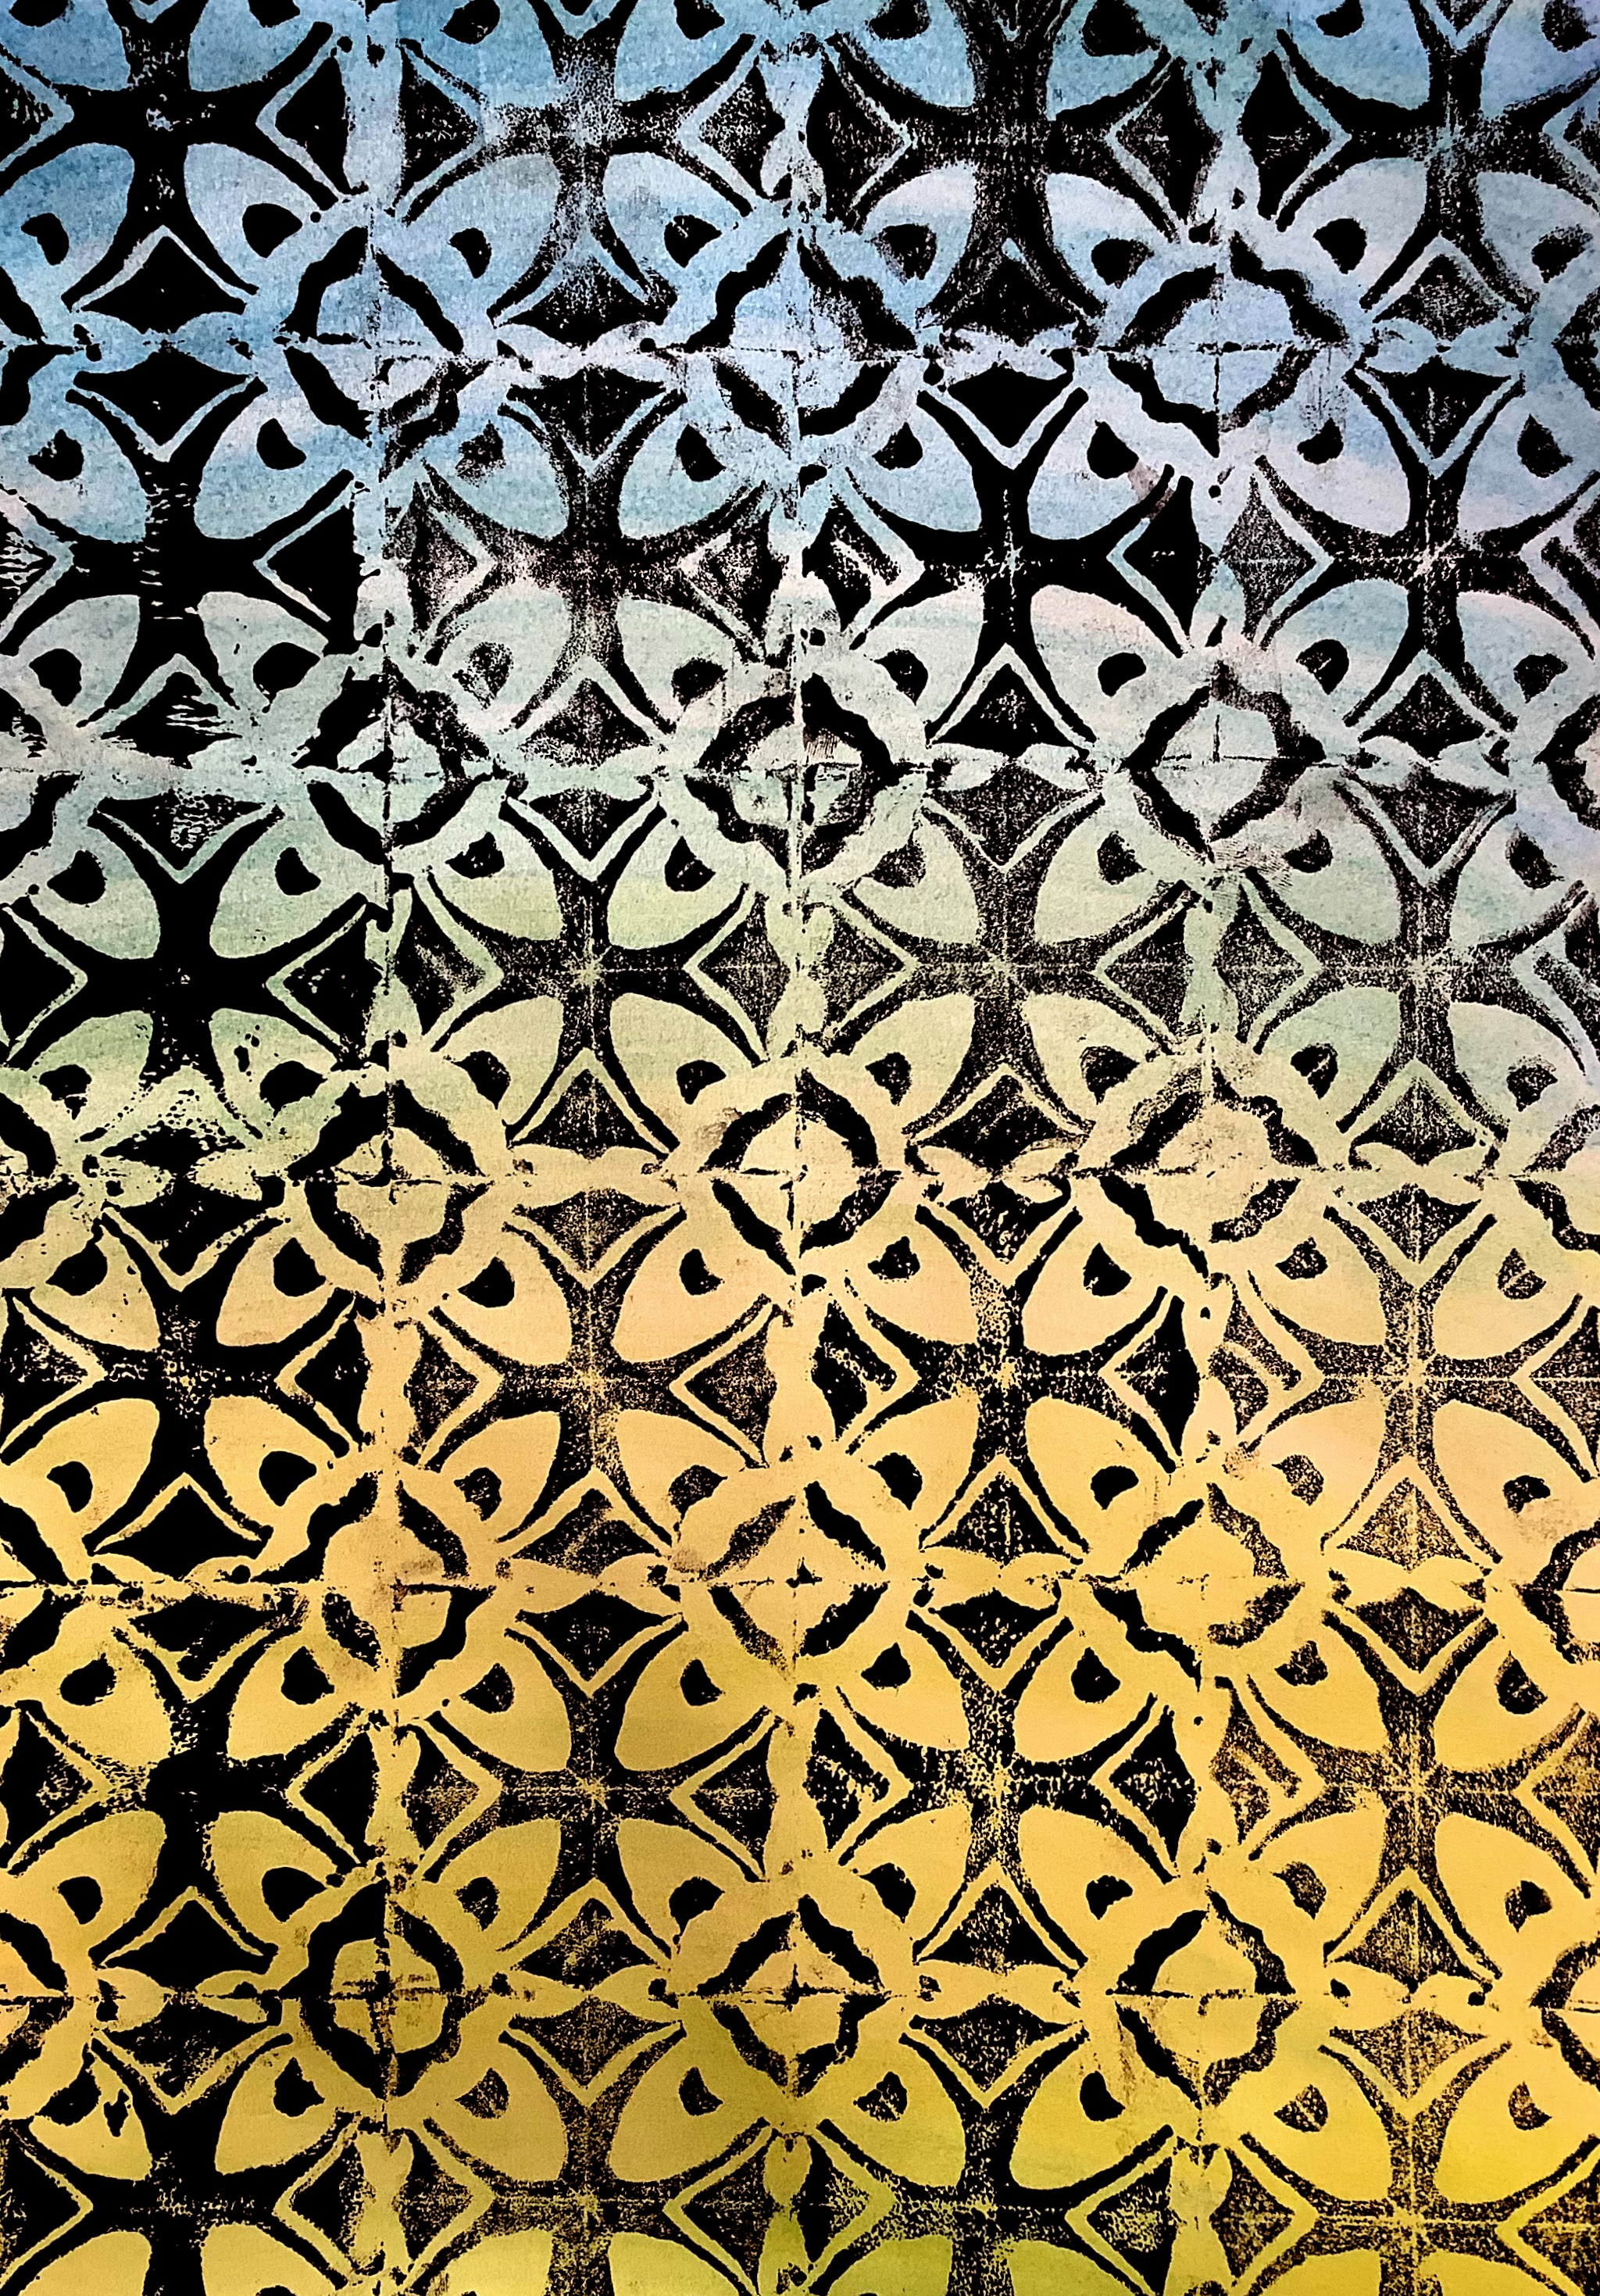
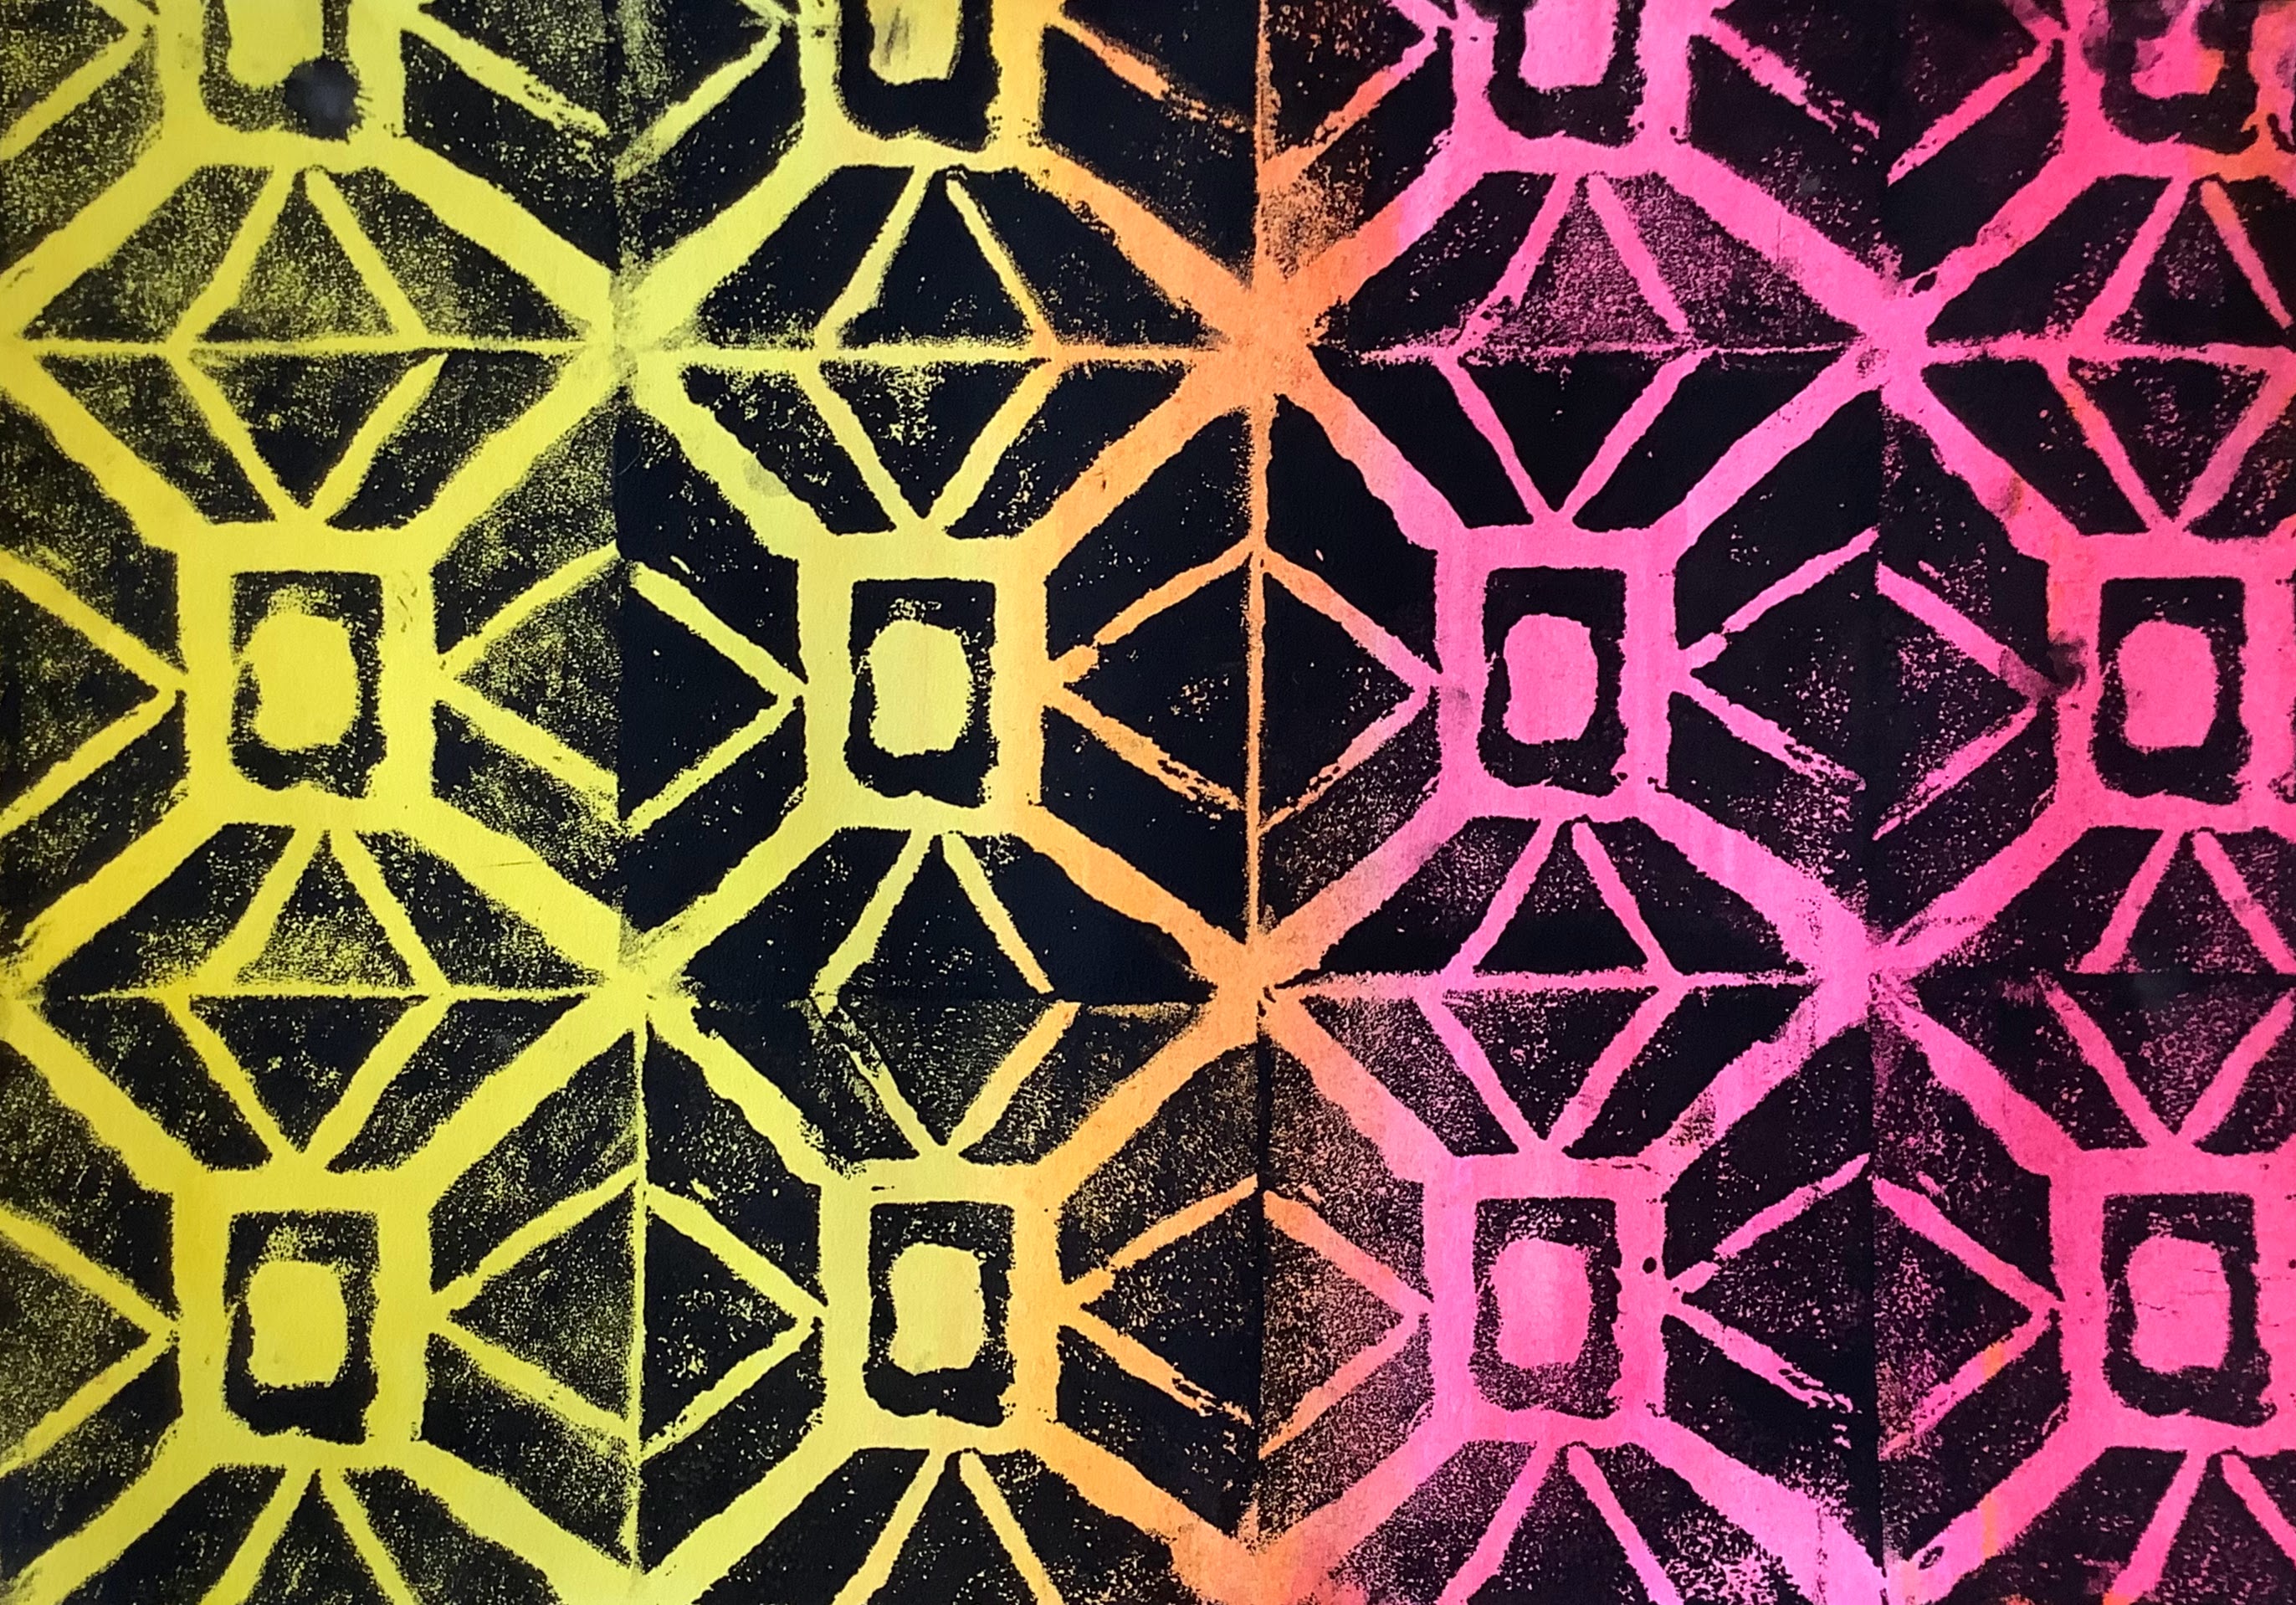
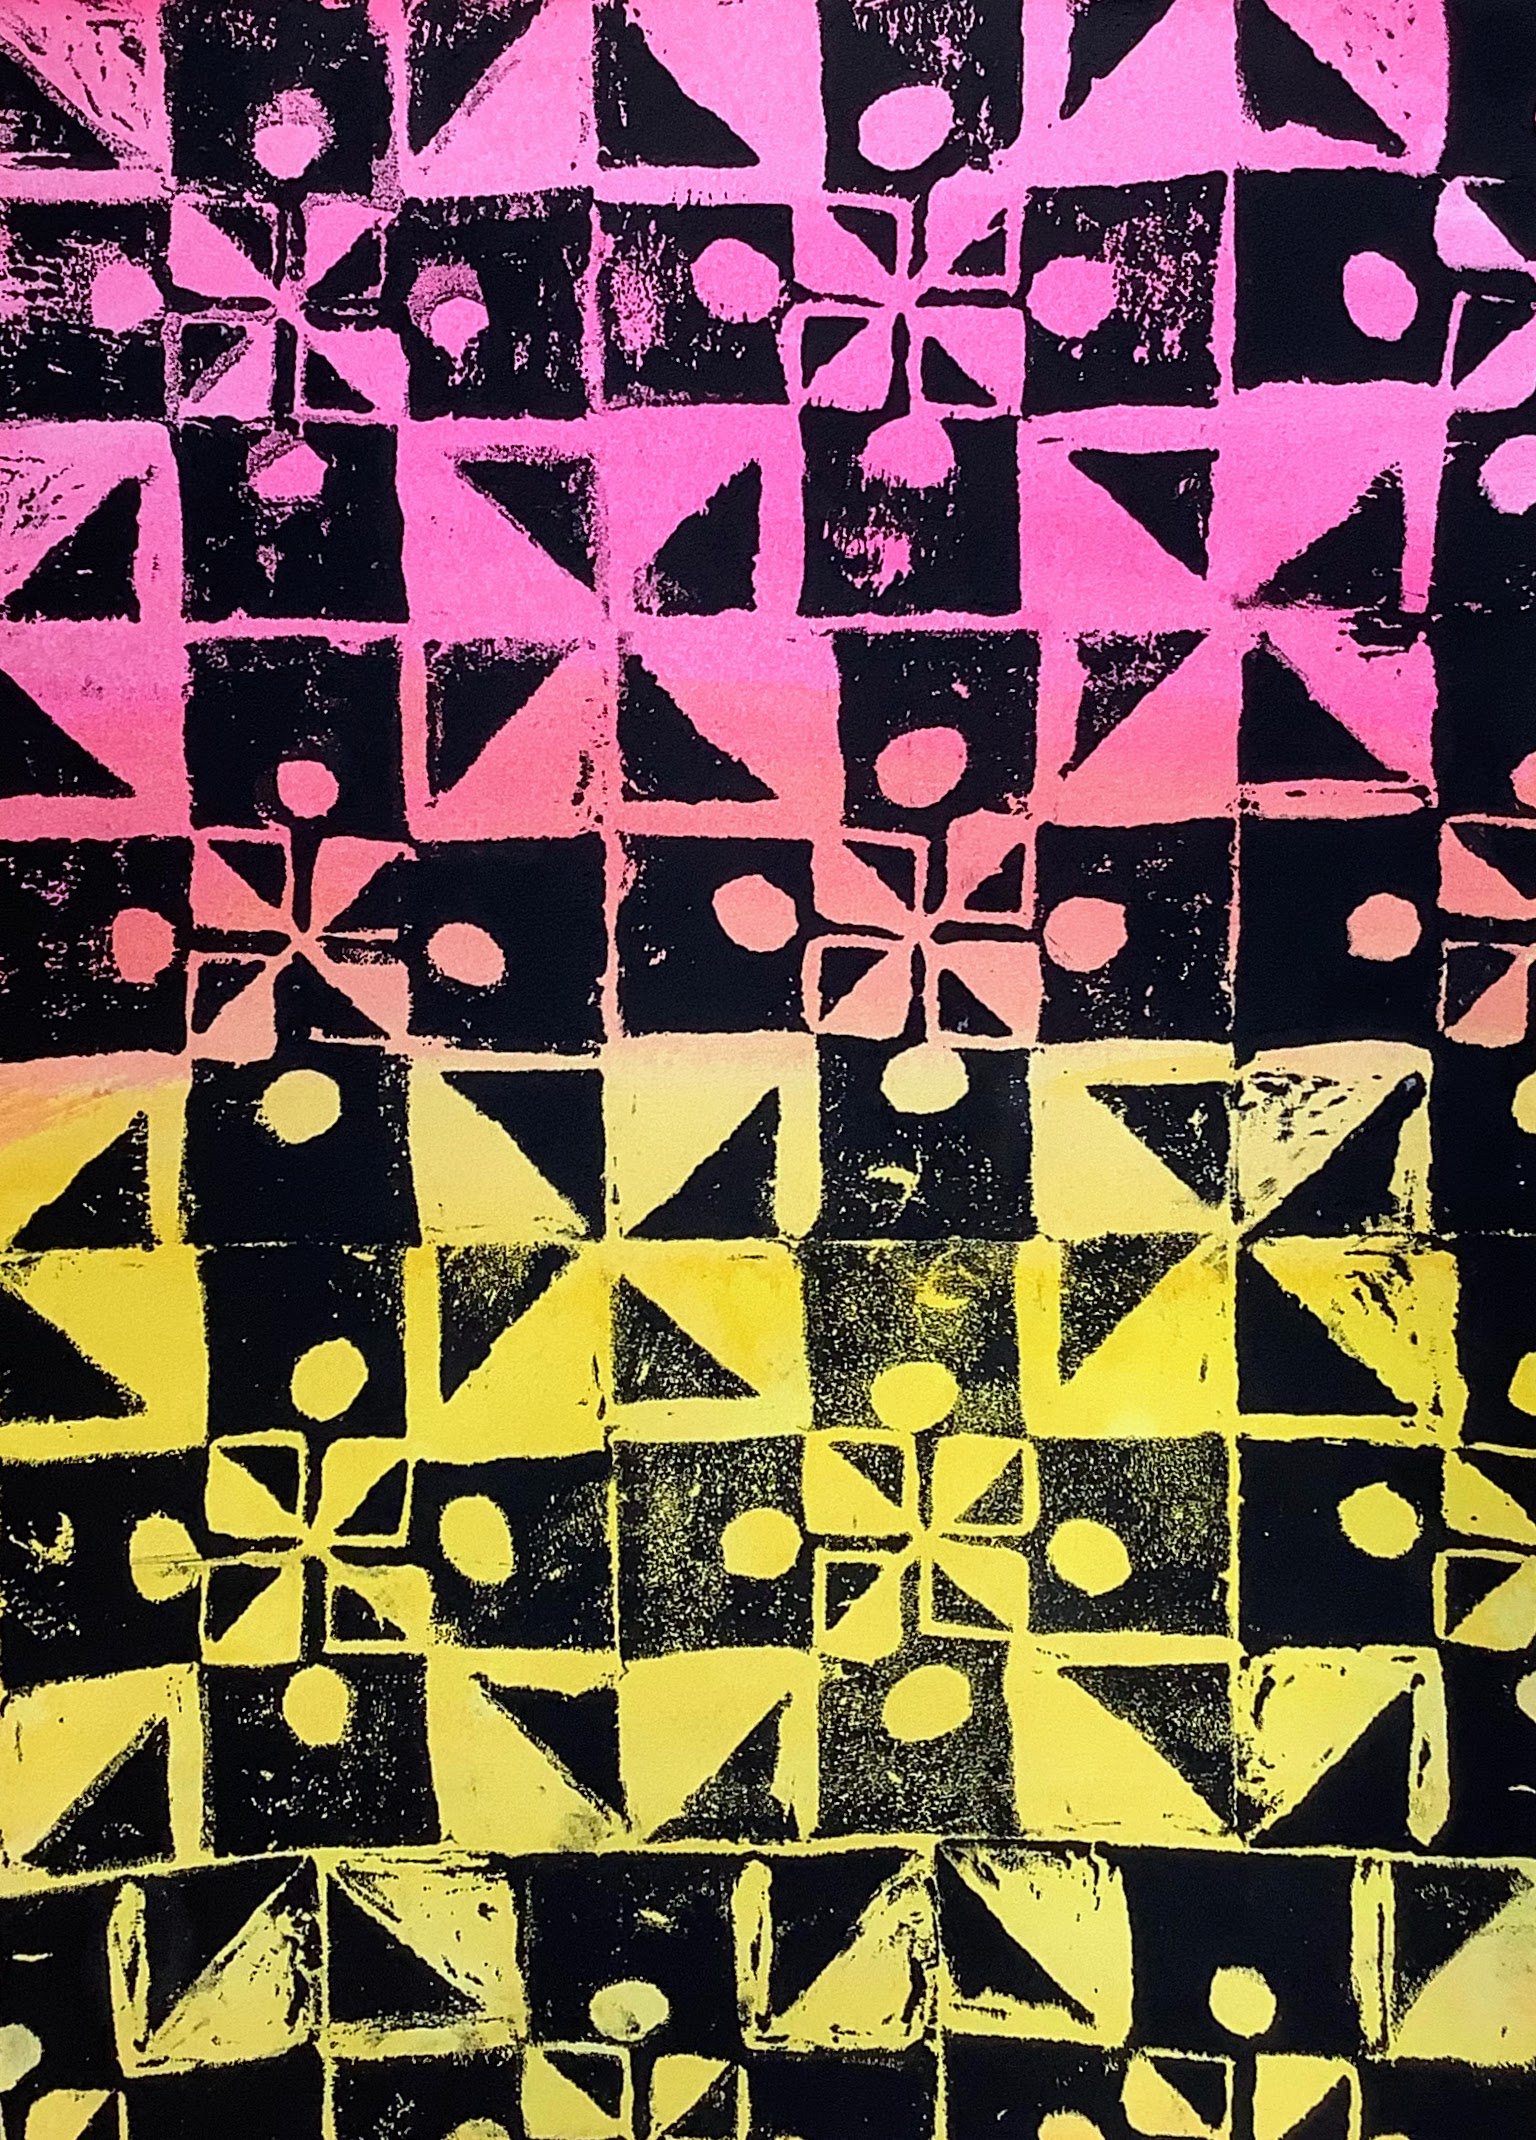
Get this full project on TES or TPT – enjoy.
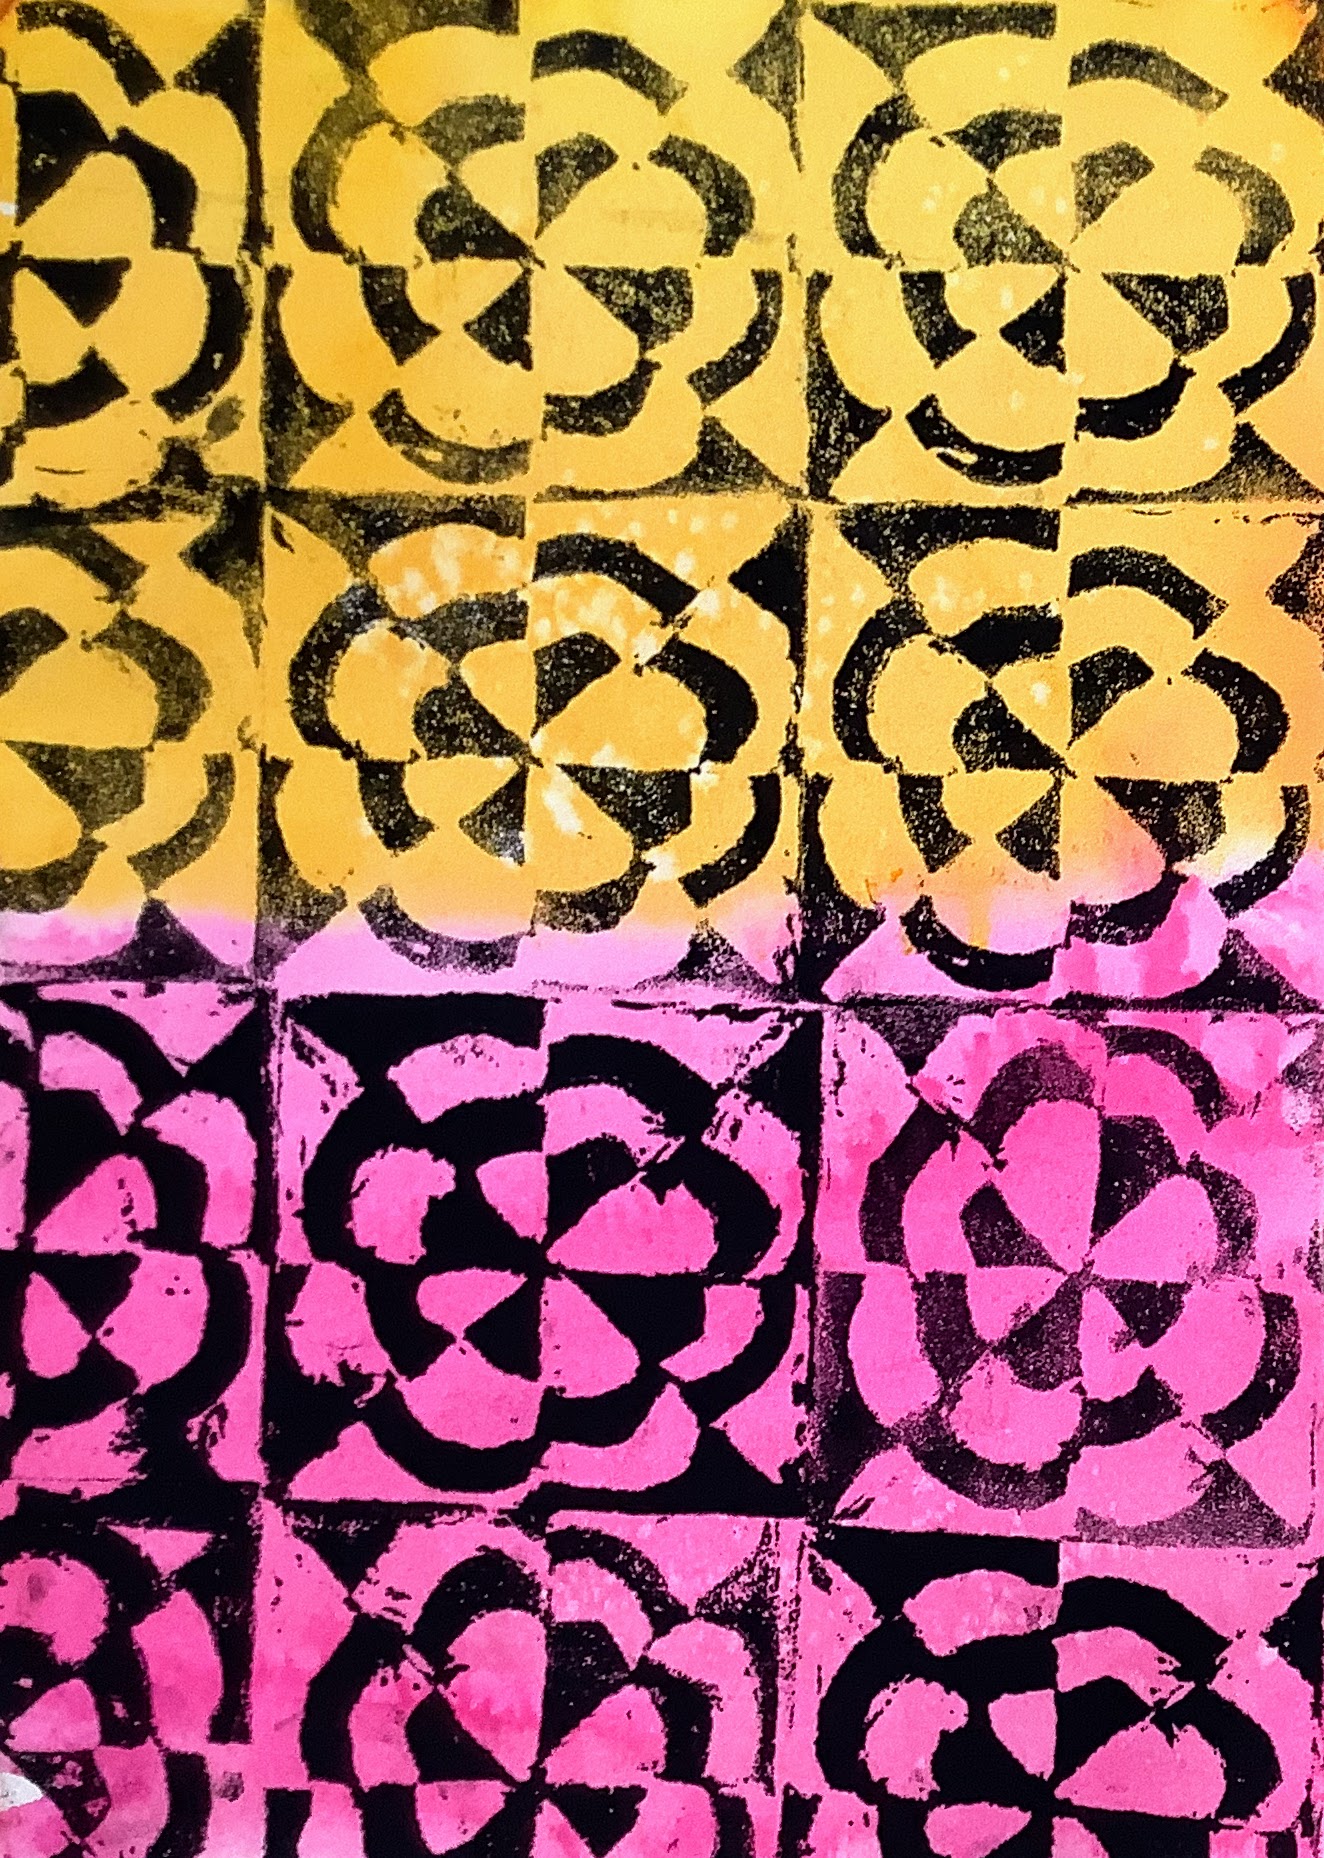
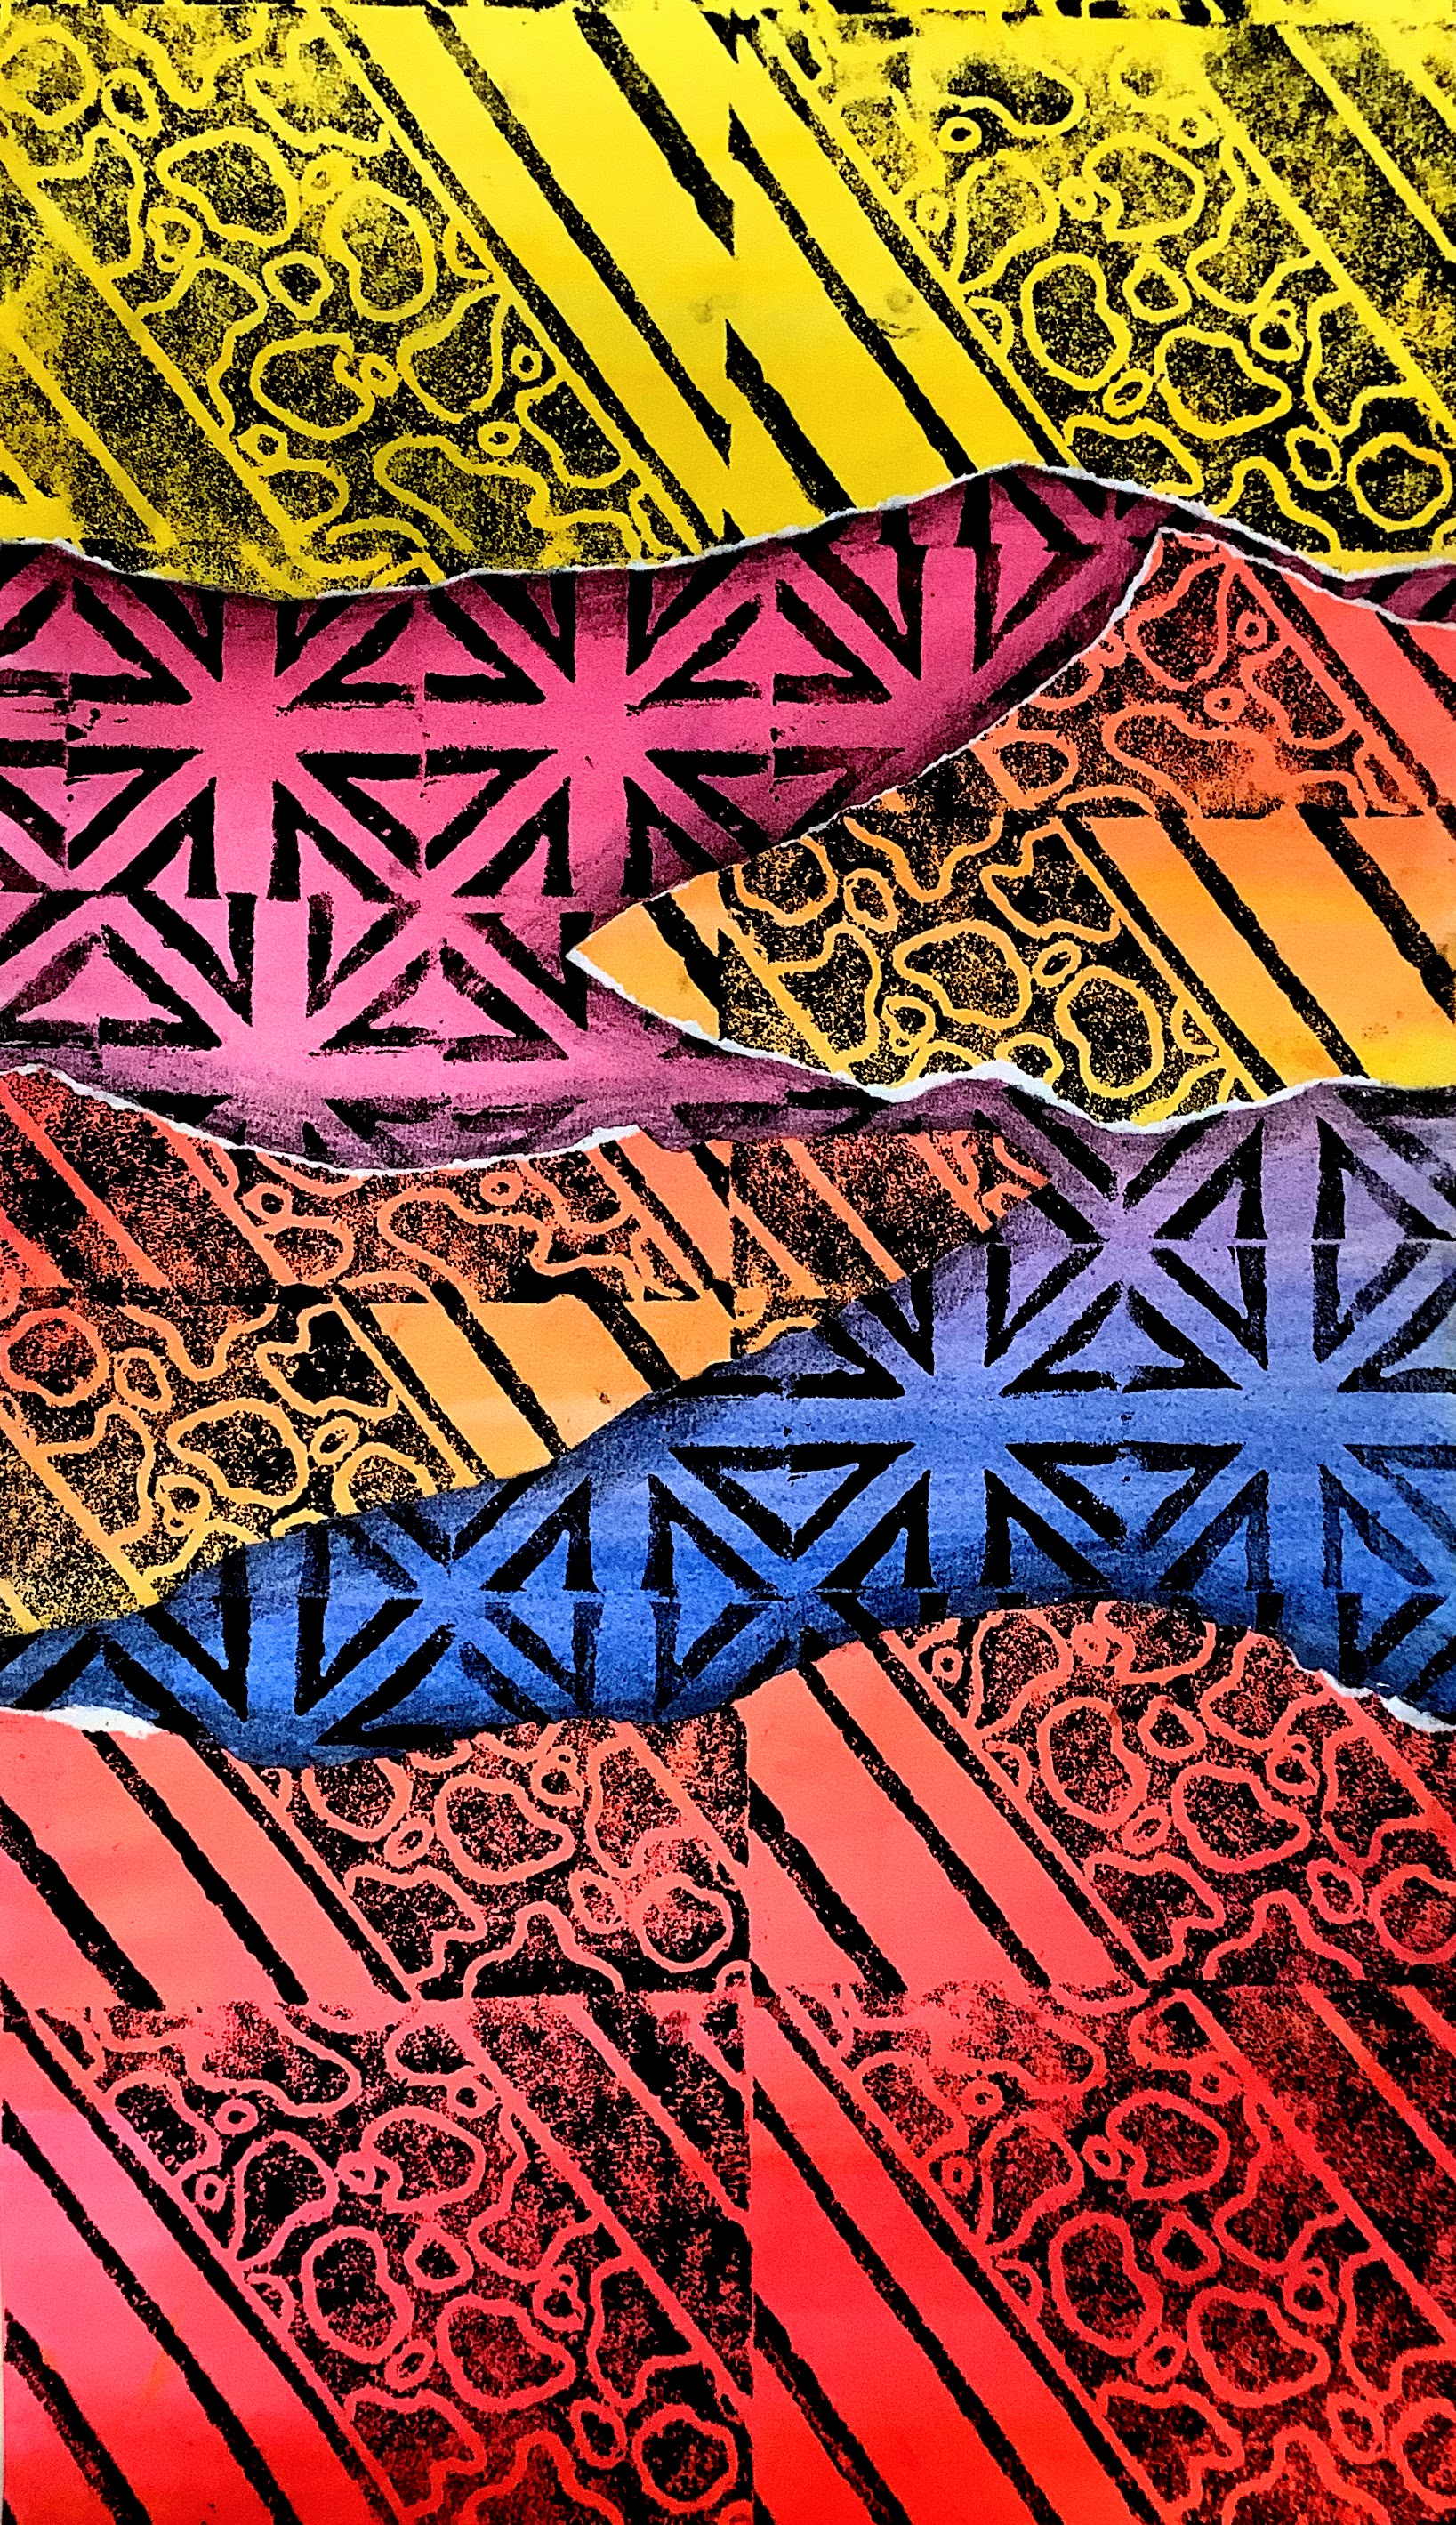
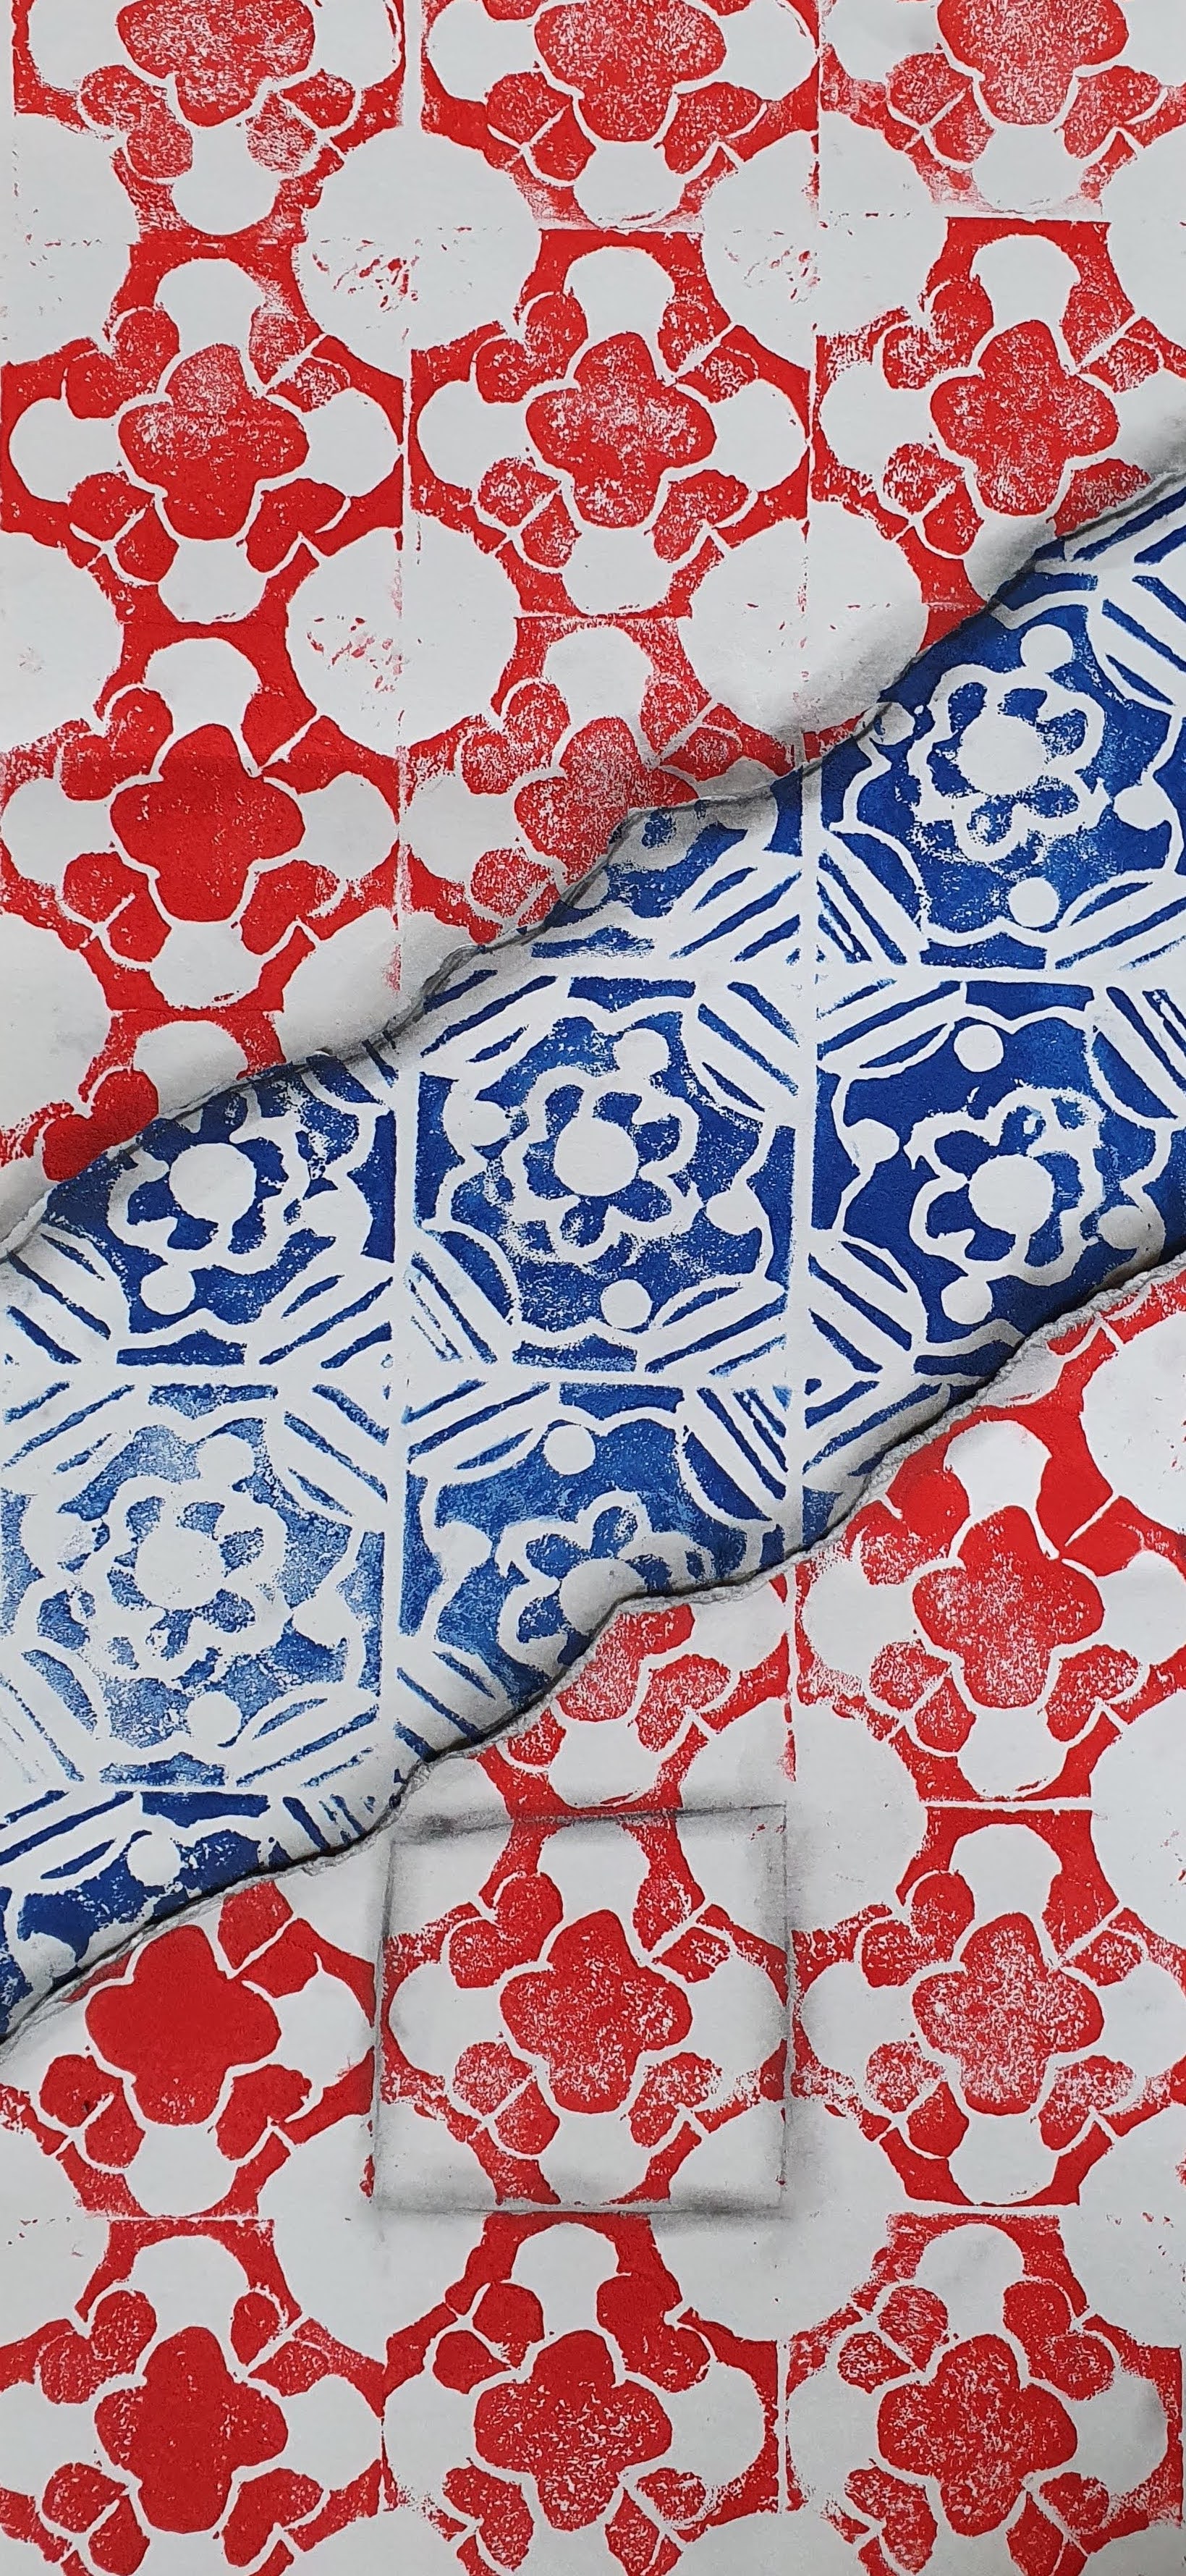
The printed pieces came out really well and we could have easily finished the project here. However! I really wanted the students to see how they could develop their work even further…
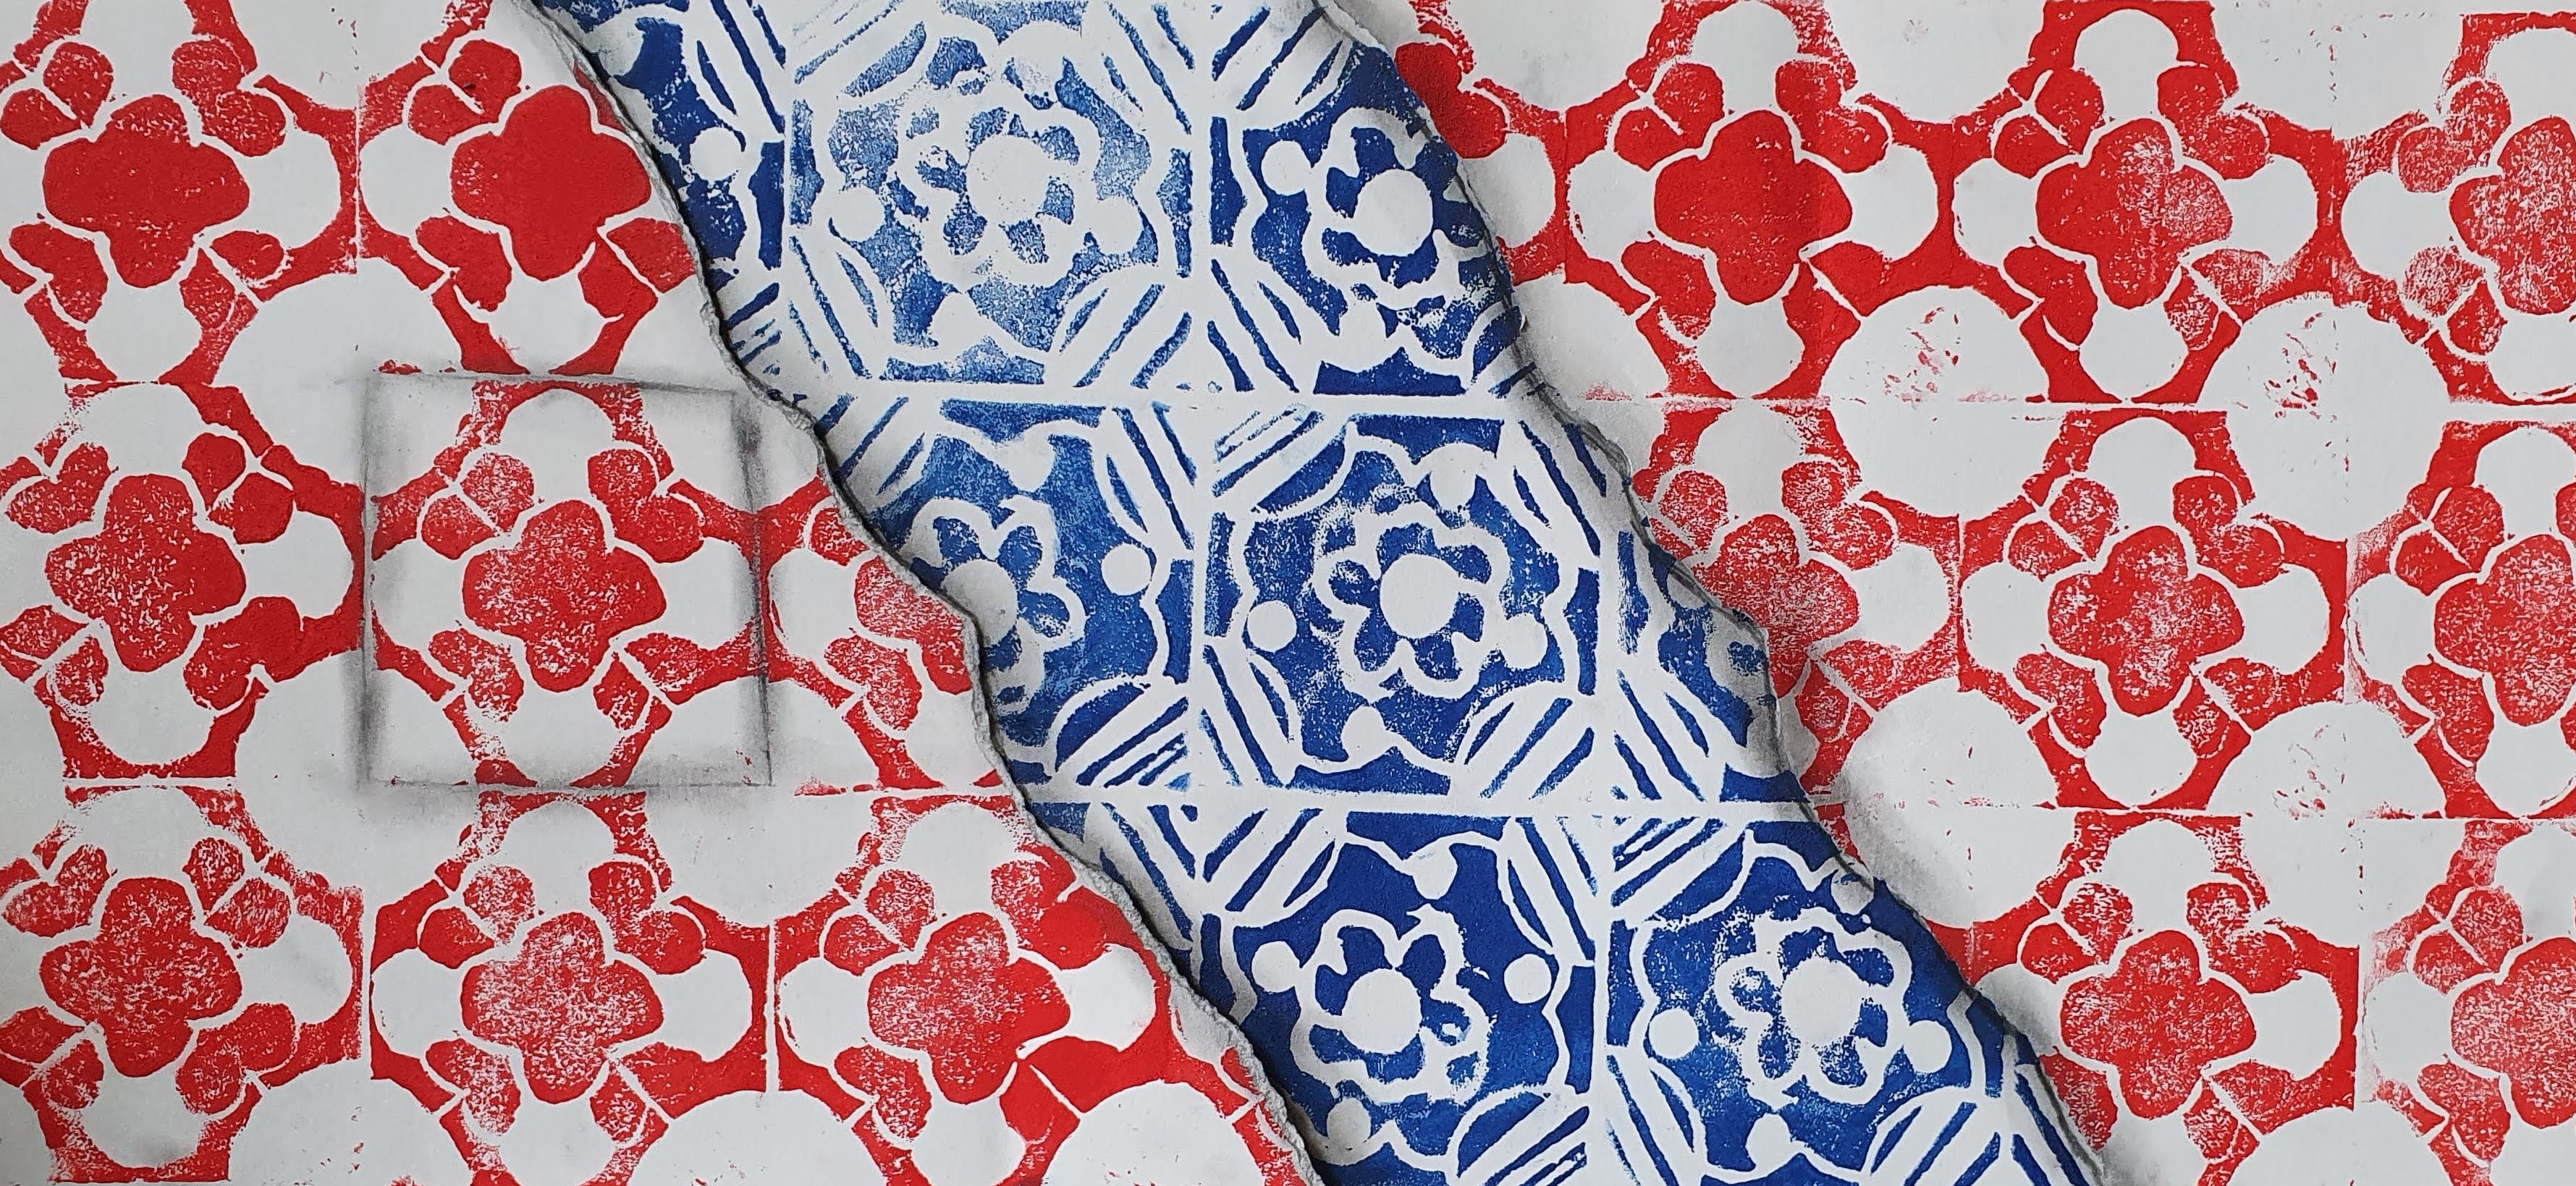
We looked back at ADD FUEL’s work and students identified how to develop their pieces by bringing together two different designs in a creative way. Telling students they were going to start ripping up their prints was… interesting 😂
The last steps in the project are all included in the presentation, but here are some of the final outcomes students made 😍 what do you think?!


Over the course of this printing project, students develop skills in pattern design, colour blending, using Indian inks, working with polystyrene boards, printing and responding to an artist. There are lots of busy but purposeful lessons and students always comment on how much they enjoy making their work!
I’d love to know your thoughts on this printmaking pattern project too – here’s my insta – which I am *trying* to keep updated 😆
